
Related Manuals for ABB ABB-Welcome M2238-04 Series


Summary of Contents for ABB ABB-Welcome M2238-04 Series
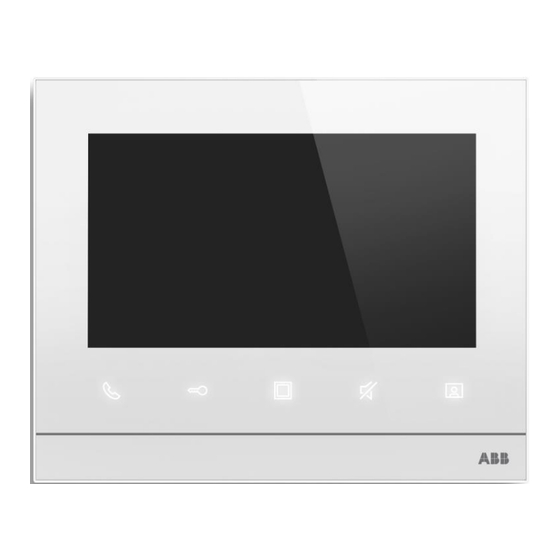
- Page 1 2TMD041800D0060 │ 06.12.2024 Product manual ABB-Welcome M2238.-.-04 Video indoor station 7...
-
Page 2: Table Of Contents
Tabl e of contents Notes on the instruction manual ......................... 4 Safety ................................. 4 Intended use ............................... 5 Environment ............................... 6 ABB devices ............................ 6 Product description ............................. 7 Control elements ..........................7 Terminal description ........................8 Technical data ............................9 Mounting/Installation .......................... - Page 3 Table of contents 8.11.10 Obtaining the product manual ......................47 8.11.11 Disclaimer ............................48 8.11.12 Updating the firmware ........................49 Operation..............................50 DES page ............................50 Incoming call ..........................51 9.2.1 Call from Outdoor Stations ........................ 51 9.2.2 Call from doorbell ..........................52 Surveillance ..........................
-
Page 4: Notes On The Instruction Manual
Please keep this manual in a safe place. If you pass the device on, also pass on this manual along with it. ABB accepts no liability for any failure to observe the instructions in this manual. Safety... -
Page 5: Intended Use
Intended use Intended use This device is a central control panel of the ABB-Welcome system and operates exclusively with components from this system. The device must only be installed in dry indoor rooms. SD card This indoor station supports the following SD card: ■... -
Page 6: Environment
ABB devices All packaging materials and devices from ABB bear the markings and test seals for proper disposal. Always dispose of the packing materials and electric devices and their components via an authorized collection facility or disposal company. -
Page 7: Product Description
Product description Product description Control elements Function Touch screen Communication button When a call is coming in, press this button within 30 s to activate communication and press again to end the call. Unlock button Open the door by pressing this button at any time. Programmable button ■... -
Page 8: Terminal Description
Product description Terminal description Function a1 b1 = bus connector Doorbell connector Station switch Set the address of the default outdoor station Address selector switch All are used to set the indoor station address. Selector switch X10 sets tens digits, selector switch X1 sets units digits. -
Page 9: Technical Data
Technical data Technical data Designation Value Operating voltage range 20-30 V DC Standby current 24 V DC, 12 mA Operating current 24 V DC, 330 mA -10 °C…+55 °C Operating temperature Display size 7" Resolution 1024 x 600 pixel Single-wire clamps 2 x 0.28 mm ...2 x 0.75 mm Fine-wire clamps... -
Page 10: Mounting/Installation
Mounting/Installation Mounting/Installation Warning Electric voltage! Dangerous currents flow through the body when coming into direct or indirect contact with live components. This can result in electric shock, burns or even death. – Disconnect the mains power supply prior to installation and/or disassembly! –... -
Page 11: General Installation Instructions
Mounting/Installation General installation instructions ■ Terminate all branches of the wiring system via a connected bus device (e.g. indoor station, outdoor station, system device). Do not install the system controller directly next to the bell transformer or other power ■ supplies (to avoid interference). -
Page 12: Surface-Mounted Installation
Mounting/Installation Surface-mounted installation Surface-mounted box 83.3 mm 89 mm 120.7 mm 120.7 mm 170.8 mm 83.3 mm 60 mm │12 Product manual 2TMD041800D0060... - Page 13 Mounting/Installation Surface-mounted installation │13 Product manual 2TMD041800D0060...
-
Page 14: Flush-Mounted Installation
Mounting/Installation Flush-mounted installation 198.5 192 mm Hole size of 162.3 144 mm pre mounting box M2238 54 mm │14 Product manual 2TMD041800D0060... -
Page 15: Cavity Wall Installation
Mounting/Installation Cavity wall installation 198 5 . 186.5 186 5 . Ø9x4 Hole size of 162 3 . 140 mounting box M2238 │15 Product manual 2TMD041800D0060... -
Page 16: Desktop Installation
Mounting/Installation Desktop installation Dismantling │16 Product manual 2TMD041800D0060... -
Page 17: Commissioning
Commissioning Commissioning Initial setup When this device is powered up for the first time, or when the "Clear all data" function on "Engineering settings" screen is used, the indoor station enters initial setup. 1. Choose country or region 2. Select system language │17 Product manual 2TMD041800D0060... - Page 18 Commissioning 3. Read license agreement 4. Set date and time │18 Product manual 2TMD041800D0060...
-
Page 19: Enter System Setting
Commissioning Enter system setting In standby mode, on the extra screen, click "SYSTEM" to access the "System Settings" screen. │19 Product manual 2TMD041800D0060... -
Page 20: Camera List
Commissioning Camera list On the "System Settings" - "Camera list" screen, click "Camera list" to access the corresponding screen. Click to synchronize all cameras on outdoor stations and cameras connected to the camera interfaces to create a camera list. │20 Product manual 2TMD041800D0060... - Page 21 Commissioning On the "Camera list" screen, click the outdoor station or camera to view the image, and then click "Save" to save an icon to the camera list. On the "Camera list" screen, click to access the settings. Function Set an alias for outdoor stations or cameras Set visual doorbell function for cameras Hide the device in the camera list Delete the device from the camera list...
-
Page 22: Sound
Commissioning Sound On the "System Settings" - "Sound" screen, Function Touch tone setting Volume setting Repeated tone setting ON = repeated ringtone within 30 s, OFF = rings only once Ringtone settings Click the drop-down list to select the ringtones for the default outdoor station, other outdoor stations, the doorbell and other devices. - Page 23 Commissioning │23 Product manual 2TMD041800D0060...
-
Page 24: Display
Commissioning Display On the "System Settings" - "Display " screen, Function Clean screen Click to lock the screen for 30 s. Please see the "Clean screen" chapter for more details. Brightness Drag the bar to adjust the brightness. Auto full screen Enable/disable the full-screen mode on the outdoor station camera by ticking/unticking the checkbox. -
Page 25: Date And Time Settings
Commissioning Date and time settings On the "System Settings" - "Date and time" screen, Function Time setting ■ Click "+" or "-" to set hour and minute ■ Choose time format (12 hours or 24 hours) from the drop-down list Date setting ■... -
Page 26: Automatic Snapshot
Commissioning Automatic snapshot On the "System Settings" - "Door Entry System" screen, click the radiobutton to enable/disable the function. When this function is enabled, three snapshots are taken and automatically saved to the history record when the bell is pressed. │26 Product manual 2TMD041800D0060... -
Page 27: Missed Call Notification
Commissioning Missed call notification On the "System Settings" - "Door Entry System" screen, click the radiobutton to enable/disable the function. When this function is enabled, the call button LED will flash to indicate the missed call. │27 Product manual 2TMD041800D0060... -
Page 28: Program Button Settings
Commissioning Program button settings On the "System Settings" - "Door Entry System" screen, Program button is set as release 2nd-lock by default. It can be also set as switch on light, unlock by realy. It will be disabled if set to "None". Press the button to enable the defined function. - Page 29 Commissioning If the standby unlock settings have been enabled, "Unlock" can be selected here, followed by a lock from the drop-down list. Please see the "Standby unlock" chapter for more details. If the standby swtich has been seleteted in the light settings, "Switch on light" can be selected here, followed by a light from the drop-down list.
-
Page 30: Language
Commissioning 8.10 Language On the "System Settings" - "Language" screen, select the language. │30 Product manual 2TMD041800D0060... -
Page 31: Engineering Settings
Commissioning 8.11 Engineering settings 8.11.1 Enter engineering settings On the "System Settings" - "Engineering setting" screen, enter the engineering password to enter the settings screen. (the system default engineering password is 345678; this password is only used to set a new engineering password and must be changed after first use) │31 Product manual 2TMD041800D0060... -
Page 32: Device Type Settings
Commissioning 8.11.2 Device type settings The "Engineering setting" - "Device settings" screen includes the settings described below. Surveillance mode If this function is disabled, it is not possible to start the surveillance process by pressing the button. │32 Product manual 2TMD041800D0060... - Page 33 Commissioning Manual snapshot If this function is disabled, it is not possible to take a manual snapshot during a call. │33 Product manual 2TMD041800D0060...
- Page 34 Commissioning Auto unlock If this function is disabled, the will be hidden on the status bar. │34 Product manual 2TMD041800D0060...
- Page 35 Commissioning Copy snapshot to SD card If this function is disabled, it is not possible to copy snapshots to the SD card on the "History" screen even when an SD card is inserted. │35 Product manual 2TMD041800D0060...
- Page 36 Commissioning Delete history data If this function is disabled, it is not possible to delete the record on the "History" screen. │36 Product manual 2TMD041800D0060...
- Page 37 Commissioning Edit camera list If this function is disabled, it is not possible to rename the camera. │37 Product manual 2TMD041800D0060...
- Page 38 Commissioning Open dedicated outdoor station If this function is enabled, it is possible to release the lock on dedicated outdoor station (1…9). │38 Product manual 2TMD041800D0060...
- Page 39 Commissioning Auto snapshot It is possible to set an auto snapshot start after 1 s or 3 s. Selecting 1 s means, this device will take a snapshot automatically at 1 s, 3 s and 5 s. Selecting 3 s means, this device will take a snapshot automatically at 3 s, 5 s and 7 s. │39 Product manual 2TMD041800D0060...
-
Page 40: Customized Camera View
Commissioning 8.11.3 Customized camera view This function can be used with the camera module 180. On the "Engineering setting" -"Customized view" screen, click "Customized camera view" to enter the page. Click the arrow button to adjust the viewing angle of the 180 degree camera. Click "Save" to save the new camera viewing angle. -
Page 41: Customized Extra Page
Commissioning 8.11.4 Customized extra page On the "Engineering setting" - "Customized page" screen, tick the check box to enable the functions. The icons for these functions will be displayed on the extra screen page. │41 Product manual 2TMD041800D0060... -
Page 42: Change Engineering Password
Commissioning 8.11.5 Change engineering password On the "Engineering setting" - "Engineering pwd" screen, click "Engineering password" to change the password in the pop-up window. Note Engineering password must be changed the first time you access engineering settings. (The system default is 345678. This password should only be used for initial setting work and should then be changed to another password. -
Page 43: Clear All Data
Commissioning 8.11.6 Clear all data On the "Engineering setting" - "Clear all data" screen, click "Clear all data" - "OK". This function is only available within 120 s after the indoor station is powered on, and will restore all user settings and engineering settings to the default values. │43 Product manual 2TMD041800D0060... -
Page 44: Reset Settings
Commissioning 8.11.7 Reset settings On the "System settings" - "Reset user settings" screen, click "Reset user settings" and enter the user password (default is 123456) to reset the following user settings: ■ Brightness: 50% ■ Volume settings: 50% ■ Auto full screen: Enable ■... -
Page 45: Viewing The Device Address
Commissioning 8.11.8 Viewing the device address On the "System settings" - "About" screen, it is possible to view the address of this device. │45 Product manual 2TMD041800D0060... -
Page 46: Viewing The Version
Commissioning 8.11.9 Viewing the version On the "System settings" - "About" screen, it is possible to view the version information. │46 Product manual 2TMD041800D0060... -
Page 47: 8.11.10 Obtaining The Product Manual
Commissioning 8.11.10 Obtaining the product manual On the "System settings" - "About" screen, there is a QR code that can be scanned to access the website. │47 Product manual 2TMD041800D0060... -
Page 48: 8.11.11 Disclaimer
Commissioning 8.11.11 Disclaimer On the "System settings" - "About" screen, it is possible to view the disclaimers e.g. OSS and EULA. │48 Product manual 2TMD041800D0060... -
Page 49: 8.11.12 Updating The Firmware
Commissioning 8.11.12 Updating the firmware Note This function is only available when an SD card is inserted. On the "System settings" - "About" screen, click "Firmware update", click the file and then click "OK" to update the firmware. To update the firmware of the indoor station, perform the following steps: 1. -
Page 50: Operation
Operation Operation DES page In standby mode, clicking the screen will light up the screen and display the Home screen automatically. Function Function page "★" means home screen, "━" means extra screen. This device has 1 home screen and 1 extra screen. The content of the extra screen can be customized on "System Settings"... -
Page 51: Incoming Call
Operation Incoming call 9.2.1 Call from Outdoor Stations This device displays an image as full screen view by default when receiving an incoming call. Clicking anywhere on the screen will switch to the normal screen view. Function Caller ID Display image from outdoor station/gate station. Click anywhere on the screen to switch to full screen. -
Page 52: Call From Doorbell
Operation 9.2.2 Call from doorbell When the doorbell is pressed, the device will display for 5 s on the status bar. If the doorbell is associated with the camera in the camera list settings, the device will display the corresponding camera automatically for 15 s. Please see the "Visual doorbell" chapter for more details. -
Page 53: Surveillance
Operation Surveillance 9.3.1 Surveillance without the camera list If no camera list has been created, press the surveillance button in standby mode on the device to initialize surveillance directly. Press to quit the surveillance. Function Caller ID Display the image from outdoor station or gate station. Click to view next image Click anywhere on the screen to switch to full screen. -
Page 54: Surveillance With The Camera List
Operation 9.3.2 Surveillance with the camera list If a camera list has been created, press the surveillance button in standby mode on the device to access the "Camera list" screen. Click the designated outdoor station or camera to view the image. Press again to quit the surveillance. -
Page 55: History
Operation History In standby mode, click to view the history. A maximum of 100 DES communication records can be stored. Highlighting indicates that the record is unread. │55 Product manual 2TMD041800D0060... - Page 56 Operation Click to play the audio or video record in the pop up window (an SD card must be inserted) Click the image to view details in the pop up window. Click "<" or ">" to change the images. (max. 3 pictures for each record) │56 Product manual 2TMD041800D0060...
- Page 57 Operation Click to enter the settings. It is possible to delete history records one by one, or to delete all the records at once with one click. Snapshots can be copied to the SD card if an SD card is inserted. If the disk space of SD card is full, will be displayed on the status bar.
-
Page 58: Voice Message
Operation Voice message In standby mode, click to access the screen. Click to access the settings. Click "+" to add a new voice message. Click the Rec button to start recording a voice message and click the Play button to play the voice message. - Page 59 Operation │59 Product manual 2TMD041800D0060...
-
Page 60: Absence Message
Operation Absence message This device allows you to leave voice messages for visitors and to record voice message from visitors. Enable "Absence message" At least one voice message must exist before this function can be used. On the "Voice message" screen, tick the check box to enable the function. Note The functions "Call forward"... - Page 61 Operation Disable "Absence message" On the extra screen, click "Leave home management" to access the screen. Switch the radiobutton to "OFF" to disable the absence message function. │61 Product manual 2TMD041800D0060...
-
Page 62: Auto Unlock Settings
Operation Auto unlock settings In "Engineering setting" – "Device settings" screen, tick the checkbox to enable the function. Click on the status bar to access the screen. │62 Product manual 2TMD041800D0060... - Page 63 Operation Click to access the settings screen. Click "+" to add a new setting. The system allows you to select the days of the week, with the selected options shown with highlighting. After setting the start time and end time, click "OK" to save. The device supports a maximum of 10 auto unlock settings.
-
Page 64: Standby Unlock
Operation Standby unlock On the "Engineering setting" - "Customized page" screen, tick the checkbox to enable the function. On the extra screen, click "Unlock" to access the screen. │64 Product manual 2TMD041800D0060... - Page 65 Operation Click to access the settings. Click "+" to add a new setting. Please refer to the table below to complete the setting. Type Description Address Connected object Address = 1 Lock is connected to system controller. (associated with outdoor station) Default lock Address = 1...4 Lock is connected to switch...
- Page 66 Operation On the "Unlock" screen, click on a designated lock to release that lock. The screen will display and the status bar will display This device supports a maximum of 16 standby locks. = Default lock or 2nd lock type = Actuator lock type │66 Product manual 2TMD041800D0060...
-
Page 67: Standby Switch On Light
Operation Standby switch on light On the "Engineering setting" - "Customized page" screen, tick the checkbox to enable the function. On the extra page, click "Switch on light" to access the screen. │67 Product manual 2TMD041800D0060... - Page 68 Operation Click to access the settings. Click "+" to add a new setting. Please refer to the table below to complete the setting. Type Description Address Connected object Light mode Light is connected to system controller. (Address = zero) Light mode Lock is connected to switch Switch on actuator, door/light MDRC.
- Page 69 Operation 3. Type = Actuator The address of the switch actuator needs to be entered on this screen. This will switch on the light associated with the switch actuator. On the "Switch on light" screen, click the corresponding light icon to turn on the light. The screen will display and the status bar will display .
-
Page 70: Mute
Operation 9.10 Mute Mute button Tap the button to mute the ringtone on the device. Tap this button again to unmute. Press button and hold for 3 s to mute the ringtone on all indoor stations in the same apartment. The device will display on the status bar when this function is enabled. - Page 71 Operation Mute icon A mute timer can be set to enable the device to be unmuted automatically. [1] Click on the status bar and select "Mute timer" to enter the setting. [2] Click "+" or "-" to set the values for the hour and minute. Click "OK" to save. [3] Click again and select "Activate mute".
-
Page 72: Visual Doorbell
Operation 9.11 Visual doorbell With this setting, the indoor station is able to display the image from the camera when the doorbell is pressed. [1] The camera should be connected to the camera interface. Please see the diagram below. [2] The camera interface must be associated with the device. (mode = 4) Please refer to the product manual for the camera interface. -
Page 73: Clean Screen
Operation 9.12 Clean screen The indoor station is able to block all operations during screen cleaning. On the "System Settings" screen, click "Display", followed by to access the screen. The countdown (1…30) is displayed on the screen. Any operations on the screen will be invalid. This device will exit "Clean screen"... -
Page 74: Cyber Security
Cyber security Disclaimer Although ABB provides functionality testing on the products and updates that we release, you should institute your own testing program for any product updates or other major system updates (to include but not limited to code changes, configuration file changes, third party software updates or patches, hardware change out, etc.) to ensure that the security measures... -
Page 75: Notice
We reserve the right to at all times make technical changes as well as changes to the contents of this document without prior notice. The detailed specifications agreed to at the time of ordering apply to all orders. ABB accepts no responsibility for possible errors or incompleteness in this document. - Page 76 Contact us Notice We reserve the right to at all times ABB Xiamen Smart Technology Co., Ltd. make technical changes as well as No. 881, FangShanXiEr Road, Xiang’An Industrial changes to the contents of this Area, Torch Hi-Tech Industrial Development document without prior notice.
Need help?
Do you have a question about the ABB-Welcome M2238-04 Series and is the answer not in the manual?
Questions and answers