
Subscribe to Our Youtube Channel
Related Manuals for Nivona CafeRomatica 605


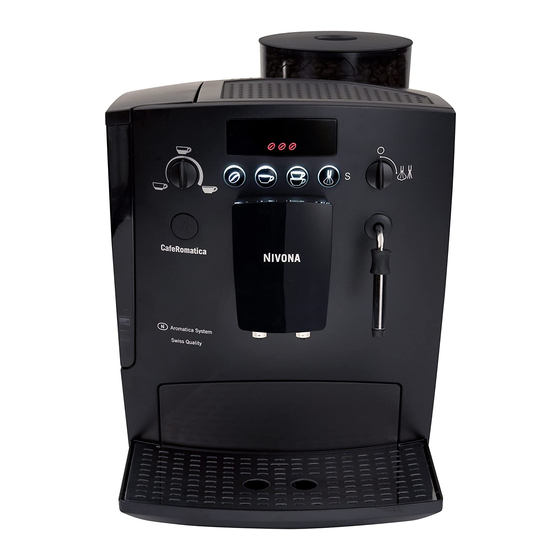
Summary of Contents for Nivona CafeRomatica 605
- Page 1 CafeRomatica Fully automatic coffee centre Operating Instructions and Useful Tips A passion for coffee.
- Page 3 Equipment Bean container with lid Symbol display screen Removable water tank Water quantity control knob On / Off button Coffee strength button 1-cup button 2-cup button Height-adjustable coffee spout Drip grill Fill level indicator for drip tray Drip tray Pre-ground coffee chamber Cup holding plate Steam warm-up / rinse button Steam / hot water valve control knob...
- Page 4 Equipment...
- Page 5 Symbols Symbol Number Brief description Coffee strength MILD Coffee strength NORMAL Coffee strength STRONG Not enough coffee beans – fill container Flashing Fill water tank Pre-ground coffee Hot water / steam, open / closed Empty used coffee tray / drip tray Descale machine Clean machine...
- Page 6 Operating Instructions and Useful Tips Dear Customer, Congratulations and many thanks for choosing a high-quality NIVONA product. To get the most out of your NIVONA machine, please read this manual carefully before use. Please start by reading the safety notes.
-
Page 7: Table Of Contents
Contents 1. Safety instructions ......37 2. Set up ........39 2.1 Preparing the machine . -
Page 8: Safety Instructions
1. Safety instructions • The machine is for domestic use • Always unplug the machine only and is not suitable for during extended periods of commercial applications. Other- absence. wise, claims under the guarantee • Do not leave the machine will not be accepted. - Page 9 Afterwards send the machine to CE – This machine conforms to the dealer from whom it was pur- EC guidelines. chased – or to NIVONA national customer services. Specifications Caution! Electrical appliances Mains voltage: 230 V...
-
Page 10: Set Up
2. Set up 2.1 Preparing the machine Please make sure the steam / hot water valve control knob (fig. 1/P ➔ Carefully remove the machine and 5) is turned to ‘0’! and all parts from the packaging. Note: If you need to return your 2.2 Getting started machine for servicing, it can be ➔... -
Page 11: Grinder Settings
... 2. Set up ➔ Slide the regulator on the rear Note: As a protective measure, the pipes are not filled with water when side (fig. 1/Q) into the desired the machine is first operat ed. The position while the grinder is runn - machine indicates this as follows: ing. -
Page 12: Making Coffee
3. Making coffee Note: The machine is preset for 3.2 Select water quantity immediate use. However, we re - You can freely select the quantity commend that first you adjust the of water used by turning the water most important settings to suit your quantity control knob (fig. -
Page 13: Making Two Cups
... 3. Making coffee enough beans’ (Symbol ) may and coffee strength settings for therefore start to flash after the one cup (fig. 1/D and 1/F). ➔ Press the 2-cup button (fig. 1/H). first grinding and no coffee is pro- ➔... -
Page 14: Drawing Hot Water
... 3. Making coffee the 1-cup button (fig. 1/G). A cup before touching, or only touch of coffee is now brewed without the plastic parts. grinding. 3.7 Drawing steam / frothing milk Note: If the pre-ground coffee ➔ Press the steam warm-up button chamber is left open by accident or no button is pressed after (fig. -
Page 15: Programming Functions
... 3. Making coffee automatically switch the operation · To froth milk, the metal pipe of off. You can prolong the operation the steam jet must be in the by turning the control knob back lowest position. and forth (fig. 1/P and 5). ·... -
Page 16: Operating Without A Filter
... 4. Programming functions ➔ Wait until no more water comes ture level, automatic switch off, out of the jet and turn the valve ECO-mode. control knob (fig. 1/P and 5) back to the left to close. 4.2 Water hardness ➔... -
Page 17: Temperature
... 4. Programming functions Note: If none of the dots turn red High = Coffee strength button and on the test strip, please set to 1-cup button are lit up level 1. Maximum = coffee strength button and 1-cup button and 2-cup button ➔... -
Page 18: Eco Mode
... 4. Programming functions ➔ 30 minutes = coffee strength saving ECO Mode with minimal button + 1-cup button are lit up. heat output 3 minutes after its ➔ 70 minutes = coffee strength last use – therefore using less button + 1-cup button + 2-cup electricity. -
Page 19: Maintenance And Care
5. Maintenance and care 5.1 Changing filter 5.2 Cleaning program The filter loses its efficiency and When the machine must be cleaned, must be replaced after at most Symbol ap pears in the display. two months. Note: You can continue to brew ➔... -
Page 20: Manual Cleaning
... 5. Maintenance and care ➔ Add the cleaning tablet to the 5.3 Descaling pre-ground coffee chamber and If the machine needs to be des - shut the lid. caled, Symbol ap pears in the ➔ Symbol flashes and the 1- display. -
Page 21: Manual Descaling
... 5. Maintenance and care ➔ Remove the drip tray and used ➔ Symbol and the 1-cup but- coffee tray (fig. 1/L and 1/U) and ton both flash. ➔ Remove and clean the water clean thoroughly. ➔ Replace the drip tray and used reservoir and fill it up with fresh coffee tray. -
Page 22: General Cleaning
... 5. Maintenance and care 5.4 General cleaning unscrewed, dismantled into pieces and given a thorough clean under Caution: Never submerge the flowing water. machine in water! Do not use abrasive materials to clean the Cleaning the brewing unit machine. Do not put the re - If required, the brewing unit can be movable components of the removed and cleaned under runn -... -
Page 23: System Messages
6. System messages ➔ Meaning ➔ What to do Message ➔ Fill or rinse out water ➔ Turn hot water control Symbol 17 flashes pipes knob (fig. 1/P and 5) to the right to open valve ➔ Water reservoir (fig. 2) ➔... -
Page 24: Troubleshooting
7. Trouble-shooting ➔ Reason ➔ What to do Fault ➔ Jet is blocked / stuck ➔ Take jet (fig. 1/R) apart No hot water or steam and clean thoroughly comes out of the jet ➔ Unsuitable milk ➔ Use cold milk Too little ➔... -
Page 25: Further Instructions
- Customer service pliances” provided by your local council. You can obtain further in - NIVONA products are designed to formation from your local council, meet the highest quality standards. the waste collection services or the... - Page 26 NIVONA machine less often. MilkCooler NICT 500: Standard accessory for the NICR770, optional for all NIVONA fully automatic coffee Cleaning tablets centres with milk NIRT 700 frothing devices: The Your fully auto matic coffee centre...
Need help?
Do you have a question about the CafeRomatica 605 and is the answer not in the manual?
Questions and answers