Nivona CafeRomatica NICR8 Series Operating Instructions And Useful Tips
Fully automatic coffee centre
Hide thumbs
Also See for CafeRomatica NICR8 Series:
- Operating instructions manual (16 pages) ,
- Operating instructions and useful tips (31 pages)

Subscribe to Our Youtube Channel
Related Manuals for Nivona CafeRomatica NICR8 Series


Summary of Contents for Nivona CafeRomatica NICR8 Series
- Page 1 CafeRomatica NICR8.. Fully automatic coffee centre Operating Instructions and Useful Tips A passion for coffee.
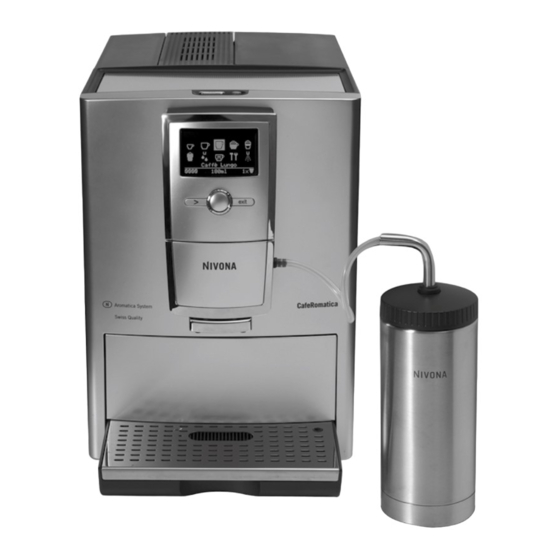
- Page 3 Text display (main menu) Rotary control knob Button „>“ Button „exit“ Height-adjustable coffee spout Removable water reservoir with lid Bean container with lid (inside) Mains switch On / Off switch Cup holding plate Cup warming plate (model 855) Service door (side wall) Pre-ground coffee chamber with lid (inside) Drip tray...
-
Page 4: Table Of Contents
Contents 1. Safety instructions 1. Safety instructions 1. SAFETY INSTRUCTIONS .....................41 2. SET UP ..........................43 2.1 Preparing the machine ....................43 2.2 The most important controls ..................43 2.3 Adding water and beans ....................43 2.4 Switching on and getting started for the rst time ............43 2.5 Switching on the machine and preparing it for use ............45 2.6 Pre-warming your cups ....................46 3. -
Page 5: Safety Instructions
Turn the appliance off only after it has nished the job. Your NIVONA machine enables you to brew a range of speciality coffees just as you like them. The most important controls and their basic functions are generally identical for the various speciality... -
Page 6: Switching On The Machine And Preparing It For Use
The system will now be lled with water. means that you have to descale your machine less often – but you must still descale it when neces- The message, “NIVONA”, will now appear on the display screen. sary. ALWAYS TAKE THE FILTER OUT before descaling! -
Page 7: Pre-Warming Your Cups
2. Set up / 3. Adjusting the basic settings 3. Adjusting the basic settings The system will now be rinsed. Then it will be ready for use, and the main menu will appear on the Caution: Even if the display screen does not show the message, “Replace lter”, and even if the ma- display screen (Image 1/A). -
Page 8: Setting The Temperature
3. Adjusting the basic settings 3. Adjusting the basic settings 3.3 Setting the temperature According to your preference, you can set the coffee temperature to “Normal”, “High”, “Maximum” Espresso or “Individually”. The factory setting is “High”. By following the procedure described below, you will Turn the Rotary control knob to the tool symbol, „settings“. -
Page 9: Setting The Switch-Off Rinsing Function
Turn the Rotary control knob to “OFF rinsing”. Press the Rotary control knob. Your NIVONA machine enables you to brew a range of speciality coffees just as you like them. The Turn the Rotary control knob to select “Disabled” or “Enabled”. -
Page 10: Brewing An Espresso
4. Brewing speciality coffees 4. Brewing speciality coffees Espresso 40ml The display screen shows: the 3-bean symbol, “40ml”, and the 1 cup symbol. You can brew your Espresso in two different ways: Espresso 1. You can either use the standard settings from the “Coffee recipes” menu. These are the factory set- 40ml tings which you can nevertheless change individually to suit your own taste, as described below. -
Page 11: Brewing A Café Crème
4. Brewing speciality coffees 4. Brewing speciality coffees vidual settings for each Espresso that you brew. Turn the Rotary control knob to “Coffee recipes”. Press the Rotary control knob. Turn the Rotary control knob to “Café Crème”. Press the Rotary control knob. The possible settings for aroma, amount and temperature (if the setting in the temperature menu is “individually”... -
Page 12: Brewing A Caffè Lungo
4. Brewing speciality coffees 4. Brewing speciality coffees While the symbol is ashing, turn the Rotary control knob to select your setting. Selecting temperature After the bean symbol for aroma, the “ml” display for amount will ash in the middle of the bottom Turn the Rotary control knob to “Temperature”. -
Page 13: Brewing A Latte Macchiato
4. Brewing speciality coffees 4. Brewing speciality coffees You can brew your Cappuccino in two different ways: Selecting temperature 1. You can either use the standard settings from the “Coffee recipes” menu. These are the factory set- Turn the Rotary control knob to “Temperature”. Press the Rotary control knob. tings which you can nevertheless change individually to suit your own taste, as described below. -
Page 14: Preparing Warm Milk (E.g. For Warm Chocolate)
4. Brewing speciality coffees 4. Brewing speciality coffees Turn the Rotary control knob to the amount of your choice. Press the Rotary control knob to con- Caution: Dried milk residue is hard to remove, so please clean the equipment thoroughly as soon as it rm your selection. -
Page 15: Preparing Hot Water (E.g. For Tea)
4. Brewing speciality coffees 4. Brewing speciality coffees Espresso 150ml The display screen shows: “150ml”, “20%”. Espresso In the main menu, turn the Rotary control knob to “Warm milk” / the warm milk symbol. Using the special spumatore (milk frother), you can froth milk straight from the carton or other con- Espresso 150ml tainer and pour it straight into the cup or glass. -
Page 16: Setting The Grinder
4. Brewing speciality coffees 4. Brewing speciality coffees You can apply your settings by pressing the exit button or by making no further changes. Please note: Do not forget whether you are brewing one or two cups (845/855 model only for drinks Espresso with milk), and put the cup(s) under the spout as required (Image 6). -
Page 17: Cleaning And Maintenance
4. Brewing speciality coffees / 5. Cleaning and maintenance 5. Cleaning and maintenance Put some water and cleaning agent (available separately, see 9) with a total volume of at least 0.3l in Please note: If you inadvertently open the pre-ground coffee chamber – or did not press the Rotary a container. -
Page 18: Descaling The System
5. Cleaning and maintenance 5. Cleaning and maintenance The machine will now heat up and be ready for use again. Empty and clean the drip tray and the used coffee tray (Images 1/N and 1/O) and put them back in the machine. 5.5 Descaling the system Caution: Please always remove all descaling liquid residue left on the machine with a damp cloth. -
Page 19: System Messages
5. Cleaning and maintenance 6. System messages 6. System messages You can continue to prepare drinks, but we would advise you always to change the lter immediately. Espresso Message Meaning What to do Turn the Rotary control knob to the tool symbol, „settings“. Press the Rotary control knob. 150ml Turn the Rotary control knob to “Filter”. -
Page 20: Troubleshooting
The CLARIS lter cartridge NIRF 700 is lled with purely organic material, without chemical addi- No hot water / steam comes Milk frother (Image 1/R) is Disassemble and clean milk tives, if changed regularly, it ensures that you will have to descale your NIVONA machine less often. out of jet blocked frother thoroughly... - Page 21 NIVONA Apparate GmbH Fritz-Haber-Straße 10 D-90449 Nürnberg www.nivona.com © 2010 by NIVONA...
Need help?
Do you have a question about the CafeRomatica NICR8 Series and is the answer not in the manual?
Questions and answers