Table of Contents
Advertisement
This gas grill must be used only outdoors in a well-ventilated space and must not be used inside a
building, garage, screened-in porch, gazebo or any other enclosed area.
DANGER
IF YOU SMELL GAS:
• Shut off gas to the appliance.
• Extinguish any open flame.
• Open lid.
• If odor continues, keep away from the
appliance and immediately call your gas
supplier or fire department.
Notice to Installer: Leave these instructions with the grill owner for future reference.
Customer Solutions: 1-866-820-8686 or
N415-0275-AU APR 08.15
Napoleon Group of Companies
214 Bayview Dr., Barrie, Ontario, Canada L4N 4Y8
Phone: 1-705-726-4278 Fax: (705)-725-2564
www.napoleongrills.com
grills@napoleonproducts.com
APPLY SERIAL NUMBER LABEL FROM CARTON
Serial No.
XXXXXX000000
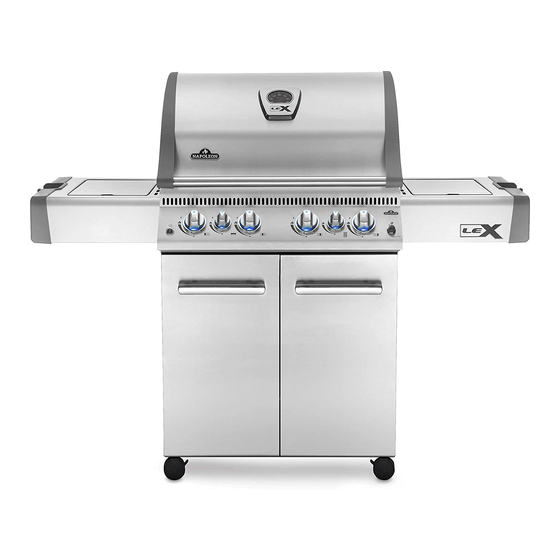
MODEL NO.
LEX 485
WARNING
Do not try to light this appliance without
reading the "LIGHTING" instructions section
of this manual.
Do not store or use gasoline or other
flammable liquids or vapors in the vicinity of
this or any other appliance. A ULPG cylinder
not connected for use must not be stored in
the vicinity of this or any other appliance.
If the information in these instructions is
not followed exactly, a fire or explosion may
result, causing property damage, personal
injury or death.
PG.18
SAI Global
SAI-400025
AS4557
Advertisement
Table of Contents

Related Manuals for Napoleon LEX 485


Summary of Contents for Napoleon LEX 485
- Page 1 Notice to Installer: Leave these instructions with the grill owner for future reference. Napoleon Group of Companies 214 Bayview Dr., Barrie, Ontario, Canada L4N 4Y8 Phone: 1-705-726-4278 Fax: (705)-725-2564 www.napoleongrills.com...
- Page 2 NAPOLEON. We at Napoleon are dedicated to you, “our valued customer.” It is our goal to provide you with the necessary tools for an unforgettable grilling experience. This manual is provided to assist you in assuring your new grill is assembled, installed, maintained and cared for properly.
- Page 3 Never use natural gas in a unit designed for Universal Liquefied Petroleum Gas. • Never use lighter fluid in a gas grill. • Use charcoal briquettes only with a Napoleon charcoal tray designed for this unit. • Burner controls must be off when turning supply cylinder on. •...
- Page 4 Location Locating Your Outdoor Gas Grill It is important when selecting a location for your gas grill to ensure clearances to adjacent combustibles are met. This appliance is intended for installation on an outdoor patio or in your yard. ‘This appliance shall only be used in an above ground open-air situation with natural ventilation, without stagnant areas, where gas leakage and products of combustion are rapidly dispersed by wind and natural convection.’...
- Page 5 Dimensions GRILL SIZE: 485 in (3130 cm WARMING RACK SIZE: 190 in (1220 cm ALL DIMENSIONS ARE APPROXIMATE OVERALL WIDTH 57 3/4" 147cm OVERALL DEPTH 27 1/2" 70cm 14 1/4" 36cm OVERALL HEIGHT 49 1/4" 125cm (59 1/4" [151cm] - LID OPEN) 36 1/4"...
-
Page 6: General Information
General Information This gas grill is certified for outdoor use and should be installed to conform to local codes. Check gas type and specifications located on the rating plate located on the back panel of the grill. Natural Gas Hook-Up The installation must be performed by a licensed gas fitter in accordance with AS5601 / AG601, and all connections must be leak tested before operating the grill. - Page 7 Universal Liquefied Petroleum Gas Cylinder Specifications WARNING! If these instructions are not followed exactly, a fire causing death or serious injury may occur. This gas grill has been designed for use with an approved 9 kg size Universal Liquefied Petroleum Gas cylinder (not supplied).
-
Page 8: Leak Testing Instructions
Bubbles will indicate a gas leak. Either tighten the loose joint or have the part replaced with one recommended by the Napoleon Customer Solutions department and have the grill inspected by a certified gas installer. If the leak cannot be stopped, immediately shut off the gas supply, disconnect it, and have the grill inspected by a certified gas installer or dealer. -
Page 9: Lighting Instructions
Lighting Instructions Side Burner Lights Left Rear Infra Red Centre Burner Burner Burner Burner WARNING! Off Position Open lid. WARNING! Ensure all burner controls are in the off position. Turn on the gas supply valve. Main Burner Rear Burner Lighting Side Burner Lighting Lighting (Rotisserie Burner) -
Page 10: Operating The Grill
For example, a 3 pound chicken on the rotisserie will be done in approximately 1½ hours on medium to high. See ‘Your all Season Grill’ cookbook by Napoleon for more detailed instructions. - Page 11 Any juices or oils that escape from the food drip onto the charcoal and vaporize into smoke giving the food its delicious grilled taste. The Napoleon infrared burner cooks in the same way. In each burner, 10,000 ports – each with its own tiny flame – cause the surface of the ceramic tile to glow red.
- Page 12 This helps it to cook faster and more evenly. To add a trademark taste to your cooking, try adding mesquite-flavoured woodchips to your Napoleon woodchip smoker. Pork chops Medium 6 min. per side Trim off the excess fat before grilling.
-
Page 13: Maintenance / Cleaning Instructions
Maintenance / Cleaning Instructions We recommend this gas grill be thoroughly inspected and serviced annually by a qualified service person. At all times keep the gas grill area free from combustible materials, gasoline and other flammable vapors and liquids. Do not obstruct the flow of ventilation and combustion air. Keep the cylinder enclosure ventilation openings (located on the cart sides and at the front and back of the bottom shelf) free and clear from debris. - Page 14 WARNING! Hose: Check for abrasions, melting, cuts, and cracks in the hose. If any of these conditions exist, do not use the gas grill. Have the part replaced by your Napoleon Gas Grill dealer or qualified gas installer. Tube Burner: The burners are made from heavy wall 304 stainless steel, but extreme heat and a corrosive environment can cause surface corrosion to occur.
-
Page 15: Troubleshooting
Infrared Burners: Because of the high intensity of the infrared burner, most drippings and food particles that fall onto the burner surface are immediately incinerated. However, some debris and residue may remain. To remove this residue after cooking, operate the grill on high for 5-10 minutes. Do not clean the ceramic tile with a wire brush. - Page 16 Cracked ceramic tile. Allow burner to cool and inspect very closely for cracks. If any cracks are found, contact your authorized Napoleon dealer to order a replacement burner assembly. Leaking gasket surrounding the ceramic Contact your authorized Napoleon dealer for...
-
Page 17: Ordering Replacement Parts
SERIAL NUMBER: (Record information here for easy reference) Before contacting the Customer Solutions Department, check the Napoleon Website for more extensive cleaning, maintenance, troubleshooting and parts replacement instructions at www.napoleongrills.com. Contact your local distributor directly (refer to the distributor contact list provide with your grill) for replacement parts and warranty claims. -
Page 18: Getting Started
CAUTION! During unpacking and assembly we recommended you wear work gloves and safety glasses for your protection. Although we make every effort to make the assembly process as problem free and safe as possible, it is characteristic of fabricated steel parts that the edges and corners might be sharp and could cause cuts if handled incorrectly. - Page 19 1 X N430-0002 16 X N570-0073 (1/4-20 X 3/8”) 3/8”(10mm) non relvolving caster- left side www.napoleongrills.com...
- Page 20 Propane Only 4 x N570-0080 (#14 x 1/2”) 3/8”(10mm) www.napoleongrills.com...
- Page 21 6 x N570-0080 (#14 x 1/2”) 3/8”(10mm) Propane Only www.napoleongrills.com...
- Page 22 4 x N570-0080 (#14 x 1/2”) 1 X N430-0002 3/8”(10mm) www.napoleongrills.com...
- Page 23 4 x N570-0091 (1/4-20 X 3/8”) 3/8”(10mm) WARNING! Propane Only - To avoid assembly difficulties, prior to mounting the grill head, remove zip tie holding regulator. This was installed at the factory to protect the regulator hose during shipping and is no longer required. (Take care when removing the tie not to damage the hose). Ensure the regulator hose does not become pinched between the grill head and the cart.
- Page 24 4 x N570-0080 (#14 x 1/2”) 3/8”(10mm) ATTENTION! Ensure that all tabs are bent down before installation. www.napoleongrills.com...
- Page 25 3/8”(10mm) 2 x N570-0080 (#14 x 1/2”) Back View Front View ATTENTION! Ensure that all tabs are bent up after installation. www.napoleongrills.com...
- Page 26 disposable grease tray www.napoleongrills.com...
- Page 27 6 x N570-0080 (#14 x 1/2”) 3/8”(10mm) Back View ATTENTION! Ensure that all tabs are bent up after installation. Front View www.napoleongrills.com...
- Page 28 2 x N570-0073 (1/4-20 X 3/8”) 3/8”(10mm) www.napoleongrills.com...
- Page 29 8 x N570-0076 (#8 X 1/2”) 4 x N570-0013 (#8 X 5/8”) Engage edge of shelf under ribs in end cap. N570-0013 (#8 X 5/8”) www.napoleongrills.com...
- Page 30 4 x N570-0082 (1/4-20 X 5/8”) 4 x N735-0001 3/8”(10mm) Tabs located on either side of ice bucket must engage notches in side shelf. www.napoleongrills.com...
- Page 31 3/8”(10mm) 4 x N570-0082 (1/4-20 X 5/8”) 4 x N735-0001 1 x N160-0023 Fit orifice into burner tube and secure with hose retainer clip supplied. Attach the wire to the side burner electrode. www.napoleongrills.com...
- Page 32 N570-0080 (#14 x 1/2”) 3/8”(10mm) Propane Only 4 x N570-0099 (#14 x 3/4”) 4 x N340-0007 3/8”(10mm) WARNING! Do not over tighten the screws, as this will cause the handle to crack. www.napoleongrills.com...
- Page 33 2 x N105-0011 2 x N160-0022 BOTTOM www.napoleongrills.com...
- Page 34 FOLD TABS OVER TO SECURE GLASS IN PLACE. www.napoleongrills.com...
- Page 35 www.napoleongrills.com...
- Page 36 Rotisserie Kit Assembly Instruction (optional) Assemble rotisserie kit components as shown. Ensure stop bushing is tightened on the inside of hood casting. www.napoleongrills.com...
- Page 37 Propane Only – Proper Hose Connection Clip hose to side panel using hose retainer clip supplied. Ensure the regulator drops into the small opening, between the tank heat shield and the right side of the cabinet. WARNING – FIRE HAZARD The regulator must be attached so that no part of the hose touches the underside of the grill or drip pan.
- Page 38 Natural Gas Only – Proper Hose Connection 3/4”(19mm) WARNING! The installation must be performed by a licensed gas fitter, and all connections must be leak tested before operating the grill. Do not use pipe dope or teflon tape on this connection. Tighten the connection with two wrenches.
-
Page 39: Parts List
Parts List Item Part # Description N590-0147-GY1SG bottom shelf N475-0236-GY1SG left/right cart enclosure panel N475-0324-GY1SG rear cart enclosure panel N655-0173-GY1SG front cabinet support N080-0212-GY1SG stabilizer brackets N430-0002 magnetic catch N105-0011 door bushings N130-0012 revolving caster N130-0013 non revolving caster N710-0083-GY1SG grease tray holder N710-0062 grease tray aluminium... - Page 40 - pilot N335-0042L-M02 stainless steel lid insert N135-0042-GY1HT left side lid casting N135-0043-GY1HT right side lid casting N585-0078 heat shield lid N385-0129 NAPOLEON logo W450-0005 logo spring clips N010-0742 lid handle N685-0013 temperature gauge N570-0091 1/4-20 x 1/2” screw N080-0287-GY1HT...
- Page 41 Parts List Item Part # Description N640-0001 hose clip N105-0001 plastic bushing N510-0013 lid bumper N080-0309 glass mount N300-0006 infrared glass N010-0499 infrared burner N080-0207-M01 support bracket infra red burner N215-0007-M01 infrared burner bracket N590-0216 infrared side burner cut out N185-0003 ice bucket N335-0048...
- Page 42 www.napoleongrills.com...
- Page 43 Notes www.napoleongrills.com...
- Page 44 N415-0275-AU...
Need help?
Do you have a question about the LEX 485 and is the answer not in the manual?
Questions and answers