Table of Contents
Advertisement
Quick Links
This gas grill must be used only outdoors in a well-ventilated space and must not be used inside a
building, garage, screened-in porch, gazebo or any other enclosed area.
DANGER
IF YOU SMELL GAS:
• Shut off gas to the appliance.
• Extinguish any open flame.
• Open lid.
• If odor continues, keep away from the
appliance and immediately call your gas
supplier or fire department.
Notice to Installer: Leave these instructions with the grill owner for future reference.
Customer Solutions: 1-866-820-8686 or
N415-0275 NOV 27.15
Do not try to light this appliance without
reading the "LIGHTING" instructions section of
this manual.
Do not store or use gasoline or other
flammable liquids or vapors in the vicinity of
this or any other appliance. An L.P. cylinder
not connected for use must not be stored in
the vicinity of this or any other appliance. If
the information in these instructions is not
followed exactly, a fire or explosion may result,
causing property damage, personal injury or
death.
Napoleon Group of Companies
214 Bayview Dr., Barrie, Ontario, Canada L4N 4Y8
Phone: 1-705-726-4278 Fax: (705)-727-4282
www.napoleongrills.com
grills@napoleonproducts.com
APPLY SERIAL NUMBER LABEL FROM CARTON
Serial No.
XXXXXX000000
MODEL NO.
DO NOT DISCARD
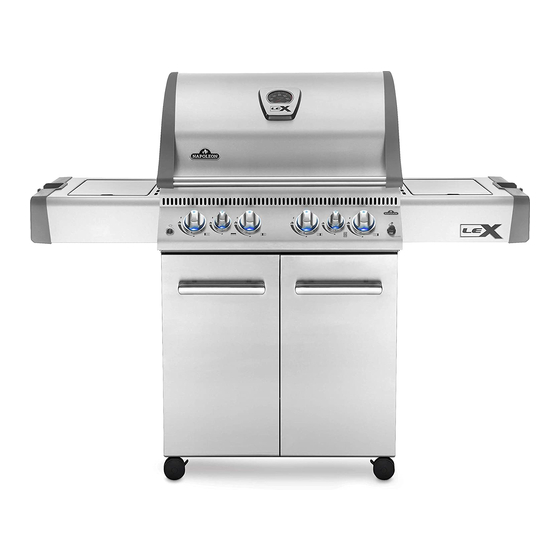
LEX 485
WARNING
EN
FR
PG.15
PG.31
Advertisement
Table of Contents

Related Manuals for Napoleon LEX 485


Summary of Contents for Napoleon LEX 485
- Page 1 Notice to Installer: Leave these instructions with the grill owner for future reference. Napoleon Group of Companies 214 Bayview Dr., Barrie, Ontario, Canada L4N 4Y8 Phone: 1-705-726-4278 Fax: (705)-727-4282 www.napoleongrills.com Customer Solutions: 1-866-820-8686 or grills@napoleonproducts.com...
-
Page 2: Conditions And Limitations
This warranty defines the obligation and liability of NAPOLEON with respect to the NAPOLEON gas grill and any other warranties expressed or implied with respect to this product, its components or accessories are excluded. NAPOLEON neither assumes, nor authorizes any third party to assume, on its behalf, any other liabilities with respect to the sale of this product. -
Page 3: Safe Operating Practices
Never use natural gas in a unit designed for liquid propane gas. • Never use lighter fluid in a gas grill. • Use charcoal briquettes only with a Napoleon charcoal tray designed for this unit. • Burner controls must be off when turning supply cylinder on. •... - Page 4 Dimensions GRILL SIZE: 485 in (3130 cm WARMING RACK SIZE: 190 in (1220 cm ALL DIMENSIONS ARE APPROXIMATE OVERALL WIDTH 57 3/4" 147cm LEX485 61 3/4" 157cm LEX485RSIB 14 1/4" 36cm OVERALL HEIGHT 49 1/4" 125cm (59 1/4" [151cm] - LID OPEN) 36 1/4"...
- Page 5 Cylinder Specification/Gas Hook Up This gas barbecue is certified under Canadian and American National Standards, CAN/CSA 1.6 2005 and ANSIZ21.58 -2005 respectively for outdoor gas grills and should be installed to conform with local codes. In absence of local codes, install to the current CAN/CGA-B149.1 Propane Installation Code in Canada or to the National Fuel Gas Code, NFPA54/ANSI Z223.1 in the United States.
-
Page 6: Natural Gas Hook-Up
Bubbles will indicate a gas leak. Either tighten the loose joint or have the part replaced with one recommended by the Napoleon Customer Solutions department and have the grill inspected by a certified gas installer. STOP If the leak cannot be stopped, immediately shut off the gas supply, disconnect it, and have the grill inspected by a certified gas installer or dealer. -
Page 7: Lighting Instructions
Lighting Instructions Side Burner Side Burner Igniter Lights Left Burner Centre Burner Right Burner Rear Burner WARNING! Off Position Open lid. WARNING! Ensure all burner controls are in the off position. Turn on the gas supply valve. Main Burner Rear Burner Lighting Side Burner Lighting Lighting (Rotisserie Burner) -
Page 8: Operating The Grill
For example, a 3 pound chicken on the rotisserie will be done in approximately 1½ hours on medium to high. See ‘Your all Season Grill’ cookbook by Napoleon for more detailed instructions. - Page 9 1. Follow the infrared side burner lighting instructions and operate on high for 5 minutes with the lid opened or until the ceramic burners glow red. 2. Place food on grills and cook according to times listed in the Infrared Grilling Chart. 3.
-
Page 10: Control Setting
Any juices or oils that escape from the food drip onto the charcoal and vaporize into smoke giving the food its delicious grilled taste. The Napoleon infrared burner cooks in the same way. In each burner, 10,000 ports – each with its own tiny flame –... -
Page 11: Maintenance / Cleaning Instructions
Maintenance / Cleaning Instructions We recommend this gas grill be thoroughly inspected and serviced annually by a qualified service person. At all times keep the gas grill area free from combustible materials, gasoline and other flammable vapors and liquids. Do not obstruct the flow of ventilation and combustion air. Keep the cylinder enclosure ventilation openings (located on the cart sides and at the front and back of the bottom shelf) free and clear from debris. - Page 12 Cleaning The Outer Grill Surface: Do not use abrasive cleaners or steel wool on any painted, porcelain or stainless steel parts of your Napoleon Grill. Doing so will scratch the finish. Exterior grill surfaces should be cleaned with warm soapy water while the metal is still warm to the touch. To clean stainless surfaces, use a stainless steel or a non-abrasive cleaner.
-
Page 13: Troubleshooting
Cracked ceramic tile. Allow burner to cool and inspect very closely for and grows dim.) cracks. If any cracks are found, contact your authorized Napoleon dealer to order a replacement burner assembly. Leaking gasket surrounding the Contact your authorized Napoleon dealer for... -
Page 14: Ordering Replacement Parts
SERIAL NUMBER: (Record information here for easy reference) Before contacting the Customer Solutions Department, check the Napoleon Grills Website for more extensive cleaning, maintenance, troubleshooting and parts replacement instructions at www.napoleongrills.com. Contact the factory directly for replacement parts and warranty claims. Our Customer Solutions Department is available between 9 AM and 5 PM (Eastern Standard Time) at 1-866-820-8686, fax at 1-705-727-4282 or e-mail grills@napoleonproducts.com. - Page 15 à la propriété, des blessures corporelles ou des pertes de vie. Note à l’installateur : Laissez ces instructions au propriétaire du gril pour consultation ultérieure. Napoleon Group of Companies 214 Bayview Dr., Barrie, Ontario, Canada L4N 4Y8 Phone: 1-705-726-4278 Fax: (705)-727-4282 www.napoleongrills.com...
- Page 16 MERCI D’AVOIR CHOISI NAPOLÉON Les produits NAPOLÉON sont conçus avec des composants et des matériaux de qualité supérieure, assemblés par des artisans qualifiés qui sont fiers de leur travail. Le brûleur et le montage de la soupape subissent un test de détection de fuites et d’allumage à...
- Page 17 AVERTISSEMENT! Si ces instructions ne sont pas suivies, des dommages matériels, des blessures corporelles ou des pertes de vie pourraient s’ensuivre. Lisez et respectez tous les avertissements et les instructions de ce manuel avant de faire fonctionner le gril. Pratiques Sécuritaires D’utilisation •...
- Page 18 Dimensions DIMENSIONS GRILLE: 485 SQ.IN ( 3130 sq.cm) DIMENSIONS GRILLE DE RÉCHAUD: 190 SQ.IN ( 1220 sq.cm) TOUS LES DIMENSIONS SONT APPROXIMATIVES 57 3/4" 147cm LEX485 61 3/4" 157cm PROFONDEUR TOTALE LEX485RSIB (brûleur arriére) PROFONDEUR TOTALE 14 1/4" 36cm HAUTEUR TOTALE 49 1/4"...
- Page 19 Spécifications De La Bonbonne / Branchement Du Gaz Ce gril à gaz est certifié selon les normes nationales canadiennes et américaines, CAN/cSa-1.6-2005 et ANSI Z21.58 -2005 pour les grils à gaz extérieurs et son installation doit être conforme aux codes locaux.
- Page 20 Branchement Au Gaz Naturel Ce gril à gaz naturel est équipé d’un boyau d’alimentation de 10 pieds (incluant un système de déconnexion rapide) conçu pour un branchement au gaz naturel et certifié pour une utilisation extérieure. Ce gril à gaz a été conçu pour fonctionner à une pression d’alimentation de 7 pouces de colonne d’eau. Les tuyaux et les soupapes en amont du système de déconnexion rapide ne sont pas fournis L’installation doit être conforme à...
-
Page 21: Instruction D'allumage
Instruction D’allumage Brûleur de latéral Bouton d’allumeur du brûleur latéral Lumières Brûleur de Bruleur Brûleur de Brûleur de gauche d’arriere Centre droite AVERTISSEMENT! Fermez Ouvrez le couvercle. AVERTISSEMENT! Assurez-vous que tous les boutons de contrôle sont à « off ». Ouvrez ensuite la soupape d’alimentation en gaz. -
Page 22: Instructions D'opération
Gardez le couvercle ouvert. Pour des instructions plus détaillées, veuillez consulter le “Livre de recettes toutes saisons” de NAPOLEON. Cuisson Directe: Placez les aliments à cuire sur la grille de cuisson, directement au-dessus de la chaleur. - Page 23 1. Faites fonctionner à « high » pendant 5 minutes avec le couvercle ouvert ou jusqu’à ce que les brûleurs en céramique deviennent incandescents. 2. Placez les aliments sur les grilles de cuisson et faites saisir pendant environ 2 minutes par côté. 3.
- Page 24 Écrans de rechange N565-0002 Chaleur Infrarouge La plupart des gens ne réalisent pas que la source de chaleur qui nous est la plus familière et que le soleil émet pour réchauffer la planète est l’énergie infrarouge. L’énergie infrarouge est une forme d’énergie électromagnétique dont la longueur d’onde est tout juste plus grande que la lumière rouge visible du spectre lumineux mais plus petite que les ondes radios.
- Page 25 Tableau de cuisson à l’infrarouge Aliment Réglage Des Contrôles Temps De Cuisson Conseils Pratiques Steak Réglage à “high” 2 min chaque 4 min - Saignant Lorsque vous choisissez votre vi- 1” (2.54cm) côté ande, demandez une viande qui est d’épaisseur marbrée.
-
Page 26: Instructions D'entretien Et De Nettoyage
Instructions D’entretien et de Nettoyage Nous vous conseillons de faire inspecter ce gril à gaz annuellement par un technicien de service qualifié. L’emplacement du gril à gaz doit être gardé libre de tous matériaux combustibles, essence ou autres liquides et vapeurs inflammables en tout temps. Les apports d’air comburant et d’air de ventilation ne doivent pas être obstrués. - Page 27 Le fini émaillée étant cuit il devient comme du verre; il s’ébrèchera au moindre choc. Vous pouvez vous procurer de la peinture émaillée pour les retouches chez votre détaillant NAPOLEON. Utilisez une solution d’eau savonneuse chaude pour nettoyer l’extérieur du gril pendant qu’il est encore tiède au toucher.
-
Page 28: Guide De Dépannage
nettoyés si le brûleur est en place. Toutefois, le nettoyage sera plus facile si le brûleur est retiré du gril. Ne pliez pas le foret en nettoyant les orifices, car le foret casserait. Ce foret doit être utilisé pour les orifices de brûleur seulement. - Page 29 Problème Causes possibles Solutions Le régulateur murmure Problème normal par temps chaud. Ceci n’est pas un défaut. Le murmure lorsque l’appareil fonctionne. est causé par une vibration à l’intérieur du régulateur et n’affecte en rien la performance et la sécurité du gril à gaz. Les régulateurs émettant un murmure ne seront pas remplacés.
-
Page 30: Commande De Pièces De Rechange
NUMÉRO DE SÉRIE: (Inscrivez l’information ici pour y avoir accès facilement.) Avant de contacter le département du service aux consommateurs, consultez le site Web de Napoleon Grills pour obtenir plus d’instructions sur le nettoyage, l’entretien, le dépannage et le remplacement des pièces à... -
Page 31: Getting Started
CAUTION! During unpacking and assembly we recommended you wear work gloves and safety glasses for your protection. Although we make every effort to make the assembly process as problem free and safe as possible, it is characteristic of fabricated steel parts that the edges and corners might be sharp and could cause cuts if handled incorrectly. - Page 32 N430-0002 N570-0073 (1/4-20 x 3/8”) non relvolving caster- left side roulette non tournant - gauche côté www.napoleongrills.com...
- Page 33 N570-0080 (#14 x 1/2”) www.napoleongrills.com...
- Page 34 N570-0080 (#14 x 1/2”) www.napoleongrills.com...
- Page 35 N570-0080 (#14 x 1/2”) www.napoleongrills.com...
- Page 36 N570-0080 (#14 x 1/2”) N430-0002 N570-0080 (#14 x 1/2”) www.napoleongrills.com...
- Page 37 N570-0091 (1/4-20 x 3/8”) N640-0001 WARNING! Propane Only - To avoid assembly difficulties, prior to mounting the grill head, remove zip tie holding regulator. This was installed at the factory to protect the regulator hose during shipping and is no longer required.
- Page 38 N570-0073 (1/4-20 x 3/8”) www.napoleongrills.com...
- Page 39 N570-0076 (#8 x 1/2”) N570-0013 (#8 x 5/8”) Rear side burner models Modèles arrière du brûleur latéral N570-0013 (#8 x 5/8”) Engage edge of shelf under ribs in end cap. Engager bord du plateau sous les côtes de bouchon. www.napoleongrills.com...
- Page 40 N570-0082 (1/4-20 x 5/8”) N735-0001 Tabs located on either side of ice bucket must engage notches in side shelf. Les pattes situées de chaque côté du bac à glace doivent s’engager dans les fentes de la tablette latérale. www.napoleongrills.com...
- Page 41 N570-0082 (1/4-20 x 5/8”) N160-0016 N735-0001 Fit orifice into burner tube and secure with hose retainer clip supplied. Attach the wire to the side burner electrode. Placez l’orifice dans le brûleur et fixez à l’aide de l’attache de retenue fournie. Fixez le fil à...
- Page 42 Cooking Grid Placement: The cooking grid can be placed at two different heights. The lower height is for use with pots or pans. The higher position is to be used when searing meats. Ensure the burner is off and the grid is cool to the touch before changing between the two heights.
- Page 43 N570-0099 (#14 x 3/4”) N340-0007 WARNING! Do not over tighten the screws, as this will cause the handle to crack. AVERTISSEMENT! Ne serrez pas trop les vis, car cela pourrait faire craquer la poignée. www.napoleongrills.com...
- Page 44 N105-0011 N160-0022 www.napoleongrills.com...
- Page 45 www.napoleongrills.com...
- Page 46 www.napoleongrills.com...
- Page 47 Rotisserie Kit Assembly Instruction (optional) Assemble rotisserie kit components as shown. Instructions D’assemblage De L’ensemble De Rôtissoire (optionnelle) Assemblez les composantes de la rôtissoire tel qu’illustré. Ensure stop bushing is tightened on the inside of hood casting. Assurez-vous que la bague d’arrêt soit serrée à...
- Page 48 Propane Only – Proper Hose Connection Propane Seulement - Branchement Adéquat Du Boyau Ensure the regulator drops into the small opening, between the tank heat shield and the right side of the cabinet. Assurez-vous que le régulateur passe dans la petite ouverture, entre le protecteur de chaleur de la bonbonne et le côté...
- Page 49 Natural Gas Only – Proper Hose Connection Gaz Naturel Seulement - Branchement Adéquat Du Boyau 3/4”(19mm) WARNING! The installation must be performed by a licensed gas fitter, and all connections must be leak tested before operating the grill. Do not use pipe dope or teflon tape on this connection. Tighten the connection with two wrenches.
- Page 50 Natural Gas Only – Improper Hose Connection Gaz Naturel Seulement - Branchement Inadéquat Du Boyau WARNING – FIRE HAZARD ATTENTION - RISQUE D’INCENDIE WARNING! Do not route hose underneath drip pan. AVERTISSEMENT! Ne pas passer le tuyau d’alimentation sous le tiroir d’égouttement afin de garder.
-
Page 51: Natural Gas Only
Bubbles will indicate a gas leak. Either tighten the loose joint or have the part replaced with one recommended by the Napoleon Customer Solutions department and have the grill inspected by a certified gas installer. STOP If the leak cannot be stopped, immediately shut off the gas supply, disconnect it, and have the grill inspected by a certified gas installer or dealer. - Page 52 Test De Détection De Fuites AVERTISSEMENT! Il doit être fait avant la première utilisation, annuellement et à chaque fois qu’une pièce du système de gaz est remplacée ou réparée. AVERTISSEMENT! N’utilisez pas une flamme nue pour vérifier pour des fuites de gaz. Assurez- vous qu’il n’y ait aucune étincelle ni flamme nue à...
-
Page 53: Parts List / Liste Des Pièces
Parts List / Liste Des Pièces Item Part # Description RSIB N590-0147-GY1SG bottom shelf / tablette du bas N475-0236-GY1SG left/right cart enclosure panel / panneau latéral de gauche/droite du cabinet N475-0271-GY1SG rear cart enclosure panel / panneau arrière pour chariot N655-0124-GY1SG front cabinet support / support avant du cabinet N080-0212-GY1SG... - Page 54 N135-0043-GY1HT right side lid casting / moulage droit du couvercle N585-0078 heat shield lid insert / pare-chaleur N385-0129-SER NAPOLEON logo / logo NAPOLÉON W450-0005 logo spring clips / clips à ressort pour logo N010-0720 lid handle / poignée du couvercle N685-0013 temperature gauge / jauge de température...
- Page 55 Parts List / Liste Des Pièces Item Part # Description RSIB N240-0026 side burner electrode / de brûleur latéral electrode N305-0086 side burner grate / grille de brûleur latéral N570-0089 side burner grate screw / vis grille de brûleur latéral vis N455-0062 side burner orifice #60 / orifice de brûleur latéral #60 N455-0063...
- Page 56 www.napoleongrills.com...
- Page 57 Notes www.napoleongrills.com...
- Page 58 Notes www.napoleongrills.com...
- Page 59 Notes www.napoleongrills.com...
- Page 60 N415-0275...
Need help?
Do you have a question about the LEX 485 and is the answer not in the manual?
Questions and answers
My LEX 485 has 3 burners. When I light any 2 burners all is good. When I light burner # 3 every thing goes to extremely low flame. I just changed to a newly filled tank. How to get all 3 burners on high burn.