Table of Contents
Advertisement
Quick Links
IMPERX
Cheetah GMAX Camera
User Manual
with CoaXPress Interface
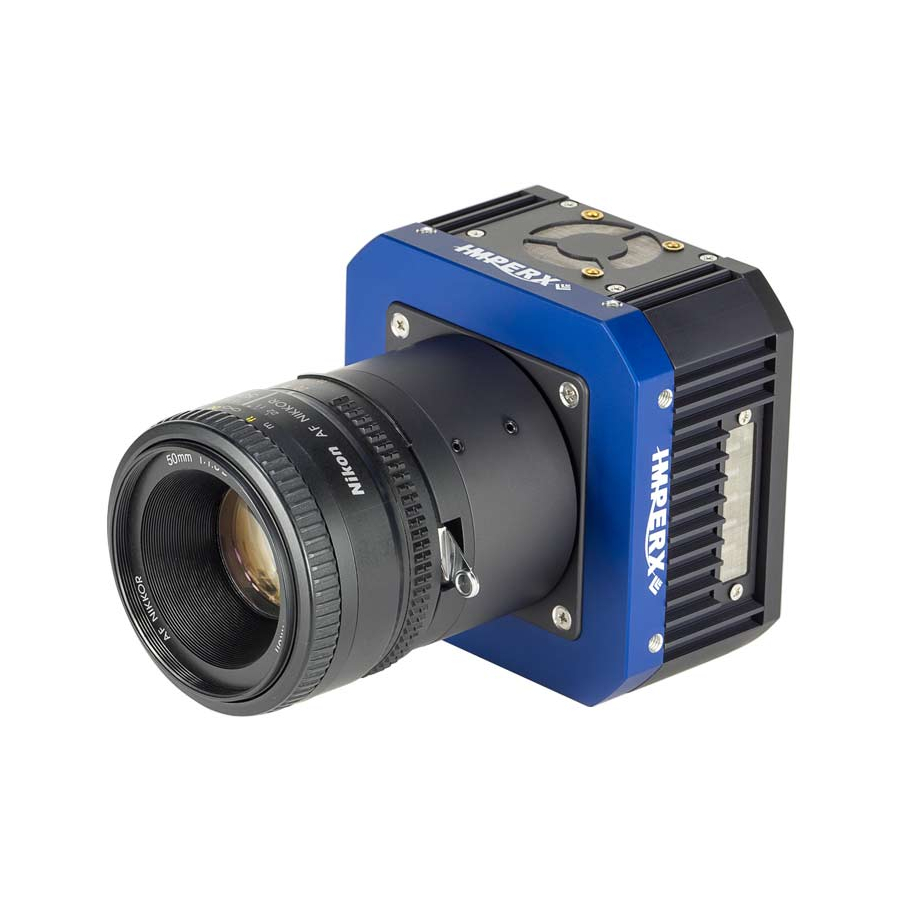
The Imperx Cheetah GMAX CMOS camera provides 65MP resolution at exceptionally high
frame rates in a remarkably compact and ruggedized design. The cameras use GMAX CMOS
sensors for their high sensitivity, image clarity, and high dynamic range. They achieve frame
rates up to 34.7 frames per second with quad CXP-6 CoaXPress output interface and
support power over CoaXPress (PoCXP).
Revision 1.1
Advertisement
Table of Contents

Related Manuals for Imperx Cheetah CXP-C9440


Summary of Contents for Imperx Cheetah CXP-C9440
- Page 1 User Manual with CoaXPress Interface The Imperx Cheetah GMAX CMOS camera provides 65MP resolution at exceptionally high frame rates in a remarkably compact and ruggedized design. The cameras use GMAX CMOS sensors for their high sensitivity, image clarity, and high dynamic range. They achieve frame rates up to 34.7 frames per second with quad CXP-6 CoaXPress output interface and...
- Page 2 Cheetah GMAX Camera with CoaXPress Interface – User Manual About Imperx, Inc. IMPERX, Inc. is a leading designer and manufacturer of high performance, high quality digital cameras, frame grabbers, and accessories for industrial, commercial, military, and aerospace imaging applications including flat panel inspection, biometrics, aerial mapping, surveillance, traffic management, semiconductors and electronics, scientific &...
- Page 3 Warranty IMPERX warrants performance of its products and related software to the specifications applicable at the time of sale in accordance with IMPERX’s standard warranty, which is 2 (two) years parts and labor. Do not open the housing of the camera. Warranty voids if the housing has been open or tampered.
-
Page 4: Table Of Contents
Cheetah GMAX Camera with CoaXPress Interface – User Manual TABLE OF CONTENTS About the Camera ..................10 General ..........................10 Key Features ........................ 11 CXP-C9440 Technical Specifications .................. 12 Ordering Information ......................13 Accessories ........................13 Technical Support ......................14 Hardware ...................... - Page 5 Finding Hot Pixels ....................... 107 Locating and adding pixel coordinates ..............109 Creating a DPM/HPM Using a Text Editor ............... 112 Creating a DPM Using Imperx Toolkit ................113 Creating an HPM Using Imperx Toolkit ................114 December 15, 2020 Page Rev 1.1...
- Page 6 Appendix B: Look Up Tables ................ 117 Creating an LUT Using a Text Editor ................117 Creating an LUT Using Microsoft Excel ................118 Creating an LUT Using Imperx Toolkit ................119 Uploading the LUT File ..................... 121 December 15, 2020 Page Rev 1.1...
- Page 7 Cheetah GMAX Camera with CoaXPress Interface – User Manual REVISION HISTORY Revision Date Reviser Comments 07/23/2020 I. Barabanova Initial release. 12/09/2020 I. Barabanova Changed Canon Lens Control specifications. Added Focus and Iris adjustment procedures for a Canon Lens. Added UKCA compliance. December 15, 2020 Page Rev 1.1...
- Page 8 ANP10 Cheetah GMAX CXP This application note describes how to change Custom Links Application Note CXP link configuration on the Imperx Cheetah CoaXPress CXP-C9440 camera. Imperx Sensor Cleaning Procedure The Sensor Cleaning Procedure provides instructions on cleaning an image sensor.
- Page 9 Cheetah GMAX Camera with CoaXPress Interface – User Manual TERMINOLOGY Defective pixels – these are pixels whose sensitivity deviates due to fluctuations in the CMOS manufacturing process and materials. Defective clusters – groups of defective pixels that are considered as one unit for pixel correction purposes.
-
Page 10: About The Camera
Cheetah GMAX Camera with CoaXPress Interface – User Manual About the Camera General The Imperx Cheetah CoaXPress cameras feature 4-channel CXP-6 CoaXPress interface and comply with CoaXPress Standard v1.1 transferring data with 6.25 Gbps per one channel (up to 25 Gbps via four channels). -
Page 11: Key Features
Cheetah GMAX Camera with CoaXPress Interface – User Manual Key Features • Global shutter (GS) Color and monochrome versions • Fast frame rates • • High data transfer rates up to 6.25 Gbps per one cable • Uses micro-BNC (HD-BNC) connectors Internal and external exposure controls •... -
Page 12: Cxp-C9440 Technical Specifications
Cheetah GMAX Camera with CoaXPress Interface – User Manual CXP-C9440 Technical Specifications Specifications CXP-C9440 (65 MP) Active image resolution 9344 (H) x 7000 (V) Pixel size 3.2 µm Optical format 37.4 mm diagonal Shutter Global Frame rate (max) 34.7 fps (8-bit), 28.9 fps (10-bit), 24.0 fps (12-bit) Sensor digitization 10 or 12-bit Dynamic range... -
Page 13: Ordering Information
CXP-6 CoaXPress w/PoCXP interface. CXP-C9440M-RF000: Cheetah Monochrome 65 MP camera with F-Mount and 4-channel CXP-6 CoaXPress w/PoCXP interface. The Imperx PS12V04A power supply is available for use with CXP cameras and can be purchased separately. Accessories Imperx offers a power supply, cable, and fan assembly for use with the cameras. The accessories are sold separately. -
Page 14: Technical Support
If the test pattern is not present, power off the camera, check all the cabling, frame grabber settings, and computer status. If you still have problems with the camera operation, contact technical support at: Email: support@imperx.com Toll Free 1 (866) 849-1662 or (+1) 561-989-0006 Fax: (+1) 561-989-0045 Visit our website: www.imperx.com... -
Page 15: Hardware
Cheetah GMAX Camera with CoaXPress Interface – User Manual Hardware This chapter contains the detailed information needed for the initial design-in process: connector types, pin numbering and assignments • • electrical connectivity and voltage requirements • mechanical drawings and cabling optical and environmental information •... - Page 16 Cheetah GMAX Camera with CoaXPress Interface – User Manual The camera’s video data output, control data, and triggers are serialized and continuously transmitted over CoaXPress (CXP-6) using a standard 75-ohm mini-coaxial cable. The interface provides a high-speed downlink up to 6.25 Gbps for video transport, lower speed 20 Mbps uplink for communication and control, and power (up to 13 W via one CXP cable).
-
Page 17: Pin Assignments
Cheetah GMAX Camera with CoaXPress Interface – User Manual Pin Assignments The 12-pin Hirose connector on the camera’s back panel is a male type miniature locking receptacle #HR10A-10R-12PB(71). Signal Name 12/24 VDC Return 12 or 24 VDC Main Power Return +12/24 VDC 12 or 24 VDC Main Power Reserved... -
Page 18: Camera Led Status Indicator
The external power supply should provide 6.5 V – 33 V DC with the inrush current 2 A @ 12 V. The power supply should terminate in a female HIROSE plug #HR10A-10P-12S(73). Imperx offers the PS12V04A Standard Power Supply adapter for use with the cameras. The PS12V04A power supply can be purchased separately. It ships with a power cable that terminates in a female HIROSE plug #HR10A-10P-12S(73). -
Page 19: Ps12V04A Standard Power Supply
Cheetah GMAX Camera with CoaXPress Interface – User Manual PS12V04A Standard Power Supply Imperx recommends using the PS12V04A power adapter for powering CXP-C9440 cameras. December 15, 2020 Page Rev 1.1 19 of 122... - Page 20 Cheetah GMAX Camera with CoaXPress Interface – User Manual PS12V04A Power Supply Specs Cable length • Supplied AC power input cable (IEC): 1.8 m (6’) 100–240 V AC, 50–60 Hz 1 A. Power supply output (+12 V): 1.5 m (5’) ± 15 cm (6”) connector HIROSE #HR10A-10P-12S. •...
-
Page 21: I/O Cable Cbl-Pwio01
Cheetah GMAX Camera with CoaXPress Interface – User Manual I/O Cable CBL-PWIO01 The optionally purchased CBL-PWIO01 cable assembly is used for transmitting external trigger and strobe signals when the cameras are powered using CoaXPress cable. It terminates in a 12-pin female HIROSE plug #HR10A-10P-12S(73) on the one end and 12 loose wires on the opposing. -
Page 22: Active Canon Ef Mount
Cheetah GMAX Camera with CoaXPress Interface – User Manual Active Canon EF mount The Canon EF lens mount provides active lens control for C9440 cameras. The cameras provide communication and power to the mount through an internal connector on the front of the camera. The connector eliminates the need for a special power supply and external cable between the camera and the Canon EF mount. -
Page 23: Electrical Connectivity
Cheetah GMAX Camera with CoaXPress Interface – User Manual Electrical Connectivity The Cheetah camera has two external inputs, INPUT1 and INPUT2. INPUT1 is optically isolated while INPUT2 accepts low voltage TTL (LVTTL). The camera provides two general-purpose outputs. Output OUT1 is a 5 V TTL compatible signal and output OUT2 is opto-isolated. The following figures show the external input and output electrical connections. -
Page 24: Opto-Isolated Output
Cheetah GMAX Camera with CoaXPress Interface – User Manual Opto-Isolated Output Opto-isolated output is an optically isolated switch. There is no pull-up voltage on either contact. An external pull-up voltage of up to 25 V is required for operation. Output is not polarity sensitive. - Page 25 Cheetah GMAX Camera with CoaXPress Interface – User Manual OUT2 High side load driver circuit: – from 2.5 V to 25 V (DC or peak AC) R3 – from 50 R to 500 R – from 1 mA to 50 mA December 15, 2020 Page Rev 1.1...
-
Page 26: Mechanical Drawings
Cheetah GMAX Camera with CoaXPress Interface – User Manual Mechanical Drawings The camera housing is made of precision-machined aluminum. For maximum flexibility, the camera has eight M3X0.5mm mounting holes located towards the front of the camera on all four sides. An additional plate with ¼-20 UNC (tripod mount) and hardware ship with each camera. Front View: Back View: December 15, 2020... - Page 27 Cheetah GMAX Camera with CoaXPress Interface – User Manual Top View: Side View with Image Plane: December 15, 2020 Page Rev 1.1 27 of 122...
-
Page 28: Mounting Plate
Cheetah GMAX Camera with CoaXPress Interface – User Manual Mounting Plate December 15, 2020 Page Rev 1.1 28 of 122... -
Page 29: Optical
Cheetah GMAX Camera with CoaXPress Interface – User Manual Optical The Cheetah CoaXPress cameras come with an adapter for F-mount lenses that have a 46.50 mm back focal distance. The camera can also be equipped with M42, Canon EF EOS Active or Passive mounts (refer to the section Ordering Information). -
Page 30: Environmental
Do not use methylated alcohol for cleaning the image sensor! Please refer to the Sensor Cleaning Procedure document found on the camera’s information USB stick or contact Imperx support for cleaning procedures. December 15, 2020 Page Rev 1.1 30 of 122... -
Page 31: Handling The Camera
Cheetah GMAX Camera with CoaXPress Interface – User Manual Handling the Camera When mounting the camera, make sure the inlet and outlet openings are not blocked by surrounding objects. The fan automatically turns on if the internal camera temperature exceeds 85 °C. Keep the fan inlets and outlet clear of obstructions. -
Page 32: Genicam Tm Api Module - Configuring The Camera
Configuring the Camera Overview Imperx Cheetah cameras are highly programmable and flexible. They allow control of all the camera’s resources, camera settings, internal registers, video amplifier, parameter flash, and so on. You communicate with the camera from a simple GenICam compliant graphical user interface (GUI). -
Page 33: Device Control Category
Cheetah GMAX Camera with CoaXPress Interface – User Manual Device Control Category Device Control provides read-only information about the camera’s XML file and enables camera reset functionality. Parameter Name Type Value Access Description DeviceVendorName String Provides the name of the manufacturer of the camera DeviceModelName String... - Page 34 Cheetah GMAX Camera with CoaXPress Interface – User Manual Parameter Name Type Value Access Description DeviceSFNCVersionMinor Integer Minor version of SFNC used for XML DeviceSFNCVersionSubMinor Integer Sub-minor version of SFNC used for XML DeviceScanType Enumeration String Specifies the scan type of the Areascan sensor DeviceReset...
-
Page 35: Version Information Category
Returns the Camera Head Firmware Version Number CameraHeadFirmwareBuild Integer Returns Firmware build Number CustomerID Integer Returns Customer ID for custom cameras (0 = Imperx Standard camera) FamilyID Integer Returns Camera Family XMLVersion Integer Returns XML Version December 15, 2020 Page Rev 1.1... - Page 36 Cheetah GMAX Camera with CoaXPress Interface – User Manual CXP Support Category The CXP Support category includes registers needed to support other standards, such as GenICam. Parameter Name Type Value Access Description Standard Integer Returns CoaXPress “magic” number. Revision Integer Returns revision of CoaXPress specification implemented in the camera.
-
Page 37: Image Format Control Category
Cheetah GMAX Camera with CoaXPress Interface – User Manual Image Format Control Category Image Format Control lets you change screen resolution, select pixel format, and more. Parameter Name Type Value Access Description SensorWidth Integer Returns effective width of sensor in pixels SensorHeight Integer Returns effective height... - Page 38 Cheetah GMAX Camera with CoaXPress Interface – User Manual Parameter Name Type Value Access Description Height Integer Min: Depends on PixelFormat Represents actual image Max: Depends on camera model output height of master AOI (in pixels) OffsetX Integer Min: 0 Horizontal offset from Max: Depends on Width origin to area of interest...
- Page 39 Cheetah GMAX Camera with CoaXPress Interface – User Manual Parameter Name Type Value Access Description Boolean Vertically flips the image ReverseY output. Any area of interest is applied after the flipping. The PixelFormat of color cameras changes automatically. Enumeration String Selects type of test TestPattern pattern generated by...
- Page 40 Cheetah GMAX Camera with CoaXPress Interface – User Manual Test Pattern values: Off – Image is coming from the sensor GreyHorizontalRamp – Image is filled horizontally with a digital pattern that goes from the darkest possible value to the brightest GreyVerticalRamp –...
-
Page 41: Acquisition Control Category
Cheetah GMAX Camera with CoaXPress Interface – User Manual Acquisition Control Category Acquisition Control lets you configure settings for image capture, exposure, frame rates, triggers, and so on. It also provides read-only information on frame and exposure time. Parameter Name Type Value Access Description... - Page 42 Cheetah GMAX Camera with CoaXPress Interface – User Manual Parameter Name Type Value Access Description Float Sets Timed Exposure in ExposureTime microseconds when ExposureMode is Timed and ExposureAuto is Off. ExposureAuto Enumeration String Num. Sets the automatic exposure mode when ExposureMode is Once Timed.
- Page 43 Cheetah GMAX Camera with CoaXPress Interface – User Manual Parameter Name Type Value Access Description Enumeration String Specifies internal signal or TriggerSource Line1 external Line as trigger source. Line2 TriggerMode must be set to On LinkTrigger (refer to Trigger Sources PulseGenerator more information).
-
Page 44: Analog Control Category
Cheetah GMAX Camera with CoaXPress Interface – User Manual PulseGenerator – Specifies that the trigger source will be generated by camera’s • internal Pulse Generator. • Software – Specifies that the trigger source will be generated by software using the TriggerSoftware command. - Page 45 Cheetah GMAX Camera with CoaXPress Interface – User Manual Parameter Name Type Value Access Description Enumeration String Num. BalanceRatioSelector White Balance Control: Selects which color will be Blue impacted by the BalanceRatio control. BalanceRatio Float Min: 0.25 White balance color ratio. Max: 4.00 Controls ratio of the selected color component to green,...
-
Page 46: Auto White Balance, Exposure And Gain Algorithm Control Category
Cheetah GMAX Camera with CoaXPress Interface – User Manual Auto White Balance, Exposure and Gain Algorithm Control Category Auto Algorithm Control lets you configure settings for AWB (Automatic White Balance), AEC (Automatic Exposure Control), and AGC (Automatic Gain Control) algorithms. You can set the camera to AEC/AGC to maintain the same image brightness during changing lighting conditions. - Page 47 Cheetah GMAX Camera with CoaXPress Interface – User Manual Parameter Name Type Value Access Description ExposureAutoUpperLimit Float Min: ExposureAutoLowerLimit The longest exposure Max: ExposureTimeMax time that Auto Exposure can set. DigitalGainAutoLowerLimit Float Min: 0.0 The lowest gain that Max: Auto Gain can set. DigitalGainAutoUpperLimit DigitalGainAutoUpperLimit Float...
- Page 48 Doing so may cause oscillations and destabilize a PID controller. Imperx sets up optimal values to balance the speed and stability of the AEC algorithm. If you need to change the P coefficient, please contact Imperx support. Parameter Name...
- Page 49 We do not recommend changing the P, I, and D coefficients. Doing so may cause oscillations and destabilize a PID controller. Imperx sets up optimal values to balance the speed and stability of the AGC algorithm. If you need to change the P, I, and D coefficients, please contact Imperx support.
-
Page 50: Data Correction Category
Cheetah GMAX Camera with CoaXPress Interface – User Manual Data Correction Category Data Correction parameters enable you to implement look-up tables and other techniques to improve performance. Parameter Name Type Value Access Description LUTEnable Enumeration String Num. Selects and enables LUT to be used in processing image. - Page 51 Cheetah GMAX Camera with CoaXPress Interface – User Manual Parameter Name Type Value Access Description Enumeration String Num. Controls the method used for BadPixelCorrectionMode Average replacing hot pixels (Highlight Highlight and Zero are for testing Zero purposes only). DefectClusterCorrection Enumeration String Num.
-
Page 52: Digital Input / Output Control Category
Cheetah GMAX Camera with CoaXPress Interface – User Manual Digital Input / Output Control Category Parameter Name Type Value Access Description LineSelector Enumeration String Num. Selects the physical line (or pin) of Input1 the external camera connector or Input2 the virtual line of the Transport Output1 Layer to configure. - Page 53 Cheetah GMAX Camera with CoaXPress Interface – User Manual Parameter Name Type Value Access Description Enumeration String Num. Returns the current electrical LineFormat NoConnect format of the selected physical TriState input or output line. OptoCoupled Strobe1Reference Enumeration String Num. Sets the reference event for Exposure Strobe #1 signal.
- Page 54 Cheetah GMAX Camera with CoaXPress Interface – User Manual Strobe2 – Maps the Strobe 2 signal to the corresponding external output. • LineFormat values: NoConnect – The line is not connected. • • TriState – The line is currently in Tri-State mode (Not driven). TTL –...
-
Page 55: Pulse Generator Category
Cheetah GMAX Camera with CoaXPress Interface – User Manual Pulse Generator Category The camera provides an internal pulse generator for generating a trigger signal. You can program it to generate a discrete sequence or a continuous trail of pulse signals. Parameter Name Type Value... -
Page 56: Canon Lens Control Category
Cheetah GMAX Camera with CoaXPress Interface – User Manual Canon Lens Control Category Canon EF Lens provides motorized iris and focus (not zoom) features. Canon Lens Control parameters give you control over the iris and focus position. Refer to section Canon Lens Control for more information on lens adjusting procedures. - Page 57 Cheetah GMAX Camera with CoaXPress Interface – User Manual Focus Category Using the Focus NearStep and FarStep features, you can focus the lens manually. After reading the FocusEncoderStatus, you can program the FocusReqPosition feature and then return to this focus position using the SetFocusPosition command. Parameter Name Type Value...
- Page 58 Cheetah GMAX Camera with CoaXPress Interface – User Manual Parameter Name Type Value Access Description GetFocusEncoderStatus Command Requests the focus encoder position value. ResetFocusEncoder Command Resets the Focus encoder. Iris Category Parameter Name Type Value Access Description IrisRequestedPositionRaw Integer Min: IrisMin2 Sets raw iris absolute position.
- Page 59 Cheetah GMAX Camera with CoaXPress Interface – User Manual IrisRange Integer Displays the limit values of the iris, after the GetIrisRange command is issued. December 15, 2020 Page Rev 1.1 59 of 122...
-
Page 60: Transport Layer Control Category
Cheetah GMAX Camera with CoaXPress Interface – User Manual Transport Layer Control Category The Transport Layer Control provides a variety of configuration settings and read-only information for configuring communications between the camera with the CoaXPress interface. Parameter Name Type Value Access Description DeviceTapGeometry Enumeration... - Page 61 Cheetah GMAX Camera with CoaXPress Interface – User Manual Parameter Name Type Value Access Description ControlPacketSizeMax Integer Returns the maximum control packet data size that the device can accept. StreamPacketSizeMax Integer Returns the maximum stream packet data size that the host can accept.
- Page 62 Cheetah GMAX Camera with CoaXPress Interface – User Manual Parameter Name Type Value Access Description TestPacketCountRx Integer Returns the current received connection test packet count. Writing a 0x0 clears the packet counter. CoaXPress Customization Category Parameter Name Type Value Access Description CustomCxpLinkConfiguration Enumeration...
-
Page 63: User Set Control Category
Cheetah GMAX Camera with CoaXPress Interface – User Manual User Set Control Category User Set Control allows you to save custom settings and reload them into the camera as needed. Parameter Name Type Value Access Description String Num. UserSetSelector Enumeration Selects User Set to load, Default save, or configure. -
Page 64: Camera Features
Cheetah GMAX Camera with CoaXPress Interface – User Manual Camera Features Image Data Flow CMOS Sensor Reverse Vertical Analog Gain Imager Analog Analog LVDS Vertical DIgital DIgital Analog Offset Interface Decimation Statistic for AEC FPGA Statistic for AGC Statistic for AWB Digital Defect Digital... -
Page 65: Exposure Control
Cheetah GMAX Camera with CoaXPress Interface – User Manual Exposure Control The camera provides three exposure control modes – Off, Timed, and Trigger Width. In the Timed mode, you can control exposure time manually or automatically. To enable manual control, set ExposureAuto to Off and specify the exposure time using the ExposureTime setting. To enable AEC (Automatic Exposure Control), set ExposureAuto to Once or Continuous. - Page 66 Cheetah GMAX Camera with CoaXPress Interface – User Manual To reduce the image exposure time under bright lighting conditions, set the exposure control mode to Timed. The electronic exposure control does not affect the frame rate; it only changes the exposure time. When the Timed mode is active, the camera controls the start of exposure, so the new exposure ends just as the readout of the current frame ends and the readout of the next frame begins.
-
Page 67: Exposure Control In Trigger Mode
Cheetah GMAX Camera with CoaXPress Interface – User Manual Exposure Control in Trigger Mode In trigger mode, you can synchronize the camera’s acquisition cycle to an external signal by setting the exposure control to either Timed or Trigger Width. Trigger mode can be set to either Standard or Fast (see Camera Triggering). -
Page 68: Global Shutter
Cheetah GMAX Camera with CoaXPress Interface – User Manual In Standard Trigger mode, the maximum exposure time is defined by the formula: Exposure Time (max) = Trigger Period – Readout Time, where the Readout Time is equal to the CurrentFrameTime (in free-running mode, with AcquisitionFrameRateEnable off). -
Page 69: Automatic Exposure And Gain Control
Cheetah GMAX Camera with CoaXPress Interface – User Manual Automatic Exposure and Gain Control Automatic exposure control (AEC) and automatic gain control (AGC) enable the camera to maintain the same image brightness during the changing lighting conditions. You can enable both AEC and AGC independently or together by setting ExposureAuto and GainAuto to either Once or Continuous. - Page 70 Cheetah GMAX Camera with CoaXPress Interface – User Manual luminance (or threshold) is achieved, the exposure is applied. The camera varies the exposure until either the target image luminance (or threshold) is reached or one of exposure limits is reached. By default, the ExposureGainAutoPriority control are set to ExposureTime.
-
Page 71: P, I, And D Coefficients
Cheetah GMAX Camera with CoaXPress Interface – User Manual P, I, and D Coefficients The P (Proportional), I (Integral), and D (Derivative) coefficients of PID feed-back control loops determine speed and stability of AEC and AGC algorithms. A PID controller continuously calculates a difference (an error) between a setpoint (SP)— ExposureGainAutoTarget—... -
Page 72: Proportional Response
Cheetah GMAX Camera with CoaXPress Interface – User Manual Proportional Response The proportional response is a difference (error) between the setpoint and the process variable. This error is then multiplied by the proportional coefficient P. Increasing the P coefficient increases the speed of the control algorithm and degrades its stability. -
Page 73: Camera Triggering
Changing the coefficients may cause oscillations and destabilize the system. If you need to change the coefficients, please contact Imperx support. Imperx sets up optimal P, I, and D coefficients to balance the speed and stability of AEC and AGC algorithms. XML Parameter Default value... - Page 74 Cheetah GMAX Camera with CoaXPress Interface – User Manual Standard Trigger Mode In Standard Trigger mode, the camera first performs the exposure and then reads out the image. An external timing pulse controls the start of the exposure if exposure control mode is set to Timed.
- Page 75 Cheetah GMAX Camera with CoaXPress Interface – User Manual Setting exposure control mode to Trigger Width allows the external timing pulse to control the exposure duration. Standard trigger mode, Exposure control is Trigger Width GenICam controls TriggerMode: On TriggerOverlap: Off TriggerSource: Line 1 (or Line2, Pulse Generator, Link Trigger) TriggerActivation: Rising Edge (or Falling Edge) TriggerFilterTime, TriggerDelay, TriggerDebounceTime: set if applicable...
- Page 76 Cheetah GMAX Camera with CoaXPress Interface – User Manual Fast Trigger Mode In Fast Trigger mode, the exposure and readout are overlapped in a way that is similar to free- running (untriggered mode). Fast trigger mode depends upon a constant and stable trigger source so the camera can position the exposure period to conclude just as the trigger period ends.
-
Page 77: Trigger Sources
Cheetah GMAX Camera with CoaXPress Interface – User Manual You can adjust the exposure duration to be equal to the external pulse width by setting the exposure control mode to Trigger Width. The new exposure begins with the next trigger pulse during the readout of the current frame. -
Page 78: Configuring The Trigger
Cheetah GMAX Camera with CoaXPress Interface – User Manual Configuring the Trigger To configure the camera to work in trigger mode, follow the steps below: 1. Turn off the camera image acquisition. 2. In the Acquisition Control menu, set TriggerMode to On. 3. - Page 79 Cheetah GMAX Camera with CoaXPress Interface – User Manual Trigger pulse width: ≥ 10 µs TriggerFilterTime: Recommended value ≤ 75% of the Trigger pulse width Max.TriggerFilterTime = 65535 µs Max. TriggerDebounceTime = 65535 µs Max. TriggerDelay = 16000000 µs Trigger period Trigger pulse width Ignored...
-
Page 80: Video Amplifier Gain And Offset
Cheetah GMAX Camera with CoaXPress Interface – User Manual Video Amplifier Gain and Offset Analog Gain The camera provides analog gain control from 0.75x (-2.5 dB) to 6.0x (15.6 dB) with 21 gain steps when sensor digitization is 12-bit. Each step increases the gain by 0.25x. For the 10-bit sensor digitization, the analog gain is limited to 0.75x, 1.0x, and 1.25x values. -
Page 81: Data Output Format
Cheetah GMAX Camera with CoaXPress Interface – User Manual Data Output Format The image sensor digitization is set automatically based on the Pixel Format setting. A Pixel Format of 8- or 10-bits enables 10-bits sensor digitization while Pixel Format of 12-bits sets sensor digitization to 12-bits. -
Page 82: Input / Output Control
Cheetah GMAX Camera with CoaXPress Interface – User Manual Input / Output Control The camera supports two inputs and two outputs (TTL and opto-isolated): Input / Output # Pin # Description Voltage/Current Input 1 Pin 8 and Pin10 (Return) Opto-isolated Voltage 3.3–24 V, Current (min) 3.3 mA Input 2... -
Page 83: Strobe And Synchronization Controls
Cheetah GMAX Camera with CoaXPress Interface – User Manual Strobe and Synchronization Controls The camera allows you to synchronize your system from several references. You can synchronize with the trigger input, the start, middle or end of exposure, or the internal pulse generator signals. -
Page 84: Configuring The Strobe In Free-Running Mode
Cheetah GMAX Camera with CoaXPress Interface – User Manual Configuring the Strobe in Free-Running Mode In free-running mode, you can set the strobe pulse duration (StrobeWidth) and the delay (StrobeDelay) with respect to the start of the exposure or the start of the readout period. The strobe period is equal to the frame time. - Page 85 Cheetah GMAX Camera with CoaXPress Interface – User Manual Strobes Positioned with Respect to the Start of Exposure and Readout, Free-running Mode GenICam controls TriggerMode: Off LineSelector: Output1 (or Output2) LineSource: Strobe1 (or Strobe2) Strobe1Reference: Start of Exposure Strobe1Enable: On Strobe1Width: User-specified (in µs) Strobe1Delay: User-specified (Min.= 10 µs) Strobe2Reference: Start of Readout...
-
Page 86: Configuring A Strobe In Trigger Mode
Cheetah GMAX Camera with CoaXPress Interface – User Manual Configuring a Strobe in Trigger Mode If the camera is in the Trigger mode (Standard or Fast Trigger), you can set the strobe pulse duration and the delay with respect to the trigger pulse active edge, start of the exposure, or start of the readout period. - Page 87 Cheetah GMAX Camera with CoaXPress Interface – User Manual 9. If necessary, set Strobe2Delay. Without a delay, the strobe occurs simultaneously with the start of exposure. 10. Set Strobe2Width to a desired value. Strobes Positioned with Respect to a Trigger, Exposure Start, or Readout Start Standard Trigger Mode GenICam controls TriggerMode: On...
- Page 88 Cheetah GMAX Camera with CoaXPress Interface – User Manual Strobe 1 is positioned with respect to the exposure start with a trigger delay. The camera is in Standard Trigger mode with Timed Exposure Control. Strobes Positioned with Respect to the Exposure Start Standard Trigger Mode GenICam controls TriggerMode: On...
- Page 89 Cheetah GMAX Camera with CoaXPress Interface – User Manual If your application requires activating a light source before the start of the exposure period, you can use StrobeReference and StrobeDelay settings to position the strobe to occur earlier that the exposure.
- Page 90 Cheetah GMAX Camera with CoaXPress Interface – User Manual Strobes Positioned with Respect to the Trigger Standard Trigger Mode GenICam controls TriggerMode: On TriggerOverlap: Off TriggerSource: Line 1 (or Line2, Pulse Generator, Link Trigger) TriggerActivation: Rising Edge (or Falling Edge) TriggerDelay: User-specified (Min.= 10 µs) TriggerFilterTime, TriggerDebounceTime: set if applicable LineSelector: Output1 (or Output2)
-
Page 91: Area Of Interest
Cheetah GMAX Camera with CoaXPress Interface – User Manual Area of Interest For some applications, you might not need the entire image, but only a portion of it. To accommodate this requirement, the Cheetah camera allows you to create one Region of Interest (ROI), also known as an Area of Interest (AOI). -
Page 92: Sub-Sampling Decimation
Cheetah GMAX Camera with CoaXPress Interface – User Manual Sub-Sampling Decimation Sub-sampling reduces the number of pixels output by reducing the output frame size but maintains the full field of view. If an area of interest (AOI) is selected, then the field of view of the AOI is maintained. -
Page 93: Transfer Function Correction
12-bit data by 4 to get 10-bit pixel values for output to the camera interface. The camera supports a Gamma control feature and four separate LUTs. All LUTs are available for modifications. You can generate and upload a custom LUT using the Imperx Upload Utility (see Uploading the LUT File). -
Page 94: Factory Luts
4095*(1024/4095)^0.45=2195. User Defined LUT You can define any 12-bit to 12-bit transformation as a user LUT and upload it to the camera using Imperx Upload Utility (see Uploading the LUT File). You can specify a transfer function to match the camera’s dynamic range to the scene’s dynamic range. There are no limitations to the profile of the function. -
Page 95: Hot And Defective Pixel Correction
The camera uses a factory installed flat field correction (located in FFC0) algorithm to correct some of the image sensor’s non-uniformity. You can upload your own FFC table to one of the FFC1 – FFC8 tables using Imperx Upload Utility. While not recommended, you can disable the FFC. -
Page 96: Test Image Pattern
Cheetah GMAX Camera with CoaXPress Interface – User Manual Test Image Pattern The camera can output several test images to verify the camera’s general performance and connectivity to the computer. This ensures that all the major modules in the hardware are working properly and the connection between your computer and camera is synchronized, that is, the image framing, output mode, communication rate, and so on are properly configured. - Page 97 Cheetah GMAX Camera with CoaXPress Interface – User Manual Manual Control over the Correction Coefficients (AWB mode: Off) To adjust the Red and Blue channel gain coefficients with respect to Green (the reference), use the control BalanceRatioSelector to point to the color (Red or Blue) whose gain should be adjusted.
- Page 98 Cheetah GMAX Camera with CoaXPress Interface – User Manual AWB mode: Once For the best color reproduction when the source has a stable spectral output, Imperx suggests illuminating a uniformly grey card with the intended source then using the Once option to determine the coefficients and then saving these coefficients into the camera and saving this configuration to one of the User Sets.
-
Page 99: Configuration Memory
You can create custom LUT tables using the Imperx IPX Toolkit utility and upload these tables to the parameter Flash using the Imperx Upload Utility. Both the IPX Toolkit and IPX Upload Utility are available from the Imperx website https://www.imperx.com/. -
Page 100: Cxp Link Customization
Cheetah GMAX Camera with CoaXPress Interface – User Manual CXP Link Customization The Cheetah CXP camera provides four CXP channels with 6.25 Gbps speed per each channel. If your application requires using lower speed and/or fewer channels, you can re-program the camera. - Page 101 Cheetah GMAX Camera with CoaXPress Interface – User Manual 2. In the User Set Control menu, point to one of the User Sets to store your configuration using the UserSetSelector. The options are UserSet0, UserSet1, UserSet2, or UserSet3. The Default is a factory configuration that cannot be changed 3.
-
Page 102: Canon Lens Control
Cheetah GMAX Camera with CoaXPress Interface – User Manual Canon Lens Control Make sure that a switch on your Canon EOS EF lens is set to Auto (AF), and Visibility is set to Guru on a frame grabber’s application screen. The camera initializes the lens upon power cycling. -
Page 103: Iris Control
Cheetah GMAX Camera with CoaXPress Interface – User Manual Canon FocusEncoderStatus is a signed value (2’s complement). Negative values can result if the Focus Encoder position is close to the Near Full position. For example, a value of 65352 means negative 184 or 184 steps past the Near Full Position. -
Page 104: Image Sensor Technology
Cheetah GMAX Camera with CoaXPress Interface – User Manual Image Sensor Technology General Information A CMOS camera is an electronic device for converting light into an electrical signal. The C9440 camera contains GPIXEL GMAX3265 CMOS image sensors with 3.2-micron square pixels. The sensor has extremely low dark current and no visible fixed pattern noise. -
Page 105: Spectral Sensitivity
Cheetah GMAX Camera with CoaXPress Interface – User Manual Spectral Sensitivity A set of color filters (red, green, and blue) arranged in a Bayer pattern over the pixels generates color images. The starting color is green for GPIXEL GMAX3265 image sensor and follows the pattern: green, blue, green, blue, …... -
Page 106: Appendix A: Creating Hot And Defective Pixel Correction Maps
Cheetah GMAX Camera with CoaXPress Interface – User Manual Appendix A: Creating Hot and Defective Pixel Correction Maps Overview Hot Pixel Correction and Defective Pixel Correction work with predetermined and preloaded Hot and Defective pixel maps. Hot Pixel Map (HPM) and Defective Pixel Map (DPM) are uploaded into the camera’s non-volatile memory. -
Page 107: Finding Defective Pixels
2. Make sure that BadPixelCorrection and DefectClusterCorrection are set to Factory. 3. Repeat steps 2–4 of the previous procedure. To obtain the factory DPM file, contact Imperx technical support at: Email: support@imperx.com Toll Free: 1 (866) 849-1662 or (+1) 561-989-0006 Fax: (+1) 561-989-0045 Visit our website: www.imperx.com. - Page 108 1. Set BadPixelCorrection to Off in Data Correction menu. 2. Make sure that DefectPixelCorrection DefectClusterCorrection are set to Factory. 3. Repeat steps 2–6 of the previous procedure. To obtain the factory HPM file, contact Imperx technical support at: Email: techsupport@imperx.com Toll Free: 1 (866) 849-1662 or (+1) 561-989-0006 Fax: (+1) 561-989-0045 Visit our website: www.imperx.com.
-
Page 109: Locating And Adding Pixel Coordinates
Cheetah GMAX Camera with CoaXPress Interface – User Manual Locating and adding pixel coordinates Follow the steps below to find first pixel coordinates, locate and adjust defective pixel coordinates, and accurately place defective pixel coordinates into the pixel map. STEP 1: Find the First Pixel Coordinates Your frame grabber’s first pixel coordinates can affect the location accuracy of defective pixel coordinates. - Page 110 Cheetah GMAX Camera with CoaXPress Interface – User Manual STEP 2: Find Defective Pixel Coordinates Click the defective pixel to find its X, Y coordinates. Click the pixel to display X, Y coordinates below. X:593 Y:4816 The coordinates are 593, 4816, where X (Column) = 593 and Y (Row) = 4816. IMPORTANT: Frame grabbers from different manufacturers may display pixel location coordinates in different order, for example: X (Column), Y (Row) or,...
- Page 111 Cheetah GMAX Camera with CoaXPress Interface – User Manual STEP 4: Add Defective Pixel Coordinates to Defective Pixel Map Place the defective pixel coordinates in the Defective Pixel Map file in ascending (increasing) numerical order of the Y (row) coordinate. The value of all Y coordinates should progressively increase as you look down the list of X, Y coordinates.
-
Page 112: Creating A Dpm/Hpm Using A Text Editor
Cheetah GMAX Camera with CoaXPress Interface – User Manual Creating a DPM/HPM Using a Text Editor You can create your own DPM and HPM files using any ASCII text editor, such as Notepad or similar. Alternatively, any spreadsheet program (i.e. Microsoft Excel) can be used by converting the spreadsheet into a comma delimited (.csv) file. -
Page 113: Creating A Dpm Using Imperx Toolkit
Cheetah GMAX Camera with CoaXPress Interface – User Manual Creating a DPM Using Imperx Toolkit 1. Set DefectPixelCorrection to Off in the Data Correction menu. 2. Make sure that BadPixelCorrection is set to Factory. 3. Make sure that TriggerMode and ExposureMode are set to Off, and the camera resolution is set to maximum. -
Page 114: Creating An Hpm Using Imperx Toolkit
Cheetah GMAX Camera with CoaXPress Interface – User Manual Creating an HPM Using Imperx Toolkit 1. Set BadPixelCorrection to Off in the Data Correction menu. 2. Make sure that DefectivePixelCorrection is set to Factory. 3. Set the longest exposure time and slowest frame rate expected. -
Page 115: Uploading Dpm / Hpm Files
Cheetah GMAX Camera with CoaXPress Interface – User Manual Uploading DPM / HPM Files After saving the maps, you can upload them to the camera using the Imperx Upload Utility. The Upload Utility enables uploads of DPM, HPM, and other files to your camera. - Page 116 Cheetah GMAX Camera with CoaXPress Interface – User Manual 4. Browse for either the edited .dpm file or .hpm file, select it, and click Upload. Wait for the upload to finish. 5. After the upload is completed, do a power cycle on the camera. 6.
-
Page 117: Appendix B: Look Up Tables
Cheetah GMAX Camera with CoaXPress Interface – User Manual Appendix B: Look Up Tables Creating an LUT Using a Text Editor You can use any ASCII text editor, such as Notepad or similar, to create a custom LUT. Alternatively, any spreadsheet program (i.e. Microsoft Excel) can be used by converting the spreadsheet into a comma delimited (.csv) file. -
Page 118: Creating An Lut Using Microsoft Excel
Cheetah GMAX Camera with CoaXPress Interface – User Manual Creating an LUT Using Microsoft Excel The LUT file can be created in Excel as follows: 1. Create the spreadsheet as shown below (note that 4096 rows are required in the table). 2. -
Page 119: Creating An Lut Using Imperx Toolkit
Cheetah GMAX Camera with CoaXPress Interface – User Manual Creating an LUT Using Imperx Toolkit 1. On the Tools tab, open LUT Manager utility. 2. Create a new LUT file. On the Create LUT dialog box, select the LUT type, set the input and output bit depth to 12, and click OK. - Page 120 Cheetah GMAX Camera with CoaXPress Interface – User Manual Example A sine function with a period of 4095/4 (approximately 1021) points: (4095/2) * (sin((x/(4095/4)) * (2*pi))+1) sine corrected signal original signal 6. For a color camera, you can set a transfer function for each channel. Use R, G, and B tabs on the left to switch between the channels.
-
Page 121: Uploading The Lut File
Cheetah GMAX Camera with CoaXPress Interface – User Manual Uploading the LUT File After saving the LUT into the .lut file, you can upload it into the camera using the Imperx Upload Utility. To upload the LUT file: 1. Connect and power up your camera. - Page 122 Cheetah GMAX Camera with CoaXPress Interface – User Manual 4. Browse for the .lut file, select it, and click Upload. Select to which camera’s LUT (LUT1–LUT4) to upload the .lut file you created. Wait for the upload to finish. 5. After the upload is completed, do power cycle the camera. 6.
Need help?
Do you have a question about the Cheetah CXP-C9440 and is the answer not in the manual?
Questions and answers