
Subscribe to Our Youtube Channel
Related Manuals for DeDietrich DHD1118X


Summary of Contents for DeDietrich DHD1118X
- Page 1 FR GUIDE D'UTILISATION EN GUIDE TO INSTALLATION ES MANUAL DE UTILIZACIÓN PT GUIA DE UTILIZAÇÃO DE BETRIEBSANLEITUNG Hotte décorative Decorative Hood Campana extractora decorativa Exaustor decorativo Dekor-Dunstabzugshaube...
- Page 2 Dear valued customer, To discover a De Dietrich product is to experience the range of unique emotions which only high-value items can produce. The attraction is immediate, from the moment you set eyes on the pro- duct. The sheer quality of the design shines through thanks to the time- less style and outstanding finishes which make each appliance an elegant and refined little masterpiece in its own right, each in perfect harmony with the others.
-
Page 3: Table Of Contents
TABLE OF CONTENTS 1 1 / / N N O O T T I I C C E E S S T T O O T T H H E E U U S S E E R R • Safety recommendations ........20 •... -
Page 4: Safety Recommendations
1 / NOTICES TO THE USER Attention Keep this user guide with your appli- — You should never "flambé" dishes under the ance. If the appliance is ever sold or trans- hood or operate gas rings under the hood ferred to another person, ensure that the without placing cookware on them (the flames new owner receives the user guide. -
Page 5: Environmental Protection
1 / NOTICES TO THE USER ENVIRONMENTAL PROTECTION • — This appliance's packaging material is recyclable. Help recycle it and protect the environment by dropping it off in the municipal receptacles provided for this purpose. — Your appliance also contains a great amount of recyclable material. It is marked with this label to indicate the used appliances that should not be mixed with other waste. -
Page 6: Description Of Your Appliance
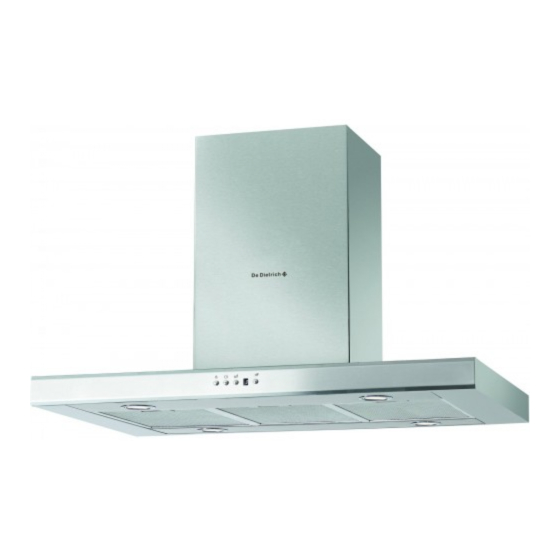
1 / NOTICES TO THE USER • DESCRIPTION OF YOUR APPLIANCE Vents Top surface Ventilation shaft Control panel... -
Page 7: Using The Evacuation Mode
2 / INSTALLING YOUR APPLIANCE - 2 people are required to correctly install this appliance (approx. 30 kg). - During installation of the hood, place the product packaging on the cooking surface to protect it in the event of the hood falling down. - The appliance must be unplugged during installation or when any repair or maintenance work is being performed. -
Page 8: Electrical Connections
2 / INSTALLING YOUR APPLIANCE • ELECTRICAL CONNECTIONS Warning During installation and maintenance opera- This appliance is delivered with a H 05 tions, the appliance must be unplugged from VVF power cord. It must be connected to the the electrical grid; fuses must be cut off or re- main power supply (which should be a 220- moved. - Page 9 2 / INSTALLING YOUR APPLIANCE For optimal use of your appliance, we recommend you connect the hood to a 150 mm- diameter flue (not delivered with the appliance). Minimise the number of angles and bends and the length of the flue. If the hood is to be used for outdoor evacuation, you should ensure a sufficient inflow of fresh air to avoid a pressure deficiency in the room.
-
Page 10: Assembling The Hood
2 / INSTALLING YOUR APPLIANCE ASSEMBLING THE HOOD • The minimum distance between the cooking surface and the lowest part of the hood must be 70 cm. If the instructions for the hob installed under the hood specify a distance of more than 70 cm, this requirement must be respected. -
Page 11: º Recycling
2 / INSTALLING YOUR APPLIANCE — In outdoor evacuation mode, fit the back- flow valve to the motor outlet (fig. 5-B). This back-flow valve allows obstruction of air entering from outside. — If you are using a 125 mm diameter flue, use the adapter supplied (fig. -
Page 12: Description Of Control Panel
3 / USING YOUR APPLIANCE • DESCRIPTION OF CONTROL PANEL Lighting Indicator Speed display (1, 2, 3 or 4) On/Off Filter saturation Speed selection (1 to 4) Timer/Delayed shutdown (10 Min) •Speed selection - Every time the speed selection button is pressed, the following cycle is defined: speed 1, 2, 3 or 4 then return to speed 1. -
Page 13: Cleaning The Filter Cartridges
4 / CARING FOR AND CLEANING YOUR APPLIANCE Warning Always unplug the hood before cleaning it or performing other maintenance acts. Regular maintenance of your appliance is a guarantee of proper functioning, good perform- ance and durability. Warning Failure to respect the guidelines for cleaning the appliance and filters may cause fires. Please carefully adhere to the maintenance recommendations. -
Page 14: Maintaining Your Appliance
4 / CARING FOR AND CLEANING YOUR APPLIANCE Warning Before carrying out any work, the power supply to the hood must be turned off, either by unplugging it or by using the circuit breaker switch. • MAINTAINING YOUR APPLIANCE M M A A I I N N T T E E N N A A N N C C E E T T O O U U S S E E W W H H A A T T T T O O D D O O P P R R O O D D U U C C T T S S / / A A C C C C E E S S S S O O R R I I E E S S N N e e v v e e r r u u s s e e m m e e t t a a l l s s c c o o u u r r i i n n g g p p a a d d s s , ,... -
Page 15: 5 / / T T R R O O U U B B L L E E S S H H O O O O T T I I N N G G
5 / TROUBLESHOOTING S S Y Y M M P P T T O O M M S S S S O O L L U U T T I I O O N N S S Ensure that: • The power is not cut off. The hood is not working...
Need help?
Do you have a question about the DHD1118X and is the answer not in the manual?
Questions and answers