
Related Manuals for DeDietrich DHD 1193 W


Summary of Contents for DeDietrich DHD 1193 W
- Page 1 FR GUIDE D'UTILISATION EN GUIDE TO INSTALLATION ES MANUAL DE UTILIZACIÓN PT GUIA DE UTILIZAÇÃO DE BETRIEBSANLEITUNG Hotte décorative Decorative Hood Campana extractora decorativa Exaustor decorativo Dekor-Dunstabzugshaube...
- Page 2 Dear Customer, When you discover De Dietrich products you experience the same feel- ings that only objects of value can arouse. You are immediately attracted as soon as you see them. The quality of the design is illustrated by its timelessness, degree of refinement and ele- gance, and high standard of finish, resulting in perfect harmony between different appliances.
-
Page 3: Table Of Contents
CONTENTS 1 / USER NOTICES • Safety guidelines ___________________________________________ • Care for the environment ____________________________________ • Description of your appliance ________________________________ 2 / INSTALLING YOUR APPLIANCE • Using the recycling mode ___________________________________ • Electrical connection _______________________________________ • Assembling the hood _______________________________________ 3 / USING YOUR APPLIANCE •... -
Page 4: User Notices
1 1 / USER NOTICES Important Note Keep this user guide with your appli- In the case of a kitchen heated by a ance. If the appliance is ever sold or trans- device connected to a chimney (a stove, for ferred to another person, ensure that the example) the “recycling”... -
Page 5: Care For The Environment
1 1 / USER NOTICES CARE FOR THE ENVIRONMENT • —This appliance’s packing materials are recyclable. Please recycle the packaging and help pro- tect the environment by placing it in the recycling bins provided by your local council. — Your appliance also contains various recyclable materials. It therefore carries this lo- go to indicate that used appliances should not be disposed of together with other waste. -
Page 6: Description Of Your Appliance
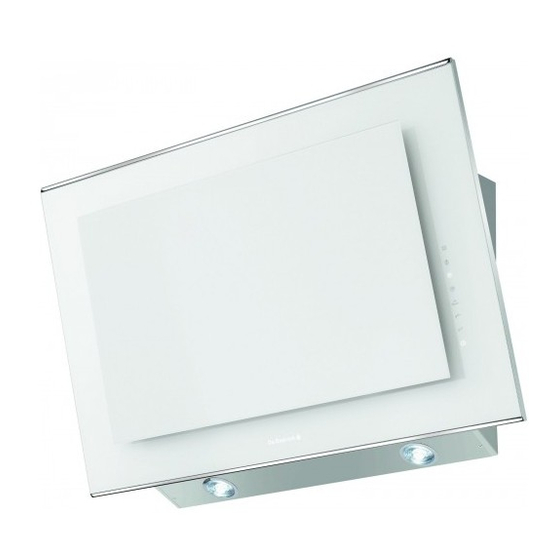
1 1 / USER NOTICES • DESCRIPTION OF YOUR APPLIANCE Grid Door 24° Control panel... -
Page 7: Installing Your Appliance
2 2 / INSTALLING YOUR APPLIANCE - The appliance must be unplugged during installation or when any repair or maintenance work is being carried out. - Ensure that the network voltage corresponds to the voltage noted on the identification plate located inside the hood. -
Page 8: Electrical Connection
2 2 / INSTALLING YOUR APPLIANCE • ELECTRICAL CONNECTION During installation and maintenance operations, the appliance must be unplugged from the electrical grid; fuses must be cut off or removed. Electrical connections must be carried out after assembly and fixing. Ensure that: - the electrical installation has sufficient voltage, - the electrical wires are in good condition... -
Page 9: Assembling The Hood
2 2 / INSTALLING YOUR APPLIANCE • ASSEMBLING THE HOOD Note The hood must be installed in compliance with all applicable regulations concerning the ventilation of premises. In France these regulations are described in DTU 61.1 from the CSTB. In particular, the evacuated air should never be carried to a duct used to evacuate smoke from appliances that use gas or other combustible fuels. - Page 10 3 3 / USING YOUR APPLIANCE Eolysis Light Timer Boost Speed 3 Speed 2 On/Off - Speed 1 This Guide to Installation and Use is valid for several models. There may be minor dif- ferences between the details and fittings on your appliance and the description provided.
-
Page 11: Using Your Appliance
3 3 / USING YOUR APPLIANCE CONTROL PANEL DESCRIPTION • On/Off Pressing the button starts the hood in speed 1 (the button is illuminated). A long press on the button turns the hood off. • Cartridge filter saturated button flashes (1 short flash) for 2 minutes after the hood stops to signal that the cartridge filters must be cleaned (see section “Cleaning the cartridge filter”). - Page 12 3 3 / USING YOUR APPLIANCE • Delayed stop At the end of cooking, you can select the button to stop the hood. This function will ensure that suction continues for a further 10 minutes at the selected speed. flashes and the power indicator is illuminated. To cancel the delayed stop, press the same button and the delay function will be deacti- vated.
-
Page 13: Cleaning The Filter And The Fat Drip Tray
4 4 / CARING FOR AND CLEANING YOUR APPLIANCE Note Disconnect the appliance by unplugging it or using the circuit breaker before cleaning it or performing other forms of maintenance. Regular maintenance of your appliance is a guar- antee of proper functioning, good performance and durability. Failure to respect the guidelines for cleaning the appliance and filters may cause fires. -
Page 14: Troubleshooting
5 5 / TROUBLESHOOTING SYMPTOMS SOLUTIONS Ensure that: • The power is not cut off. The hood is not working... • A speed has been selected. Ensure that: • The selected motor speed is sufficient for the quantity of smoke and vapours to be cleared. The hood is not operating effectively... -
Page 15: After-Sales Service
6 6 / AFTER-SALES SERVICE Any repair made to your appliance must be carried out by a qualified professional, authorised to work on the brand. When you call, state your appliance’s complete reference information (model, type, serial number). This information appears on the manufacturer’s nameplate (Fig. 1). ORIGINAL PARTS During maintenance work, request the exclu- sive use of certified genuine replacement... - Page 16 CZ5700919_00 - 09/11...
Need help?
Do you have a question about the DHD 1193 W and is the answer not in the manual?
Questions and answers