
Related Manuals for TESTO 875


Summary of Contents for TESTO 875
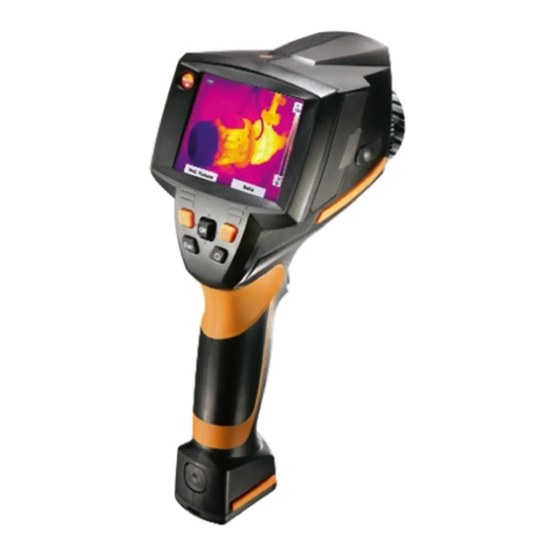
- Page 1 875 · Thermal imager Instruction manual Testo-Direct info@Testo-Direct.com 1.888.475.5235 www. .com...
- Page 2 Testo-Direct info@Testo-Direct.com 1.888.475.5235 www. .com...
-
Page 3: Table Of Contents
Image gallery ....................22 6.1.3. Scale......................24 6.1.4. Display......................24 6.1.5. Emissivity.......................25 6.1.6. Palette ......................28 6.1.7. Configuration ....................28 6.2. Measuring..................30 Maintaining the product ................32 Tips and assistance................34 8.1. Questions and answers ..............34 8.2. Accessories and spare parts ............35 Testo-Direct info@Testo-Direct.com 1.888.475.5235 www. .com... -
Page 4: Safety And The Environment
Result of an action. Menu Elements of the instrument, the instrument displays or the program interface. [OK] Control keys of the instrument or buttons of the program interface..| ... Functions/paths within a menu. “...” Example entries Testo-Direct info@Testo-Direct.com 1.888.475.5235 www. .com... -
Page 5: Ensure Safety
> Carry out only the maintenance and repair work on this instrument that is described in the documentation. Follow the prescribed steps exactly. Use only original spare parts from Testo. > Improper use of rechargeable batteries can lead to destruction or injuries by means of current surges, fire or escaping chemicals. -
Page 6: Protecting The Environment
> At the end of its useful life, send the product to the separate collection for electric and electronic devices (observe local regulations) or return the product to Testo for disposal. Testo-Direct info@Testo-Direct.com 1.888.475.5235 www. -
Page 7: Specifications
3 Specifications Specifications 3.1. The testo 875 is a handy and robust thermal imager. It opens the door to contactless determination and illustration of the temperature distribution on surfaces for you. Typical areas of application are: • Building inspection (heating, ventilation and air conditioning... -
Page 8: Technical Data
9 Hz Focus manual Detector type FPA 160 x 120 pixels, a.Si Spectral range 8 - 14 μm Visual image output (testo 875-2 only) Characteristic Values Field of vision/min. 33° x 25°/0.4 m (1.31 ft) focusing distance Image size 640 x 480 pixels... - Page 9 Telephoto lens: 3 mm at 1 m On-time (time to 30 s image) Measuring functions Standard measurement (1-point), Cold-/ Hotspot testo 875-2: Display of the surface moisture distribution via manual entry of the dewpoint Compensation for manual reflected temperature Setting emissivity 0.01 - 1.00...
- Page 10 Values Weight 900 g (including battery) Dimensions 152 x 108 x 262 mm (5.98 x 4.17 x 10.31") Tripod mounting Yes, with adapter (included in delivery) Housing Protection class IP 54 Vibration max. 2 G Testo-Direct info@Testo-Direct.com 1.888.475.5235 www. .com...
- Page 11 Values System Operating system Windows XP Service requirements Pack 2 or Windows Vista USB 2.0 interface Standards, tests, warranty Characteristic Values EU Directive 2004/108/EC IEC 60068-2-6 Vibration 2 years, warranty conditions: see website Warranty www.testo.com/warranty Testo-Direct info@Testo-Direct.com 1.888.475.5235 www. .com...
-
Page 12: Product Description
Cancel action. Left/right ["xy"] Call up a function. The function assigned to quick select button the quick select button at any one time is shown in the display. 3 Instrument rechargeable battery lock release button. Testo-Direct info@Testo-Direct.com 1.888.475.5235 www. .com... -
Page 13: Basic Properties
4 Metric thread: For fastening the included tripod adapter. Do not use desktop tripods, danger of tilting! 5 Right interface terminal: Not assigned 6 Digital camera lens: For recording visual images (testo 875-2 only) 7 Infrared camera lens: For recording thermography images. -
Page 14: First Steps
3. Move Joystick up/down to change the setting. 4. Confirm the entry with [OK]. 5. Confirm the settings with Übernehmen (Apply). 6. Press to switch off the thermal imager. Testo-Direct info@Testo-Direct.com 1.888.475.5235 www. .com... - Page 15 4. Charge the battery fully, then disconnect the instrument from the power supply. After the initial charging of the battery, the thermal imager is ready for operation. Charging the battery is also possible using a desktop charging station (accessory). Testo-Direct info@Testo-Direct.com 1.888.475.5235 www. .com...
-
Page 16: Getting To Know The Product
1. Place the tripod adapter on the lower end of the handle and screw on using the included Allen key (ISO 2936, size 4). 2. Slide thermal imager into the fastening plate of the testo tripod and lock or fasten it to the commercially available standard tripod (screw-type fastening). - Page 17 Softcase down around the display (2). 2. Guide Velcro strip through the two plates (3) and close (4). Change/activate lens (testo 875-2 only) Only lenses that were adjusted to the respective thermal imager can be used. The serial number on the lens must match the serial number of the instrument.
- Page 18 > To switch on the instrument: Press Switch the imager on/off 1. Remove protection cap from the lens. 2. Press The start screen appears on the display. The type designation of the imager and the firmware version are shown. Testo-Direct info@Testo-Direct.com 1.888.475.5235 www. .com...
- Page 19 The quick select buttons can be assigned functions that are required often so that you can call them up directly. Factory settings: • Left quick select button: [Scale]. • Right quick select button: [Palette] (testo 875-1) or [Image type] (testo 875-2). Testo-Direct info@Testo-Direct.com 1.888.475.5235 www.
- Page 20 2. Move Joystick up/down to select the desired function. Function Description Image type Change display mode: Infrared image, real (testo 875-2 only) image or infrared/real image. Palette Change color palette for the infrared image. Emissivity... Set emissivity and reflected temperature. Scale...
-
Page 21: Using The Product
Hotspot quick select button to activate/deactivate the respective function. Humidity (testo 875-2 only) The surface humidity is calculated using the manually entered dewpoint temperature and the measured surface temperatures. In the display, the areas that are at risk of developing mould are... -
Page 22: Image Gallery
The folder name of the opened folder is displayed in the header. ROOT designates the base folder (top level). The saved data is shown as preview images (image overview). The image saved last is shown directly behind the folders. Testo-Direct info@Testo-Direct.com 1.888.475.5235 www. .com... - Page 23 The folder name can consist of up to 8 characters. Incorrect entries can be deleted using the right [◄C] quick select button. 3. Press left [Create Folder] quick select button to create the folder. Testo-Direct info@Testo-Direct.com 1.888.475.5235 www. .com...
-
Page 24: Scale
Hidden function keys can be shown again by pressing a quick select button: The first press of the button shows the function keys again. To trigger a function, the button must be pressed again. Testo-Direct info@Testo-Direct.com 1.888.475.5235 www. .com... -
Page 25: Emissivity
Concrete (25 °C) 0.93 Ice, smooth (0 °C) 0.97 Iron, emery ground (20 °C) 0.24 Iron with casting skin (100 °C) 0.80 Iron with rolling skin (20 °C) 0.77 Gypsum (20 °C) 0.90 Glass (90 °C) 0.94 Testo-Direct info@Testo-Direct.com 1.888.475.5235 www. .com... - Page 26 (e.g. using a globe thermometer). The reflected temperature has only little effect on objects with high emissivity. Testo-Direct info@Testo-Direct.com 1.888.475.5235 www. .com...
- Page 27 6. Confirm the entry with [OK]. 7. Confirm the settings with Apply. The changes are saved. The selected emissivity ( ) is shown at the bottom right in the display in measurement view. Testo-Direct info@Testo-Direct.com 1.888.475.5235 www. .com...
-
Page 28: Palette
The selected option has an orange border ( ). 3. Confirm the selection with [OK]. The selected setting is highlighted orange ( ). 4. Move Joystick up/down to change the setting. Testo-Direct info@Testo-Direct.com 1.888.475.5235 www. .com... - Page 29 With the option activated, the length of time until shut-down can be set. > Move Joystick to the right and press [OK]. Move Joystick up/down to change the setting. Confirm the entry with [OK]. 4. Confirm the settings with Apply. Testo-Direct info@Testo-Direct.com 1.888.475.5235 www. .com...
-
Page 30: Measuring
Measuring Important framework conditions Please observe the following framework conditions in order to obtain significant measurement results. Humidity measurement (testo 875-2 only): • Gently wave the separate dewpoint measuring instrument to shorten the equalization period. Avoid sources of interference (e.g. breathed air). - Page 31 2. Select the desired folder with the joystick and open with [OK]. The folder name of the opened folder is displayed in the header. 3. Press left [Apply] quick select button to select the opened folder. Testo-Direct info@Testo-Direct.com 1.888.475.5235 www. .com...
-
Page 32: Maintaining The Product
1. Open the cover on the left side of the thermal imager. 2. Remove battery holder, including backup battery, from the battery slot. Testo-Direct info@Testo-Direct.com 1.888.475.5235 www. .com... - Page 33 (type CR 1632). NOTICE Incorrectly inserted batteries can lead to damage of the product! > When inserting the batteries, observe the polarity (label on the battery holder). 4. Insert battery holder into the battery slot. Testo-Direct info@Testo-Direct.com 1.888.475.5235 www. .com...
-
Page 34: Tips And Assistance
> Check parameter settings for plausibility. If we could not answer your question, please contact your dealer or Testo Customer Service. For contact details see the rear side of this document or the web page www.testo.com/service-contact Testo-Direct info@Testo-Direct.com 1.888.475.5235 www. -
Page 35: Accessories And Spare Parts
• Calibration points at 0 °C, 100 °C, 200 °C in measuring range 0 °C to 280°C For further accessories and spare parts, please refer to the product catalogues and brochures or look up our website: www.testo.com Testo-Direct info@Testo-Direct.com 1.888.475.5235 www. - Page 36 Testo-Direct info@Testo-Direct.com 1.888.475.5235 www. .com 0970 8750 en 01 V01.00 en-GB...
Need help?
Do you have a question about the 875 and is the answer not in the manual?
Questions and answers