Table of Contents
Advertisement
Advertisement
Table of Contents

Related Manuals for TESTO testo 881


Summary of Contents for TESTO testo 881
- Page 1 881 · Thermal imager Instruction manual...
-
Page 3: Table Of Contents
1 Contents Contents Contents ....................3 Safety and the environment..............4 2.1. About this document ................4 2.2. Ensure safety...................5 2.3. Protecting the environment..............6 Specifications ..................7 3.1. Use ....................7 3.2. Technical data .................9 Product description................14 4.1. Overview..................14 4.2. Basic properties................15 First steps ....................17 5.1. -
Page 4: Safety And The Environment
2 Safety and the environment Safety and the environment 2.1. About this document > Please read this documentation through carefully and familiarize yourself with the product before putting it to use. Pay particular attention to the safety instructions and warning advice in order to prevent injuries and damage to the products. -
Page 5: Ensure Safety
> Carry out only the maintenance and repair work on this instrument that is described in the documentation. Follow the prescribed steps exactly. Use only original spare parts from Testo. > Improper use of rechargeable batteries can lead to destruction or injuries by means of current surges, fire or escaping chemicals. -
Page 6: Protecting The Environment
> Dispose of faulty rechargeable batteries/spent batteries in accordance with the valid legal specifications. > At the end of its useful life, send the product to the separate collection for electric and electronic devices (observe local regulations) or return the product to Testo for disposal. -
Page 7: Specifications
3 Specifications Specifications 3.1. The testo 881 is a handy and robust thermal imager. It opens the door to contactless determination and illustration of the temperature distribution on surfaces for you. Typical areas of application are: • Building inspection (heating, ventilation and air conditioning... - Page 8 Export control Thermal imagers may be subject to the export restrictions of the European Union. The testo 881 with 33 Hz in particular can only be exported to countries outside of the European Union with an export permit from the authorities.
-
Page 9: Technical Data
Manual testo 881-3: manual + motorized Detector type FPA 160 x 120 pixels, a.Si Spectral range 8 - 14 μm Visual image output (testo 881-1/-3 only) Characteristic Values Field of vision/min. 33° x 25°/0.4 m (1.31 ft) focusing distance Image size... - Page 10 -20 - 100 °C (-4 - 212 °F) Measuring range 2: 0 - 350 °C (32 - 662 °F) Measuring range 3 (testo 880-3 only): 350 - 550 °C (662 - 1022 °F) Accuracy With measuring range 1 activated, for readings within the range of -20 - 100 °C...
- Page 11 Characteristic Values Standard lens 32° x 23° Telephoto lens (testo 9° x 7° 881-2/-3, optional): Aperture 0.84 Audio functions (testo 881-2/-3 only) Characteristic Values Sound via headset (included in delivery) recording/playback Recording period max. 30 s per image Power supply...
- Page 12 3 Specifications Characteristic Values Power supply output 5 V/4 A voltage Ambient conditions Characteristic Values Operating -15 - 40 °C (5 - 113 °F) temperature Storage -30 - 60 °C (-22 - 140 °F) temperature Air humidity 20 - 80 %RH, not condensing Enclosure rating of IP54 (Interface terminals closed, battery the housing...
- Page 13 3 Specifications Standards, tests, warranty Characteristic Values EU Directive 2004/108/EC Vibration IEC 60068-2-6 Warranty 2 years, warranty conditions: see website www.testo.com/warranty...
-
Page 14: Product Description
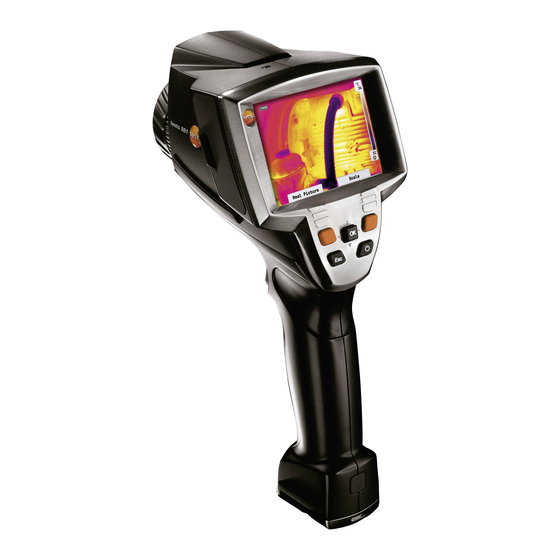
4 Product description Product description 4.1. Overview Product components 1 Display. 2 Control keys: Functions Switch the imager on/off. [OK] Joystick • Press [OK]: Open menu, confirm selection/setting. • Move [OK] up/down/right/left = Joystick function: Select functions, navigate [Esc] Cancel action. Left/right ["xy"] Call up a function. -
Page 15: Basic Properties
5 Right interface terminal: Not assigned. [Motor focus switch]: To switch the motor focus on/off (testo 881-3 only). 7 2 LEDs: For illumination for the visual image (testo 881-3 only). 8 Digital camera lens: For recording visual images (testo 881-1/-3 only) 9 Aperture: Not assigned. - Page 16 4 Product description The instrument is equipped with a backup battery (type CR 1632) to maintain the system data during an interruption in the power supply (e.g. when the battery is changed). File formats and file names The images are saved according to the following pattern: XX_YYYYY.ZZZ for infrared image and surface moisture image without attached real image,...
-
Page 17: First Steps
5 First steps First steps 5.1. Commissioning Connect rechargeable battery The thermal imager is delivered with a rechargeable battery that is inserted in the rechargeable battery slot but not connected. > Push the battery all the way into the rechargeable battery slot until this is flush with the bottom of the handle. - Page 18 5 First steps Initial charging of rechargeable battery The thermal imager is delivered with a partially charged battery. Completely charge the battery before use. > Connect the country-specific adapter required for the existing mains to the power supply. 1. Open the cover on the left side of the thermal imager (1). 2.
-
Page 19: Getting To Know The Product
> To remove the memory card: Press on the memory card to release the lock. Attaching headset (testo 881-2/-3 only) 1. Open the cover on the left side of the thermal imager. 2. Insert stereo jack of the headset into the headset slot (1). - Page 20 1. Place the tripod adapter on the lower end of the handle and screw on using the included Allen key (ISO 2936, size 4). 2. Slide thermal imager into the fastening plate of the testo tripod and lock or fasten it to the commercially available standard...
- Page 21 5 First steps Mount sunshield The sunshield increases the readability of the display with a high exposure to light. > Set the sunshield on the thermal imager from above (1) and pull both sides of the sunshield down around the display (2). Mounting Softcase The Softcase combines the functions of instrument protection, Sun Shield and carrying function (strap).
- Page 22 5 First steps Change/activate lens (testo 881-2/-3 only) Only lenses that were adjusted to the respective thermal imager can be used. The serial number on the lens must match the serial number of the instrument. After changing the lens, the new lens must be activated in the imager.
- Page 23 This can be recognized by means of a "click". The image is frozen briefly when this occurs. > To switch off: Press The display goes out and the imager is switched off. Focus image using motor focus (testo 881-3 only) > testo 881-3: Slide [Motor focus switch] towards the display (position: ).
- Page 24 Factory settings: • Left quick select button: [Scale]. • Right quick select button: [Palette] (testo 881-2) or [Image type] (testo 881-1/-3). Changing assignment of the quick select buttons 1. Move Joystick...
- Page 25 5 First steps Function Description Emissivity... Set emissivity and reflected temperature. Scale... Set scale limits. Adjustment Perform manual zero point calibration. 3. Press [OK] to activate the selected function. Navigating in the menu 1. Press [OK] button. Menu is opened. 2.
-
Page 26: Using The Product
[OK] Measurement [OK] 1-point measurement | [OK]. 2-point measurement (testo 881-2/-3 only) 2-point measurement has 2 crosshairs with which individual temperatures can be read off. If this function is activated ( ), the quick select buttons are fixed with the functions... - Page 27 Coldspot Hotspot quick select button to activate/deactivate the respective function. Min./Max. on area (testo 881-2/-3 only) Min./Max. on area shows the minimum and maximum temperature value within the area selection shown on the display. The area selection is neither scalable nor adjustable. If Min./Max.
- Page 28 2. Select the desired temperature range and confirm with [OK]. For measuring range 350 - 550 °C (662 - 1022 °F): • The high-temperature filter must be installed, see Mounting/removing high-temperature filter (testo 881/-3 only) page 20. • With temperature differences larger than 350 K the use...
-
Page 29: Image Gallery
6 Using the product of the Ironbow HT palette is recommended as it enables lower temperatures to be shown with higher contrast, see Palette page 34. 6.1.2. Image gallery Show images… [OK] Image gallery [OK] Show images… | [OK]. Folder dialogue is opened. -
Page 30: Scale
6 Using the product Folder name dialogue is opened. 2. Name folders: Use the Joystick to select the desired letters and confirm with[OK]. The folder name can consist of up to 8 characters. Incorrect entries can be deleted using the right [◄C] quick select button. -
Page 31: Display
6 Using the product 6.1.4. Display... Select display options The presentation can be adapted by means of showing/hiding the following elements: Crosshairs, temperature scale and quick select buttons. Hidden function keys can be shown again by pressing a quick select button: The first press of the button shows the function keys again. - Page 32 6 Using the product Material (material temperature) Emissivity Aluminum, bright rolled (170 °C) 0.04 Cotton (20 °C) 0.77 Concrete (25 °C) 0.93 Ice, smooth (0 °C) 0.97 Iron, emery ground (20 °C) 0.24 Iron with casting skin (100 °C) 0.80 Iron with rolling skin (20 °C) 0.77 Gypsum (20 °C)
- Page 33 6 Using the product as ovens or machines) are in the proximity of the object being measured should the radiation temperature of theses heat sources be determined and used (e.g. using a globe thermometer). The reflected temperature has only little effect on objects with high emissivity.
-
Page 34: Palette
6 Using the product 6.1.6. Palette Change color palette for the infrared image You can choose between 9 existing palettes. The Ironbow HT palette is intended specifically for measurements in the high- temperature measuring range (low temperatures are shown with higher contrast). - Page 35 The lenses adjusted to the instrument are shown. Only the lenses that are shown may be used. testo 880-3: The high-temperature filter registered in the instrument is shown. With use of another high-temperature filter, the specified accuracy is not ensured.
- Page 36 6 Using the product > Move Joystick to the right and press [OK]. Move Joystick up/down to change the setting. Confirm the entry with [OK]. 4. Confirm the settings with [Apply]. Audio settings… The volume of the audio playback and recording can be set. [OK] Configuration…...
-
Page 37: Measuring
> testo 881-1/-2 and testo 880-3 without high-temperature filter: Do not perform any measurements at scene temperatures > 500 °C/932 °F. > testo 881-3 with high-temperature filter: Do not perform any measurements at scene temperatures > 800 °F/1472 °F. With measurements of high scene temperatures (>350 °C or >662 °F), always install the high-temperature filter, see... - Page 38 6 Using the product Before saving an image, ensure that it is focused correctly (in focus), see Focus image using motor focus (testo 881-3 only) page 23 or Manually focusing the image page 23. Images that are not in focus cannot be corrected retroactively!
- Page 39 6 Using the product Recording/playing audio comments It is only possible to record an audio comment for frozen images. It is possible to play audio comments with frozen and saved pictures. 1. While an image is frozen (fixed image): Press the right [Audio] quick select button.
-
Page 40: Maintaining The Product
7 Maintaining the product Maintaining the product Changing the battery To prevent losing the instrument settings: Only change the rechargeable battery when a backup battery is inserted in the instrument or the power supply is connected. 1. Press lock release button. The rechargeable battery is released and sticks out a little from the rechargeable battery slot. - Page 41 7 Maintaining the product 3. Remove empty battery from the holder and insert new battery (type CR 1632). NOTICE Incorrectly inserted batteries can lead to damage of the product! > When inserting the batteries, observe the polarity (label on the battery holder).
-
Page 42: Tips And Assistance
Reading cannot be calculated. reading. > Check parameter settings for plausibility. If we could not answer your question, please contact your dealer or Testo Customer Service. For contact details see the rear side of this document or the web page www.testo.com/service-contact... -
Page 43: Accessories And Spare Parts
0520 0490 • Calibration points at 0 °C, 100 °C, 200 °C in measuring range 0 °C to 350 °C For further accessories and spare parts, please refer to the product catalogues and brochures or look up our website: www.testo.com... - Page 44 0970 8808 en 02 V01.06 en-GB...
Need help?
Do you have a question about the testo 881 and is the answer not in the manual?
Questions and answers