
Related Manuals for Flyer E-Bike


Summary of Contents for Flyer E-Bike
-
Page 1: Operating Instructions
Operating instructions E-Bike according to EN 15194 · translation of the original operating instructions... - Page 2 Ensure that your child has learned to use his or her E-bike safely and responsibly – preferably in the environment where he or she will ride the Adhere to the fastening torques: The exact fastening E-Bike.
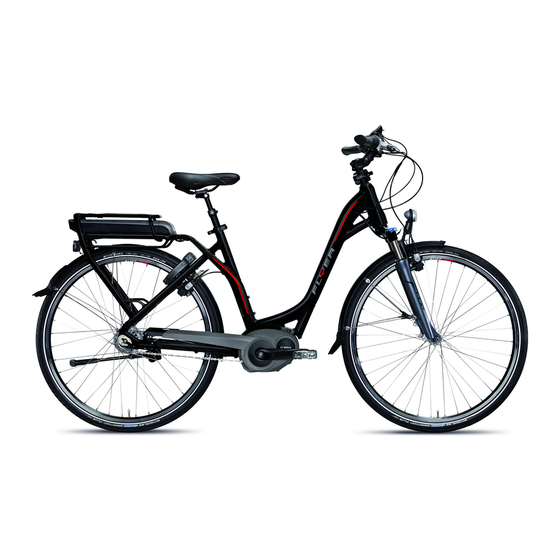
- Page 3 If you leave this page folded out, you can easily locate the component you are currently reading about. II. The E-Bike and its components Handlebar with grip Shifter Operating unit The battery may also Brake lever be positioned at the...
- Page 4 These instructions are based on the as- and ride. It is explicitly required that you read 3. Take the battery out of the E-Bike before per- sumption that you and all users of this FLYER all operating instructions carefully before your forming any work (e.g.
-
Page 5: Table Of Contents
1. Table of contents I. Safety instructions - C2 and axles – 13 Technical data – 27 II. The E-Bike and its components - C3 Seat height – 14 25.1 Batteries for the next-generation Preamble - C4 Seat position – 15 FLYER models (36V) –... -
Page 6: Brief Introduction To The Flyer With Panasonic Drive Unit
This button’s functions may change according Indicates when an external device (e.g. mobile activate the assistance function or the various to the type of E-Bike. When the E-Bike has a phone) is connected to the display unit. indicators. heavy load, the pushing aid works at speeds of... -
Page 7: Operation And Indicators For The Panasonic Drive Unit / Laterally Mounted Display
5 Bicycle button This button’s functions may change according to the type of E-Bike. When the E-Bike has a heavy load, the pushing aid works at speeds of up to 6 km/h. Fast FLYER E-Bikes for the EU market can ride up to 20 km/h without pedal- ling when this button is pressed. -
Page 8: Battery
1 Charge status LEDs The battery can be charged while it is installed 5 lit up ***** 81-100% Shows the battery’s in the E-Bike or once it has been removed. remaining charge. 4 lit up **** 61-80% 2 Charge status... - Page 9 Such bat- teries must therefore be inspected by a Inserting the battery specialist dealer. 1) Insert the battery into the E-Bike’s lower The battery is supplied with a partial charge. Completely holder. 3) Separate the mains plug from the mains...
-
Page 10: The Pushing Aid
• "OFF": The electrical support is switched • Briefly press the controls’ on/off button 5 able to slowly move your E-Bike at up to max. off and the E-Bike can be moved by pedal- 6 km/h without pedalling. It helps you, for ex- once the controls and the battery have been ling only, like a normal bicycle. - Page 11 • You release the "WALK" 14 button, port level chosen. • The wheels of the E-Bike are blocked (e.g. Checking the battery before its first use by breaking or bumping against an obstacle) Check the battery before you charge it or use it •...
-
Page 12: Charging The Battery
Brief introduction to the FLYER with Bosch drive unit Do not charge a damaged bat- The battery is supplied with tery and do not use it. a partial charge. Completely Contact an authorised bicycle charge the battery using the dealer. -
Page 13: Inserting And Removing The Battery
A9 of the E-Bike (the battery may remove it from its holder. have an incline of up to 7° towards the frame). -
Page 14: Legal Stipulations
16 years do not require a riding licence. are not required to wear a helmet. • You may ride the fast FLYER without a riding A bicycle helmet tested according to the EN licence if you were born before 01/04/1965. -
Page 15: Austria
Please note that the performance of a rim brake may be lower in wet con- An E-Bike must be used on bicycle paths, ex- Permitted total weight: ditions and on slippery ground. Always cept when it has several tracks and is up to 80... -
Page 16: Before Any Ride
• Check the wheels are firmly and correctly You have to get the seat, handlebar and stem attached using their fastening nuts or adjusted to your body size and the desired quick-release fasteners. seating position to use your FLYER safely and comfortably. -
Page 17: Operation Of Quick-Release Fasteners
2. You can now move and adjust the post. may lead to severe accidents. 3. You must firmly close the quick-release fastener before using the FLYER. Fold down the quick-release lever so that you can read "Closed" on its outside. -
Page 18: Seat Height
The position is ideal when you can sit on intentionally. • Do not ride your bike if you are not your FLYER and place the heel of your foot onto sure that the front wheel has been the pedal while the crank is vertically aligned. -
Page 19: Seat Position
9.4 Seat position Speedlifter The chassis must be adjusted to the rider's This can be done very quickly when your FLYER weight and the type of application by a special- The horizontal position of the seat can and is equipped with a Speedlifter stem. -
Page 20: Wheels And Tires
A bent, torn or broken rim may lead to major accidents and severe falls. Do not use your E-Bike once you have dis- covered damage on a rim. Have the rim checked by a specialist dealer. -
Page 21: Tires And Tubes
13. Bicycle gear systems Get thorough instructions regarding the opera- The permitted tire pressure tion and the special features of the E-Bike gear may not be exceeded when system from your specialist dealer, even when pumping up the tire. Otherwise you are an experienced cyclist. -
Page 22: Bicycle Chain
Get thorough instructions regarding the op- components may lead to falls. tervals. eration and the special features of the E-Bike Have it checked and readjusted as re- • Hub gear system: from approx. 3000 km braking system from your specialist dealer, quired in a specialist workshop if you •... -
Page 23: Lighting System
16. Lighting system If your FLYER uses a hub dynamo, you can sim- Do not brake continuously during ply switch it on or off with the switch at the rear The lighting system is a safety- long downhill rides as the brakes side of the front wheel headlight. -
Page 24: Riding With Additional Load
• Other parts may lead to accidents or ranty becomes void in such cases. and block the wheel. The loose ends damage the E-Bike Make use of your of the holders may lead to serious ac- specialist dealer’s expertise. cidents. -
Page 25: Bicycle Trailers And Child Trailers
The maximum permitted total weight of the behind the saddle. The child’s fingers E-Bike and the maximum load of the luggage may be get caught in it. Prevent the container may not be exceeded when trans-... -
Page 26: Bicycle Basket
• The performance of the E-Bike dete- • The basket may not obscure the vant, national legal practice for riorates when a trailer is used. Adjust headlight or the front reflector. -
Page 27: Electrical System
21. Maintenance All information, data and instructions concern- • Do not transport your E-Bike ing the electrical system of your FLYER are in- Do not use a strong water jet upside down. Only fasten the E- cluded in the attached operating instructions... -
Page 28: Wearing Parts
Additional, important information about main- • Brake disks • The first inspection has to be performed by taining your E-Bike is also available on the re- • Bicycle chains or toothed belts a specialist dealer. spective component manufacturers’ websites. -
Page 29: Inspection Plan
23.1 Inspection plan After each ride on your E-Bike After 1000 kilometres ridden Maintenance/control the following parts have to be checked: The braking hub must be checked, lubricated • Spokes and exchanged as required by a specialist After the first 200 kilometres ridden •... -
Page 30: Exchanging The Components Of The "Fast Flyer
Regular inspections 24. Exchanging the components of the "fast FLYER" The following list shows which components of • Rear-view mirror: Can be exchanged for Please note that not all lubri- your FLYER may only be replaced by identical, another approved rear-view mirror. -
Page 31: Technical Data
25.2 Fastening torques for screw weight (rider, luggage and bicycle) of 149 kg. 14-16 connections 25.1 Batteries for the next-genera- Stem, ahead stem, 10-12 tion FLYER models (36V) fork shaft 15-17 Inappropriately fastened screws Bar end, may damage components. You should therefore always adhere... -
Page 32: Stipulations Regarding Warranty And Guarantee
2. Voluntary manufacturer warranty Magura Shifting lever a. Warranty periods clamp Biketec AG voluntarily provides a manufacturer warranty for all FLYER E-Bikes that have been Brake lever ultimately assembled and adjusted by a recog- clamp/brake handle nised FLYER specialist dealer: V-brake, fastening screw •... - Page 33 Do damaged by the clamping force of the identifying the FLYER E-Bike and a full service not touch it. You might burn yourself. holder.
-
Page 34: Inspections
Inspections 27. Inspections 1. Inspection 2. Inspection 3. Inspection At the latest after 100-300 kilometres or At the latest after 2,000 kilometres or one At the latest after 4,000 kilometres or two three months after the sales date year years Order No.: ............. - Page 35 4. Inspection 5. Inspection 6. Inspection At the latest after 6,000 kilometres or three At the latest after 8,000 kilometres or four At the latest after 10,000 kilometres or five years years years Order No.: ............. Order No.: ............. Order No.: ............. Date: ..............
-
Page 36: Declaration Of Conformity & Imprint
DIN EN 15194 (Bicycles - Electronically supported bicycles - EPAC bicycles) www.flyer.ch DIN EN 14764 (City and trecking bicycles - Safety engineering requirements and test methods) FLYER EN Version 1.5 January 2014 Technical documentation by: For Biketec AG: Biketec AG... -
Page 37: Handover Protocol - U5
The handover of this FLYER to the customer was performed after the fi- Handover date, stamp, nal assembly, which confirmed the E-Bike is in a usable state and the signature of the dealer issues listed below were in good working order (additional works shown in brackets). -
Page 38: E-Bike Passport - U6
(Advice for the dealer: Copy your E-Bike passport and handover protocol and add the copies to your customer file; send copies to the bicycle manufacturer as required) V. E-Bike passport Manufacturer Biketec AG Wheel or tire size __________________________________ Brand FLYER... - Page 39 Handed over by Biketec AG FLYER Electronic Bicycles | Schwende 1 | CH-4950 Huttwil | Tel. +41 (0)62 959 55 55 | Fax +41 (0)62 959 5566 | info@flyer.ch | www.flyer.ch...
Need help?
Do you have a question about the E-Bike and is the answer not in the manual?
Questions and answers