Table of Contents
Advertisement
Quick Links
THE SAFETY OF
PRODUCTS AND THE MATERI-
ALS USED FOR THEIR PRODUCTION
IS GUARANTEED AND
CERTIFIED IN TEST LABORATORIES ACCORDING TO EN STAN-
DARDS.
INSTRUCTION MANUAL FOR
BABY STROLLER "FERRARA"
PLEASE READ CAREFULLY THIS INSTRUCTION MANUAL AND
KEEP IT IN A SAFE PLACE FOR FUTURE REFERENCE! IT CON-
TAINS IMPORTANT INFORMATION, INSTRUCTIONS AND RECOM-
MENDATIONS FOR THE STROLLER AND ITS SAFE USAGE
Advertisement
Table of Contents

Related Manuals for Chipolino FERRARA


Summary of Contents for Chipolino FERRARA
- Page 1 IS GUARANTEED AND CERTIFIED IN TEST LABORATORIES ACCORDING TO EN STAN- DARDS. INSTRUCTION MANUAL FOR BABY STROLLER “FERRARA” PLEASE READ CAREFULLY THIS INSTRUCTION MANUAL AND KEEP IT IN A SAFE PLACE FOR FUTURE REFERENCE! IT CON- TAINS IMPORTANT INFORMATION, INSTRUCTIONS AND RECOM-...
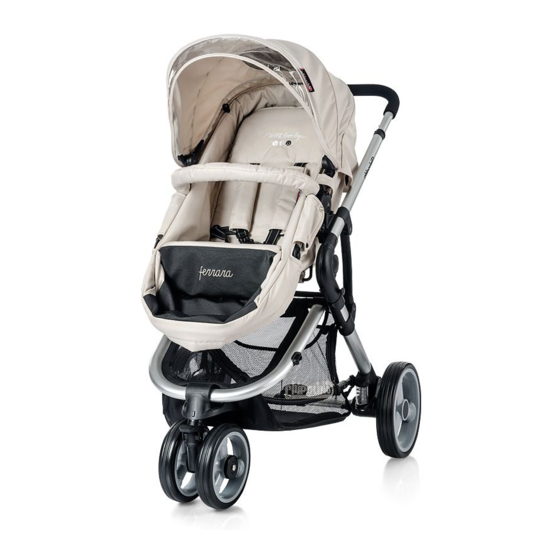
- Page 2 This stroller is suitable for children from 0 to 36 months, with weight not more than 15 kg. The stroller has 5-point harness which keeps safe your child. The backrest of the seat, the footrest and the canopy can be regulated.The seat can be converted into carry cot, suitable for newborn babies.
- Page 3 15. Fold and unfold the stroller carefully in order to avoid finger entrapment! Make sure the child is in safe place away from the stroller when you make adjustments, folding or unfolding of the stroller. 16. Never lift, fold, adjust and repair the stroller while the child is in! 17.
-
Page 4: Unfolding The Stroller
ASSEMBLY INSTRUCTION. FUNCTIONS PARTS LIST UNFOLDING THE STROLLER Release the latch “ A” located on the left side of the handlebar as shown in fig.1 and fig.2. Step on the rear tube, while raising the handle bar with one hand. Once in place, you will hear a distinct click fig. -
Page 5: Attaching The Rear Wheels
ATTACHING THE REAR WHEELS Insert the rear wheel into the axle until you hear a click. Repeat for the other rear wheel. Pull to confirm it is assembled (fig.5). fig. 5 REMOVING THE REAR WHEELS Press the quick-release lever (fig.6-1) of each of the rear wheels and pull them outwards (fig.6-2). -
Page 6: Attaching The Seat
ATTACHING AND REMOVING OF THE FRONT BUMPER fig. 9 fig. 10 Insert the both ends of the front bumper in the slots of the armrests, as shown on fig.9, until you hear a click. To remove the bumper, press the buttons, located at the bottom in place of attachment of the bumper and pull out all (fig.10). - Page 7 MOUNTING AND REMOVING OF THE CANOPY fig. 13 fig. 14 To mount the canopy, insert both ends into the holes on either side of the seat (fig.13). To remove the canopy, press both ends and pull it inwards (fig.14). FRONT WHEEL. FUNCTIONS locking Before activating one of the two functions of the front wheel (for a 360 °...
-
Page 8: Handlebar Adjustment
HANDLE BAR ADJUSTMENT Press the button, located in the middle of the handle and set it to one of the 3 possible positions by moving upwards or downwards (fig.16). fig. 16 PARKING DEVICES color display fig. 17 fig. 18 Press the lever downwards, located on the rear wheel axle (fig.17). IMPORTANT! Color display shows whether the parking devices are engaged (fig.18). - Page 9 ADJUSTING THE BACKREST OF THE SEAT fig. 19 fig. 20 fig. 21 Pull the lever located at the top of the seat back (fig.19). By shifting forward or backward, set the backrest in the desired position and release the lever. Open the belt buckle, at the back of the backrest.
-
Page 10: Folding The Stroller
CONVERTING THE SEAT INTO CARRY COT fig. 27 fig. 28 fig. 29 Unbuckle the harness belts. Pull the belts through the corresponding slots of the seat, backrest and the fabric slots and remove them. Set the seat to the fully reclined position (fig. - Page 11 INSTALLATION OF CAR SEAT “EUPHORIA” ON THE CONSTRUCTION OF THE STROLLER WARNING! For the correct and safe installation of the car seat, please follow the instruc- tions described. Make sure the car seat is fixed well to the construction of the stroller. Do not install when there is a child in the car seat.
-
Page 12: Care And Maintenance
CARE AND MAINTENANCE 1. Periodically check all locking mechanisms, brakes, safety belts and buckles, joints, fixing mechanisms and the adapters to make sure that they function properly and are not damaged or worn out. 2. If you find any loosen connections, worn out, broken or missing parts, they should be repaired or replaced. - Page 14 1 Goliamokonarsko shosse, Plovdiv, BULGARIA www.chipolino.com...
Need help?
Do you have a question about the FERRARA and is the answer not in the manual?
Questions and answers