Table of Contents
Advertisement
Quick Links
THE SAFETY OF
USED FOR THEIR PRODUCTION IS GUARANTEED AND CERTIFIED
IN TEST LABORATORIES ACCORDING TO EN STANDARDS.
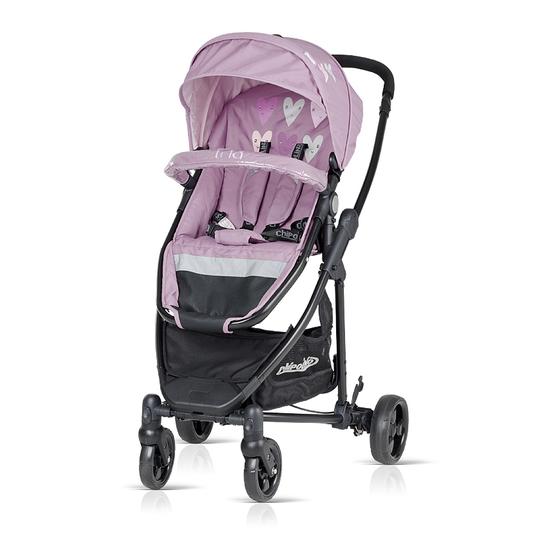
INSTRUCTION MANUAL FOR USE OF
BABY STROLLER "TRIA 3 in 1"
PLEASE READ CAREFULLY THIS INSTRUCTION MANUAL AND
KEEP IT IN A SAFE PLACE FOR FUTURE REFERENCE! IT CON-
TAINS IMPORTANT INFORMATION, INSTRUCTIONS AND RECOM-
MENDATIONS FOR THE STROLLER AND ITS SAFE USAGE
PRODUCTS AND THE MATERIALS
Advertisement
Table of Contents

Subscribe to Our Youtube Channel
Related Manuals for Chipolino TRIA


Summary of Contents for Chipolino TRIA
- Page 1 USED FOR THEIR PRODUCTION IS GUARANTEED AND CERTIFIED IN TEST LABORATORIES ACCORDING TO EN STANDARDS. INSTRUCTION MANUAL FOR USE OF BABY STROLLER “TRIA 3 in 1” PLEASE READ CAREFULLY THIS INSTRUCTION MANUAL AND KEEP IT IN A SAFE PLACE FOR FUTURE REFERENCE! IT CON-...
- Page 2 This set contains: • Baby stroller, suitable for a child aged 6 months plus and weight up to 15 kg. • Carry cot, suitable for a newborn baby to 6 months, weighing up to 9 kg, who cannot sit unaided, roll over or push up on its elbows and knees. •...
-
Page 3: Safety Requirements And Warnings
SAFETY REQUIREMENTS AND WARNINGS! 1. Never leave your child unattended! 2. The seat of this stroller is not suitable for children under 6 months of age! 3. The seat unit must be used by children that are older than 6 months and can stay in sitting position unaided! 4. - Page 4 21. Do not place items with long strings around your child's neck and do not attach additional strings to toys to avoid strangulation! 22. Do not place an additional mattress in the cot! 23. Extra pads or pillows placed on the seat will impede the proper use of the safety harnesses and will reduce the safety and stability of the child in the stroller!! 24.
-
Page 5: Parts List
ASSEMBLY AND FUNCTIONS OF THE STROLLER This stroller is supplied partially assembled. In order to complete the assembly, you don’t need any tools. Follow exactly the instructions given and check the pictures. Please, note that in most cases after the completion of an operation you will hear a clicking sound. IMPORTANT! After each operation, make sure that you have followed the instructions correctly and the fixing is stable. -
Page 6: Unfolding The Stroller
UNFOLDING THE STROLLER fig. 1 Place the folded frame of the stroller on a flat surface (fig.1-1). Release the fixing hook. Grab the handle of the stroller and pull it up (fig.1-2), until the stroller is fully unfolded and you hear a click (fig.1-3). ATTENTION! Check if the mechanisms are well engaged. -
Page 7: Rear Wheels
SWIVEL AND STRAIGHT MOTION OF THE FRONT WHEELS The front wheels can swivel (at 360°) or move straight. ATTNETION! You must position the wheels in the position shown in fig.3, before fixing them in swivel or straight motion. Праволинейно Straight motion of the front wheels The front wheels will move only straight, when you press down the lever В... -
Page 8: Front Bumper
CANOPY fig. 6 To assemble the canopy, place its two brackets to the frame tube, as shown in fig.6. To remove the canopy, pull it out. ATTENTION! Always use the velcro at the back section of canopy and attach it to the seat. The canopy can be opened or closed by pulling or pushing it by hand. -
Page 9: Safety Belts
SAFETY BELTS fig. 9 fig. 10 ATTENTION! Always use the safety belts when the baby is inside the stroller. The stroller is equipped with a 5-point harness. Join the loose ends of the shoulder and waist straps, as shown in Fig.9. Insert them in the central buckle until you hear a click (fig.10). Adjust the length of the belts according to the baby’s growth. - Page 10 PLACING OF THE FOOTCOVER fig. 14 fig. 15 Place part А of the footcover (fig.14) on the footcover (fig.15-1). Thread the footcover through the front bumper (fig.15-2) and fasten at the front (fig.15-3). FOLDING OF STROLLER fig. 16 ATTENTION! Make sure that the child is at a safe distance from the stroller during folding and unfolding.
-
Page 11: Carry Cot
CARRY COT fig. 17 UNFOLDING OF THE CARRY COT 1. Unfold the two U shaped metal parts located at the inside of the carry cot , under the mattress, to the sides of carry cot, until they are fixed in the holes (fig.17-1). 2. - Page 12 INSTALLING OF THE CARRY COT ON THE STROLLER FRAME fig. 19 ATTENTION! ALWAYS INSTALL THE CARRY COT IN A FACE TO FACE MODE FOR A NEWBORN BABY (fig.19А)! To install the carry cot on the frame, position it in a face to face mode, align the carry cot adaptors with the corresponding holes on the frame and press down until you hear a click (fig.19-В).
-
Page 13: Folding The Carry Cot
FOLDING THE CARRY COT fig. 21 fig. 22 fig. 23 To save space, the carry cot may be folded for storage. ATTENTION! It is dangerous to fold the carry cot if it is installed on the frame and there is a baby in it! Remove the carry cot from the frame and follow the steps: 1. - Page 14 fig. 25 ATTENTION! ALWAYS INSTALL THE CAR SEAT IN A FACE TO FACE MODE FOR A NEWBORN BABY! To install the car seat: 1. Stay at the side of the handle and place the adaptors with markings L and R (fig.24-1) on the stroller frame.
- Page 15 CARE AND MAINTENANCE GUIDELINES 1. Regularly check all locking mechanisms, brakes, safety harnesses and buckles, joints and fixing mechanisms to make sure that they function properly and are not damaged or worn out. 2. Should you find loose, torn or damaged parts, they need to be repaired or replaced. 3.
- Page 16 1 Goliamokonarsko shosse, Plovdiv, BULGARIA www.chipolino.com...
Need help?
Do you have a question about the TRIA and is the answer not in the manual?
Questions and answers