Table of Contents
Advertisement
Quick Links
THE SAFETY OF
PRODUCTS AND THE MATERIALS
USED FOR THEIR PRODUCTION IS GUARANTEED AND CERTIFIED
IN TEST LABORATORIES ACCORDING TO EN STANDARDS.
INSTRUCTION MANUAL FOR BABY
STROLLER "PERFECTA"
PERF E CTA
PLEASE READ CAREFULLY THIS INSTRUCTION MANUAL AND
KEEP IT IN A SAFE PLACE FOR FUTURE REFERENCE! IT CON-
TAINS IMPORTANT INFORMATION, INSTRUCTIONS AND RECOM-
MENDATIONS FOR THE STROLLER AND ITS SAFE USAGE
Advertisement
Table of Contents

Related Manuals for Chipolino Perfecta


Summary of Contents for Chipolino Perfecta
- Page 1 USED FOR THEIR PRODUCTION IS GUARANTEED AND CERTIFIED IN TEST LABORATORIES ACCORDING TO EN STANDARDS. INSTRUCTION MANUAL FOR BABY STROLLER “PERFECTA” PERF E CTA PLEASE READ CAREFULLY THIS INSTRUCTION MANUAL AND KEEP IT IN A SAFE PLACE FOR FUTURE REFERENCE! IT CON-...
- Page 2 This stroller is suitable for children from 0 to 36 months, with weight not more than 15 kg. The stroller has 5-point harness which keeps safe your child. The backrest of the seat, the footrest and the canopy can be regulated. Face to face and forward facing mode of the seat unit.
- Page 3 15. Before each use, check the operation of the parking devices! Always engage the brakes when the stroller has stopped and is not moving, especially when you place or take out your child from it! 16. Make sure the stroller is fully unfolded and all locking mechanisms are engaged before placing the child in the stroller! 17.
-
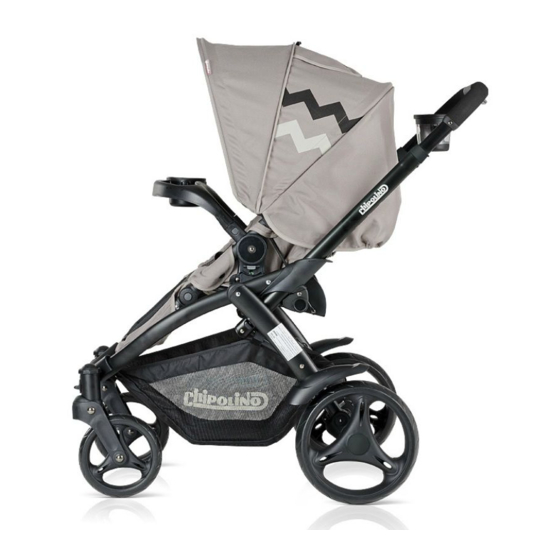
Page 4: Parts List
ASSEMBLY INSTRUCTION.FUNCTIONS The stroller is supplied partially assembled. Check that you have all the parts for this model before assembling your product. No tools required. Please follow strictly the instructions and make sure you have performed the directions properly and the fixing is stable after each step. WARNING! Fold and unfold carefully in order to avoid finger entrapment! PARTS LIST seat... -
Page 5: Attaching The Front Wheels
UNFORLDING THE STROLLER Release the latch located on the right side of the handlebar as shown in Figure 1. Step on the basket tube as shown in fig.2, while raising the handle bar with one hand. Once in place, you will hear a distinct click. - Page 6 ATTACHING THE REAR WHEELS Insert the rear wheel into the axle until you hear a click. Repeat for other rear wheel. Pull to confirm it is assembled securely. See fig.6. REMOVING THE REAR WHEELS Release the rear wheels by pushing the release lever downwards. Pull wheels off of stroller.
-
Page 7: Releasing The Brakes
FUNCTIONS FRONT SWIVEL LOCKS Push the front wheel swivel release lever down until you hear a click. Start pushing stroller and the wheels will automatically lock into place. See fig 10. SWIVEL FUCNTION OF THE FRONT WHEELS Push the front wheel swivel release lever up and you will activate the swivel function. WARNING! When you use the stroller on uneven surfaces, fix the front wheel. -
Page 8: Adjusting The Canopy
REMOVING CHILD TRAY Locate the buttons on the base of the child tray joint. Press buttons and remove the child tray from the stroller. See fig.14. ADJUSTING THE CANOPY To adjust the canopy, simply move the canopy forward and backward to desired location. See fig.5 &... -
Page 9: Folding The Stroller
FITTING AND ADJUSTING THE HARNESS This stroller has a 5-point harness. WARNING! Never leave your child child unattended, even for a short period of time. Always use safety belts. Check frequently to make sure it is secure. For babies under 6 months, the belts must be covered as instructed above. - Page 10 INSTALLATION OF CAR SEAT “EUPHORIA” ON THE CONSTRUCTION OF THE STROLLER WARNING! This is an option. The car seat is not included in the set and can be bought additionally. This car seat is suitable for newborn and babies with weight up to 13 kg. It has been approved under No Е4-44R –...
-
Page 11: Care And Maintenance
CARE AND MAINTENANCE 1. Periodically check all locking mechanisms, brakes, safety belts and buckles, joints, fixing mechanisms and the adapters to make sure that they function properly and are not damaged or worn out. 2. If you find any loosen connections, worn out, broken or missing parts, they should be repaired or replaced. - Page 12 1 Goliamokonarsko shosse, Plovdiv, BULGARIA www.chipolino.com...
Need help?
Do you have a question about the Perfecta and is the answer not in the manual?
Questions and answers