Table of Contents
Advertisement
Advertisement
Table of Contents
Troubleshooting

Subscribe to Our Youtube Channel
Related Manuals for BIG ASS FANS X2


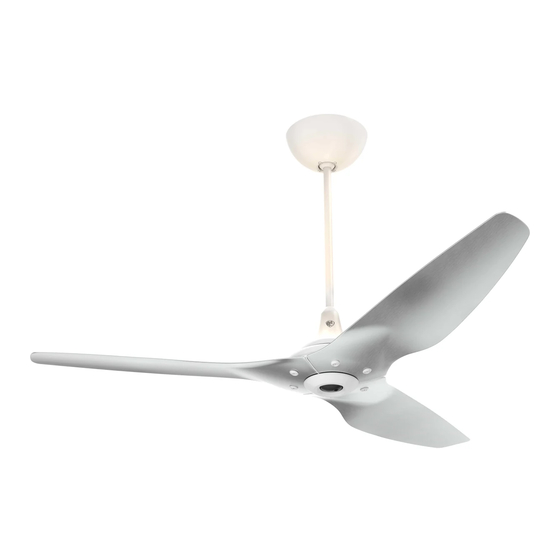
Summary of Contents for BIG ASS FANS X2
- Page 1 Installation Guide...
- Page 2 Installation Guide: Oct. 2014 Rev. C Model Number: K3150-X2-XX-XX-03-C K3127-X2-XX-XX-03-C S3150-X2-XX-XX-03-C S3127-X2-XX-XX-03-C K3150-X2-XX-XX-02-C K3127-X2-XX-XX-02-C S3150-X2-XX-XX-02-C S3127-X2-XX-XX-02-C Thank you for buying the world’s most innovative fan. Please take a few moments to register your fan with us online at www.haikufan.com/warrantyregistration. This product is sold by a plant whose This device complies with Part 15 of Conforms to UL STD 507–Electric Fans...
-
Page 3: Troubleshooting
Preparing the wiring cover & canopy Installing the mounting ball MAINTENANCE Installing the mounting bracket Annual maintenance Wiring the fan Hanging the fan Connecting the fan to power Securing the safety cable Installing the canopy HAIKU ® by Big Ass Fans... -
Page 4: Important Safety Instructions
IMP O RTA N T S AF E TY I NST RU CT IO N S Read and save these instructions prior to installing and operating your Haiku . Retain ® this installation guide for maintenance and troubleshooting information. If you have further questions, contact Haiku Customer Service at www.haikufan.com/service. -
Page 5: Technical Specifications
STYLE. Backed by the engineering resources of Big Ass Fans, the fan of choice for smaller spaces that need extraordinary air movement is crystal clear—it’s Haiku. -
Page 6: Parts And Hardware
INTRODUCTION (CONT.) Parts and hardware If you are missing any parts or hardware required for the installation or operation of your Haiku, contact Haiku Technical Service. Note: Drawings below are not to scale. Mounting bracket Mounting hardware Airfoil hardware • 4 mm Self tapping screw •... - Page 7 10° (2:12 pitch). • If mounting the fan with the 7-inch (17.8 cm) extension tube, install the fan where it will be protected from strong winds. HAIKU ® by Big Ass Fans...
-
Page 8: Tools Needed
PREPARATION (CONT.) Tools needed You will need the following tools to install the fan. If you are installing an outlet box, additional tools may be necessary. Consult the outlet box manufacturer’s instructions. • Ladder • 5 mm Hex key (provided) •... -
Page 9: Installation
Be careful not to damage the circuit board while installing airfoils! Haiku Bamboo ® Haiku ® tip! To ease airfoil installation, the (3) motor top screws can be loosened. Do not forget to retighten them! Motor top screw HAIKU ® by Big Ass Fans... - Page 10 INSTALLATION (CONT.) Step 2a. Installing the lower cover (fans without SenseME™) If you purchased the wall control kit or LED light kit, proceed to the instructions included with the kit. If installing both kits, install the wall control kit first. Return to these instructions once the kits are installed.
- Page 11 Align the four slots on the lower cover trim with the four small round tabs on the bottom of the fan hub, and turn the trim clockwise to lock it into place. Lower Cover Trim Note: If installing the LED light kit, do not install the lower cover trim. HAIKU ® by Big Ass Fans...
- Page 12 INSTALLATION (CONT.) Step 3. Installing the extension tube With the fan placed carefully in the upright position, loosely Extension secure the motor brackets to the motor with M6 x 28 mm Tube bolt (A). Install the extension tube with the M6 x 32 mm bolt (B).
-
Page 13: Step 7. Installing The Mounting Bracket
Install the fan on a switched circuit so that you can turn off the fan using a wall switch in Mounting addition to using the remote control. Bracket HAIKU ® by Big Ass Fans... -
Page 14: Step 9. Hanging The Fan
INSTALLATION (CONT.) Step 9. Hanging the fan Raise the fan to the mounting bracket. Align the slot in the mounting ball to the rib in the mounting bracket, and then let the fan hang freely. Gently twist the mounting ball to ensure it is properly seated tip! and will not move during fan operation. -
Page 15: Step 12. Installing The Canopy
Secure the canopy to the mounting bracket with the (4) painted M4 x 6 mm screws. Ensure no wires or the safety cable are showing. Test the fan. Canopy HAIKU ® by Big Ass Fans... -
Page 16: Wire Color Chart
E le c t ric a l WARNING: Disconnect power to the fan location before wiring the fan! Install the fan on a switched circuit so that you can turn off the fan using a wall switch in addition to the remote control. Do not use the fan with a dimmer switch. - Page 17 Brown, Black, or Grey Blue Green with Yellow Tracer 220–240 V System AC Hot / L1 Switched 100–240 VAC, AC Neutral / L2 1 Φ, 50 Hz, 0.36 A PE / Earth Ground GRN W/ YEL BLUE BROWN HAIKU ® by Big Ass Fans...
-
Page 18: Replacing The Remote Control Battery
O pe r atio n Before using the Haiku remote control, remove the plastic tab in the battery tray. The fan mode indicators are located on the underside of the fan hub when tip! viewed from the floor. Remote Front Powering the fan To turn the fan on or off, press the On/Off button on the fan remote. -
Page 19: Operating The Light
Timer mode indicator The Timer LED indicates that Timer mode is active. A flashing Timer LED indicates that the Timer mode is being adjusted. See the previous page for instructions on using Timer mode. timer HAIKU ® by Big Ass Fans... -
Page 20: General Troubleshooting
Tro u b le s hoo tin g WARNING: To avoid electric shock, remove power from the fan before servicing! WARNING: Risk of fire, electric shock, or injury to persons during cleaning and servicing! WARNING: Do not operate fan with missing or damaged components! General troubleshooting Some issues can be resolved before requesting service. -
Page 21: Annual Maintenance
Do not use solvents, gasoline, or any other chemical cleaners! These may cause surface distortion and damage to the fan. • Make sure the wiring harnesses are secure and the ground wire is securely connected. Outlet Safety Cable Canopy Extension Tube Wiring Airfoil Cover HAIKU ® by Big Ass Fans... - Page 24 *004446-01* www.haikufan.com © 2013 Delta T Corporation 004446-01...
Need help?
Do you have a question about the X2 and is the answer not in the manual?
Questions and answers