Table of Contents
Advertisement
Quick Links
Advertisement
Table of Contents

Related Manuals for Tern Valo 2


Summary of Contents for Tern Valo 2
- Page 1 Valo ™...
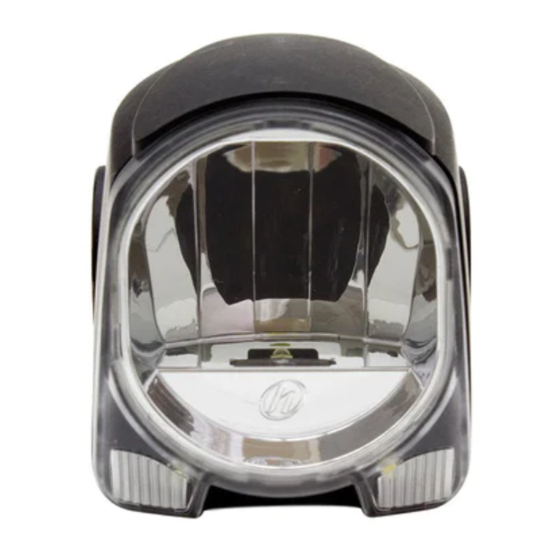
- Page 2 Parts 1. Cover 2. Clamp Bolts 3. Lens with Clarity Optics ™ 4. Connection Terminals 5. CryoCore Connector ™ 6. Standlight LEDs 7. Dynamo Cable 8. On/Off Switch Hub Dynamo, Dynamo Plug and Rear Light not included...
- Page 3 The electronics are protected against over-voltage from the dynamo, even when no rear light is connected. The Valo 2 can only be used with hub dynamos (AC). Do not connect to direct current, such as batteries and other DC power supplies, including ebikes.
- Page 4 Installation 1. Remove Grip, Brake Lever, and Gear Shifter from one side of the Handlebar. 2. Loosen the Stem and slide the Handlebar halfway out. Remove Valo if fitted.
- Page 5 3. Position the Valo 2 within the Stem and slide Handlebar through the Clamp Hole. If the Handlebar doesn’t fit through the Clamp Hole, loosen the four Clamp Bolts evenly and try again. 4. Tighten the Stem and install the Grip, Brake Lever, and Gear Shifter, tightening all...
- Page 6 5. Tighten the four Clamp Bolts evenly until the Valo 2 remains in place. Do not over-tighten the screws, otherwise the plastic casing may break. 6. Connect the Dynamo Cable to the Dynamo Terminals. There is no polarity so the cables can be installed to either Terminal (+/-).
- Page 7 7. Switch on the Valo 2 and adjust the angle according to the area you want lit up. We recommend angling the central beam approximately 10 m in front of the bicycle. If the Valo 2 cannot rotate, evenly loosen the Clamp Bolts a quarter turn.
- Page 8 Temperature Range ..........-40°C ~ 50°C (-40°F ~ 122°F) * Included parts and specification subject to change. Dynamo Hub The Valo 2 is optimized for usage with both 2.4 W and 3.0 W Dynamo Hubs, but we recommend using the BioLogic Joule 3 Dynamo Hub.
Need help?
Do you have a question about the Valo 2 and is the answer not in the manual?
Questions and answers