Table of Contents
Advertisement
Quick Links
Valo
™
Tools Required
*
• #2 Crosshead Screwdriver
Optional Tools
*
• Needlenose Plier
Parts Required
*
• Handlebar Stem (Either Tern Andros
• Handlebar with a central-section diameter of 25.4 mm
• Direct current power source, such as a USB Power Bank or an E-Bike System with
compatible voltage
Optional Parts
*
• Tern RidePocket
to hold USB Power Bank
™
Compatibility
Not for use with a hub dynamo or any AC voltage power source.
Be sure to select a USB Power Bank or E-Bike System with a visual indication of
remaining power.
General Warnings
To prevent vision impairment, never look directly at the light.
Do not submerge in water. The Valo Direct is designed for outdoor use, and can
be used in heavy rain and snow but it is not waterproof.
Before riding, always ensure Light is clean and functioning correctly so that you
are visible to others on the road.
Do not connect Rear Light to the output terminals. Leave the plug on at all times.
* Not included
Direct
™
or Syntace VRO 47)
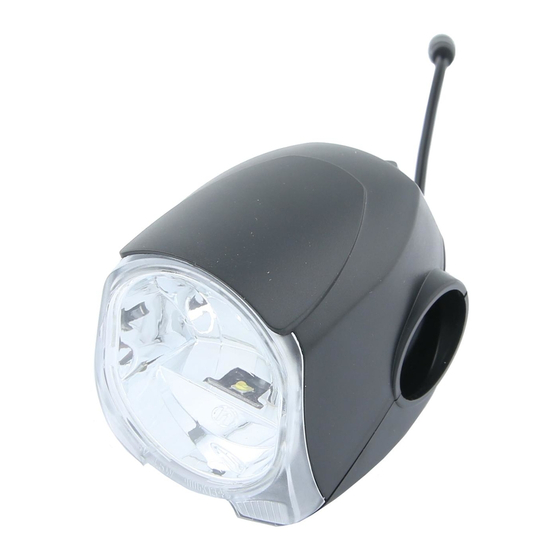
Parts
1. On/Off Switch
2. Housing
3. Lens with Clarity
Optics
™
4. Connection Terminals
5. Clamp Bolts
6. USB Cable
Installation
1. Remove Grip, Brake Lever, and Gear Shifter from Handlebar.
2. Loosen Stem and slide Handlebar halfway out. Remove existing light, if fitted.
Advertisement
Table of Contents

Related Manuals for Tern Valo Direct


Summary of Contents for Tern Valo Direct
- Page 1 General Warnings To prevent vision impairment, never look directly at the light. Do not submerge in water. The Valo Direct is designed for outdoor use, and can be used in heavy rain and snow but it is not waterproof. Before riding, always ensure Light is clean and functioning correctly so that you are visible to others on the road.
- Page 2 If Handlebar doesn’t fit, loosen the four Clamp Bolts evenly until there is sufficient clearance. 6. Connect the USB end of the cable to the pre-installed cable on Valo Direct. If the USB Cable comes loose at the Connection Terminals, reconnect by locating 4.
Need help?
Do you have a question about the Valo Direct and is the answer not in the manual?
Questions and answers