Gigaset C530 IP Manual
Hide thumbs Also See for C530 IP:

Advertisement

C530
- C530A
IP
IP
Congratulations
By purchasing a Gigaset, you have chosen a brand that is fully
committed to sustainability.
This product's packaging is eco-friendly!
To learn more, visit www.gigaset.com.

Advertisement

Table of Contents
loading
Need help?

Need help?

Do you have a question about the C530 IP and is the answer not in the manual?

Questions and answers

Subscribe to Our Youtube Channel

Summary of Contents for Gigaset C530 IP

  • Page 1 C530 - C530A Congratulations By purchasing a Gigaset, you have chosen a brand that is fully committed to sustainability. This product’s packaging is eco-friendly! To learn more, visit www.gigaset.com.
  • Page 2: Safety Precautions

    Do not use the devices in environments with a potential explosion hazard (e.g. paint shops). If you give your Gigaset to a third party, make sure you also give them the user guide. Remove faulty devices from use or have them repaired by our Service team, as these could interfere with other wireless services.
  • Page 3: Please Note

    Emergency numbers cannot be dialled if the keypad/display lock is activated! This quick user guide only describes a small proportion of the functions of your telephone. For more details about the functions of your telephone, please refer to the user guide online at www.gigaset.com/gigasetC530ip or www.gigaset.com/gigasetC530Aip.
  • Page 4: Contents Of The Package

    Contents of the package Contents of the package Base for the Gigaset C530 IP or C530A IP Power adapter to connect the base to the mains power supply Phone cable (flat) to connect the base to the analogue fixed line network...
  • Page 5: Handset Display And Keys

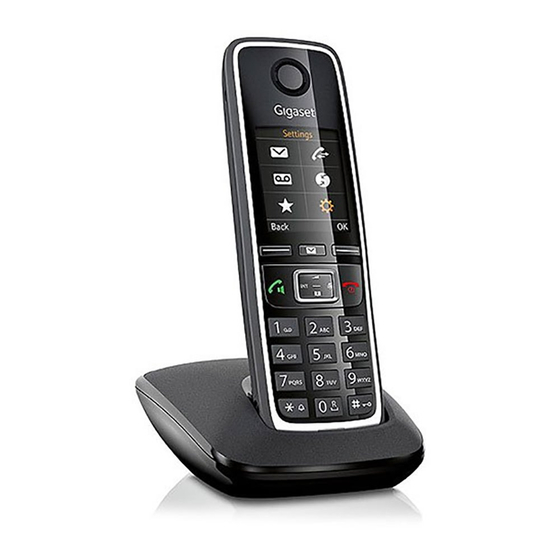
    Handset display and keys Handset display and keys Display in idle status Status bar Icons display current settings and operating status of the phone Display keys Message key Access to the calls and message lists; Flashing: new message or new call End call key, On/off key Ã...
  • Page 6: Overview Of Connections

    Connect the base to the telephone network and the mains power supply To connect the base to the internet, connect the base to the router (connection via router and modem or via router with integrated modem) PC in LAN (optional) - for further configuration of the Gigaset C530 IP/C530A IP base...
  • Page 7: Preparing The Handset

    Preparing the handset Preparing the handset Insert the batteries supplied and close the battery cover ¤ ¤ Insert the batteries with Insert the battery cover To re-open the battery the polarity in the right from the top cover: ¤ ¤ direction (for correct +/- Press the cover until it Grip the notch on the...
  • Page 8: Connecting The Base

    You can now make calls using the fixed line network: Enter the number on the handset and press the Answer call key The local answer machine Answer Mach. 1 is started in recording mode (Gigaset C530A IP only).
  • Page 9: Connect The Base To The Router (Internet)

    IP address to the base for LAN access. You must enter this IP address on the handset before carrying out the following steps. For further information, please refer to the detailed user guide online at www.gigaset.com/ gigasetC530ip, www.gigaset.com/gigasetC530Aip. To enter this information, use the following handset menu: Ï...
  • Page 10: Configuring Voip Connections

    Open the web browser on your PC. ¤ Enter the URL www.gigaset-config.com into the address field of your web browser and press the return key. You will be connected to the web configurator of your base. For registration using the web configurator, you will need the system PIN of the telephone (factory setting: 0000).
  • Page 11: Start Configuration

    Configuring VoIP connections Start configuration When your handset is sufficiently charged (approx. 20 minutes after placing it in the charging cradle), the Message key flashes on the handset. ¤ Press the Message key on the handset. If "New firmware available" is shown on the display, there is a firmware update available for §Yes§...
  • Page 12 Configuring VoIP connections A list of all possible IP connections will be shown in the display (IP 1 to IP 6). VoIP connections that ³ Select IP Account are already configured are marked with ¤ ´ IP 1 If required, press down on the control key ´...
  • Page 13: Enter The Auto-Configuration Code

    Configuring VoIP connections Enter the auto-configuration code ¤ Enter the auto-configuration code using the keypad (max. 32 characters). ¤ IP Wizard §OK§ Press the display key Activation code for All data required for VoIP telephony is downloaded directly from the Internet onto your autoconfiguration: telephone.
  • Page 14: Enter Voip Account Data

    ¤ Change the configuration and assignment of the incoming and outgoing connection using the web configurator. For further information, please refer to the detailed user guide online at www.gigaset.com/gigasetC530ip, www.gigaset.com/gigasetC530Aip. Enter VoIP account data ¤ To switch between upper/lower case and digit entry: Press the key (multiple times if required).
  • Page 15: Assigning An Incoming/Outgoing Connection

    Fixed Line: 4560123 to change the incoming connection selected. IP 1: 12345602 ¤ §OK§ Press the display key if you do not Gigaset.net: 12345#9 want to change the setting. The following steps are skipped. Continue Change from step e.
  • Page 16 Press right on the control key to set to No. Receive calls for IP 1: < Yes > Receive calls for Gigaset.net: Back Save ¤ To switch to the next connection: Press down on the control key . Set INT 1 to Yes or No as described above.
  • Page 17 Assigning an incoming/outgoing connection The handset displays the outgoing connection that is currently set for the Send Connections handset: Ð Fixed Line. ¤ To retain setting: Press the display key INT1 §OK§ . The following step is skipped. ¤ sends calls with To change the setting: Press the display §Change§...
  • Page 18: Complete The Installation

    Complete the installation For the Gigaset C530A IP: You can then launch the connection wizard for the three answer machines of your Gigaset. For each answer machine, the following is shown in the display: Assign connections to answering machine ? ¤...
  • Page 19: Gigaset.net Phonebook Entry

    ** Data protection information Your nickname is saved on a central Gigaset server and appears in the Gigaset.net phonebook. You can be called by other users of the Gigaset.net service under this nickname. By entering your information, you agree for this data to be saved.
  • Page 20: Making Calls And Operating The Answer Machine

    (Fixed Line, IP 1, etc.). ¤ Select an outgoing connection and press the Answer call key . The number is dialled using the selected outgoing connection. Operating the answer machine for the Gigaset C530A IP Activating/deactivating the answer machine Ì ¤ ¤...
  • Page 21: Customer Service & Product Warranty - Australia And New Zealand

    3. The product has been damaged by lightning or a mains power surge. 4. The Phone was not imported into Australia by Gigaset Communications GmbH. To obtain service during the terms of this warranty and/or to claim warranty call the Information...
  • Page 22 Replacement or repair services are only offered for products purchased in Australia and New Zealand that bear Gigaset Communications GmbH local registered N Number and Telepermit markings. Please have your proof of purchase ready when calling.
  • Page 23: Contact With Liquid

    Environment Our environmental statement We at Gigaset Communications GmbH are aware of our social responsibility. That is why we actively take steps to create a better world. In all areas of our business – from product planning and production to sales and waste of disposal – following our environmental conscience in eve- rything we do is of utmost importance to us.

This manual is also suitable for:

C530a ip

Table of Contents