Table of Contents
Advertisement
Advertisement
Table of Contents

Related Manuals for Type A Machines SERIES 1


Summary of Contents for Type A Machines SERIES 1
- Page 1 SERIES 1 USER MANUAL TYPE A MACHINES...
- Page 2 Attribution-NonCommercial-ShareAlike (CC BY-NC-SA) Users are free to remix, tweak, and build upon this work for non-commercial use, as long as users credit Type A Machines Inc. and license their new creations under the identical terms. Every effort has been made to ensure that the information contained in this manual is accurate.
- Page 3 2014 Series 1 User Manual | Version 1.2 2014 Series 1 3D Printer User Manual Welcome to the Type A Machines family of creators. We’re excited about helping professionals, educators and individuals like yourself create amazing things that support your success.
-
Page 4: Table Of Contents
2014 Series 1 User Manual | Version 1.2 Contents Box Contents ..........................2 About Your Series 1 ........................3 Getting Started ..........................4 Unpacking Your Printer ......................4 Attach the Side Panels, Spool Holder, and Build Platform ..........4 Connect to Ethernet and Power On ................... 8 Load Filament ........................ -
Page 5: Box Contents
2014 Series 1 User Manual | Version 1.2 1 Box Contents Your 2014 Series 1 3D Printer Quick Start Guide PLA filament sample Flat box containing: Glass build platform Acrylic side panels (4) Accessory box containing:... -
Page 6: About Your Series 1
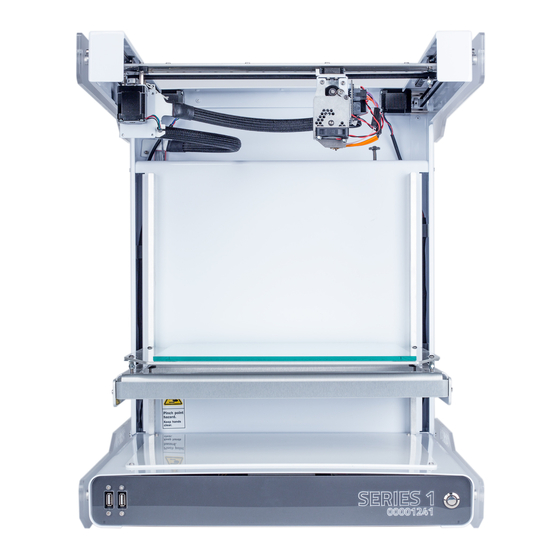
2014 Series 1 User Manual | Version 1.2 2 About Your Series 1 typeamachines.com... -
Page 7: Getting Started
Now check the contents of the printer box to make sure that your 2014 Series 1 3D Printer shipped with all its parts. 3.2 Attach the Side Panels, Spool Holder, and Build Platform Gently lay the printer on its back to attach the acrylic side panels using the large bolts and spacers, which are placed between the side panel and printer. - Page 8 2014 Series 1 User Manual | Version 1.2 NOTE: It is important to install the side panels. The bottom side panels act as feet for the printer and are required for ventilation. The upper side panels act to stabilize the printer during printing.
- Page 9 2014 Series 1 User Manual | Version 1.2 IMPORTANT: The build platform standoffs are factory calibrated and should not need to be adjusted unless troubleshooting indicates it is necessary. typeamachines.com...
-
Page 10: Load Filament
NOTE: Not all filament is created equal. Please be aware that the quality of PLA can vary substantially. Poor quality PLA may damage your 2014 Series 1 3D Printer and it will interfere with your ability to create a successful print. High quality filament is available through the Type A Machines online store: www.typeamachines.com/products... -
Page 11: Connect To Ethernet And Power On
To access the printer’s web interface, open a web browser on your computer and enter series1-XXXX.local:5000, as shown below. Use the last 4 digits of the serial number engraved on the face of your 2014 Series 1 3D Printer in place of XXXX. -
Page 12: Verifying And Calibrating The Z Height
3.6 Verifying and Calibrating the Z Height The 2014 Series 1 3D printer features a black Z height adjustment knob, shown left, at the top right of the build area. - Page 13 2014 Series 1 User Manual | Version 1.2 switch is triggered when the build surface is just below the tip of the print head nozzle. CAUTION: Before checking the Z height, make sure the print head is cool. Failure to ensure the print head is cool may result in damage to the machine.
-
Page 14: Verifying Build Platform Alignment
2014 Series 1 User Manual | Version 1.2 3.7 Verifying Build Platform Alignment The build platform is calibrated to be parallel to the print head during manufacturing, but shifting may occur during shipping. Use the X and Y buttons on the Control tab of the web interface to move the print head to each corner of the build surface to verify your build platform is aligned with the print head. - Page 15 2014 Series 1 User Manual | Version 1.2 CAUTION: The print head is hot and you may burn yourself if you touch it or newly extruded filament. If your GCode is set to extrude filament prior to starting the print, you can manually remove this extra filament with the print removal spatula, or allow it to be wiped off on the build surface.
-
Page 16: Wi-Fi Set Up
2014 Series 1 User Manual | Version 1.2 It’s a good idea to closely examine the first layer as it prints. This is the most critical part of the print. The extruded filament should spread onto the print surface and adhere to it. It should not be stringy nor should it be crushed into the surface. -
Page 17: Slicing Software
5.1 Slicing software To begin printing your own designs to your 2014 Series 1 3D Printer you will need to install a slicing engine. This is the program that takes the model information from your CAD program and converts it into machine readable code (also known as GCode) to tell the printer what to do. -
Page 18: Removing A Printed Object From The Print Surface
2014 Series 1 User Manual | Version 1.2 files will take longer to upload. 6 Removing a Printed Object from the Print Surface When your 3D print completes, the print head will move to the back of the machine. Most of the time you will be able to gently pry your print off the surface using the included print removal spatula. -
Page 19: Customer Support
The 2014 Series 1 3D Printer reads instructions about how to move the print head and build platform and when to extrude filament from a file called a GCode file. GCode is produced by “slicing” software. GCode files end in “.gcode”... - Page 20 Model: S114SA2 Printing Specifications Software Specifications Technology: FFF (Fused Filament Fabrication) Slicing Software: Supported Packages: Cura for Type A Machines Filament Diameter: 1.75mm Supported file types: STL, OBJ, AMF Hot End Type: SINGLE PIECE Windows 32/64 Bit Vista/7/8 Nozzle Diameter: 0.4mm...
Need help?
Do you have a question about the SERIES 1 and is the answer not in the manual?
Questions and answers