Table of Contents
Advertisement
Available languages
Available languages
Advertisement
Table of Contents

Related Manuals for Isotherm CR165


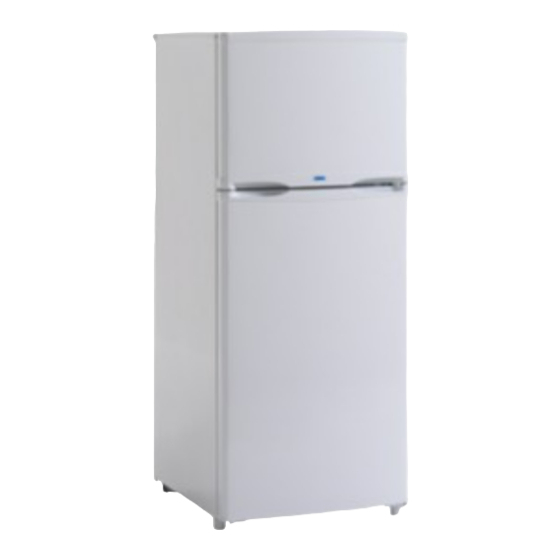
Summary of Contents for Isotherm CR165
- Page 1 Manuale di Istruzioni Instruction manual CR165 CR219 CR271 Ver. 1.1...
- Page 2 Manuale d’uso – User’s Manual CG 010710 Ver 1.1...
- Page 3 Manuale d’uso – User’s Manual I refrigeratori Isotherm sono progettati per Istruzioni per la Sicurezza garantire un corretto funzionamento anche in difficili condizioni ambientali/marine, eccellendo Quando si è connessi alla rete elettrica della nelle caratteristiche più importanti per la nautica: banchina, assicurarsi che il generatore di corrente affidabilità...
- Page 4 Il forare lo stesso causando la fuoriuscita del refrigeratore Isotherm è stato progettato per gas refrigerante e danneggiando in modo soddisfare le normali dimensioni di installazione. irreparabile il prodotto.
- Page 5 Manuale d’uso – User’s Manual Connessioni e cablaggio elettrico Sostituzione Lampadina Per la connessione del refrigeratore seguire le seguenti avvertenze: Per sostituire la lampadina impostare il termostato in posizione 0 (OFF, luce spenta), fare pressione Usare sempre cavi con un’adeguata sezione, sulla levetta del coperchio trasparente (Fig.6) •...
- Page 6 Manuale d’uso – User’s Manual Cambio senso aperture porte Rimuovere la cerniera centrale, fissata con 2 viti. Fatto questo è possibile rimuovere la porta frigo. Rimuovere il coperchio di plastica sulla parte superiore del frigo. Questo è fissato con 4 viti, 2 nella parte posteriore e 2 sulla parte superiore nascoste da piccoli tappini di plastica.
- Page 7 Drenaggio e Condensa ricolmo di alimenti. 2. Se la temperatura ambiente è molto alta, si Il refrigeratore Isotherm viene fornito con un tubo otterranno risultati migliori posizionando il di drenaggio direttamente collegato termostato ad un punto intermedio (pos.4) all’apparecchio, Fig.4.
- Page 8 Collegamento Centralina DC 12V/24V...
- Page 9 Manuale d’uso – User’s Manual Difetto Possibile Causa Azione da intraprendere Il frigorifero non raffredda. Alimentazione elettrica assente. Controllare cablaggio elettrico, Il compressore non parte. Batterie scariche. cavi e collegamenti. Termostato danneggiato. Verificare alimentazione Fusibile danneggiato. compressore. Centralina elettrica danneggiata. La luce funziona? Controllare il sistema di ricarica batterie.
- Page 10 Manuale d’uso – User’s Manual CG 010710 Ver 1.1...
- Page 11 30°. refrigerator directly. New battery charger contain To guarantee the most efficient function possible an explosive gas in addition to the acid. of the Isotherm refrigerator, comply with the Warning! following instructions: Never cover the ventilation openings of the compressor unit.
- Page 12 Almost all ships have a specific area for any rod or support risks piercing this, refrigerator installation. The Isotherm refrigerator causing refrigerant gas to leak out and has been designed to comply with normal irreparably damaging the product.
- Page 13 Manuale d’uso – User’s Manual Electrical wiring and connections Replacing the bulb Comply with the following warnings for refrigerator connection: To replace the bulb, set the thermostat to 0 (OFF, light off), apply gentle pressure to the transparent Always use appropriate section wires. The cover lever (Fig.
- Page 14 Manuale d’uso – User’s Manual Door Opening Change Now remove the middle hinge by removing 2 screws, and you can remove the fridge door. Remove the plastic lid on the top. It’s fixed with 4 screws, 2 of them on the back of the fridge and the other 2 on the top, under 2 small mini-lid that cover the screws.
- Page 15 0 (OFF) to avoid any wastage of current caused by the light being on. TECHNICAL INFORMATION Drainage and condensation Voltage 12/24 Volts The Isotherm refrigerator is supplied with a Consumption 12V 6A (compressor operating) drainage pipe directly connected to the appliance, Average 2.3 – 2.5 A Fig.
- Page 16 Manuale d’uso – User’s Manual Connection Control unit DC 12V/24V CG 010710 Ver 1.1...
- Page 17 Manuale d’uso – User’s Manual Problem Possible cause Action to be taken The refrigerator does not cool No electrical supply. Check electrical wiring, wires and down. Batteries flat. connections. The compressor does not start. Thermostat damaged. Check compressor power. Fuse damaged. Does the light work? Electrical control unit damaged.
- Page 18 Manuale d’uso – User’s Manual CG 010710 Ver 1.1...
- Page 19 Manuale d’uso – User’s Manual This appliance is marked according to the European directive 2002/96/EC on Waste Electrical and Electronic Equipment (WEEE). By ensuring this product is disposed of correctly, you will help prevent potential negative consequences for the environment and human health, which could otherwise be caused by inappropriate waste handling of this product.
- Page 20 Manuale d’uso – User’s Manual Cet appareil porte le symbole du recyclage conformément à la Directive Européenne 2002/96/CE concernant les Déchets d'Équipements Électriques et Électroniques (DEEE ou WEEE). En procédant correctement à la mise au rebut de cet appareil, vous contribuerez à empêcher toute conséquence nuisible pour l'environnement et la santé...
- Page 21 Manuale d’uso – User’s Manual Zona Artigianale 3400 Gateway Drive, Unit #107 IT – 61019 – Sant’Agata Feltria (RN) – ITALY Pompano Beach, FL – 33069 Tel. +39 0541 848030 – Fax. +39 0541 848563 Phone (954) 984-8448 – Fax (954) 979-2533 E-MAIL: info@indelwebastomarine.com E-MAIL:...
Need help?
Do you have a question about the CR165 and is the answer not in the manual?
Questions and answers
Hallo, können sie mir **** einen Kühlschrank Isotherm CR165 mit Türanschlag links anbieten. Oder eine baugleiche Alternative. Vielen Dank Mit freundlichen Grüßen Willi Urgibl