Advertisement
Advertisement

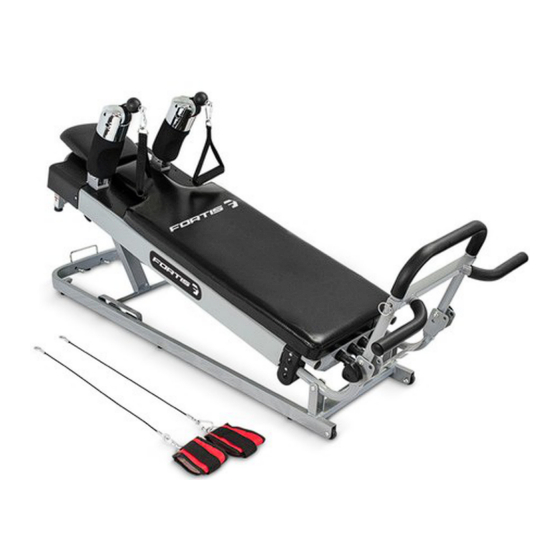
Related Manuals for Fortis FSPLTPWRGM


Summary of Contents for Fortis FSPLTPWRGM
-
Page 2: Table Of Contents
IMPORTANT SAFETY INFORMATION..................2 Assembly...............................3 Storage and Cleaning........................3 Exercise Preparation........................4 The Glide Board..........................4 Tension Cords..........................4 Starting your Workout ........................5 Clothing and Hair .........................6 When is the best time to exercise?..................6 Stretches...............................6 Triceps stretch ..........................6 Achilles and Calf stretch ......................6 Inner Thigh stretch ........................6 Quadriceps stretch ........................6 Upper Back stretch ........................6 Pilates Gym Workout ........................7... - Page 3 We recommend keeping the equipment in a room that can be locked. Make sure children are aware of the dangers involved in touching the equipment. This is essential if you fall into any of the categories below: YOU ARE OVER 35 YEARS OF AGE •...
- Page 4 Lift the into the upright position and secure with knobs ensuring they are fully inserted and tightened. Place the onto the and secure with ensuring they are fully inserted and secured in place Remove from and lift the to an upright position. Replace the ensuring they are fully in inserted and secured in place.
- Page 5 You can easily set the intensity of your workout on the Pilates Gym Machine by adjusting the height of the Glide board. There are several levels ranging from the beginners (flat) through to more intense inclines. There are also eleven different Glide board positions that will allow you to set the resistance to match your fitness level.
-
Page 6: Important Safety Information
Depending on the exercise hand or foot straps can be attached to the Pulley Arm Assembly found on each side of the headrest. Attach the hand or feet straps by using the clips on the straps to connect them to the clip on the end of the black Position Balls. - Page 7 Always wear comfortable clothing, which allows freedom of movement. The Pilates Gym Machine, workout can be done in bare feet or flexible athletic shoes. Socks or stockings are not recommended as they could cause feet to slip when using the foot rest or other foot accessories. Do not wear rubber plastic clothing as this can result in elevated body temperature.
-
Page 8: Tension Cords
On the following pages we detail Pilates exercises which are designed to strengthen and tone your lower back, legs, arms, hips, thighs and abdominal muscles. Each exercise has recommendations for both beginner and advanced fitness level adjustments of the Pilates Gym. These are suggested guides only. - Page 9 Works hips, thighs and lower legs Glide board incline position B or C Tension Cords 1 and/or 2 1, 2, 3 and 4 : Lie on Glide Board with head on headrest and heels against the Footrest Bar. Keeping your legs together and toes pointing upward slowly extend your legs until they are straight - Do not lock your knees.
- Page 10 Attach hand straps for this exercise - works arms, shoulders, upper back and abs Glide board incline position Tension Cords No cords or 1 1, 2 and/or 3 : Lie on the Glide Board with head on the headrest and feet on the footrest. Grasp the hand straps with palms facing towards the footrest and raise arms straight up above the shoulders.
- Page 11 Works lower back, thighs, calves and abs Glide board incline position A or B Tension Cords 1 and/or 2 1, 2, 3 and/or 4 : Sit in centre of Glide Board with back straight supporting yourself by placing your hands just behind your hips.
- Page 12 Works hips, thighs and lower legs – Strengthens core abdominal muscles Glide board incline position Tension Cords 1 and/or 2 1, 2, 3 and/or 4 : Lie on back with head on headrest and arms by your sides. Place heels on the outer corners of the footrest bar.
-
Page 13: Strengthening Workout
The strengthening workout is designed to assist you in increasing your lean muscle mass and toning your body. Each exercise has recommendations for glide board and tension cord settings. You can customise your workout to suit your fitness requirements. Always remember the following points: BREATHING : Breathing is important during any workout. - Page 14 Attach hand straps for this exercise - works forearms, biceps and abs Glide board incline position Tension Cords 1 and/or 2 1, 2, 3 and/or 4 : Straddling the Glide board with feet on the floor, sit at footrest end facing the headrest. Take a hand strap in each hand with palms facing upwards, elbows bent and held against your sides.
- Page 15 Attach hand straps for this exercise - works forearms and triceps Glide board incline position B or C C1, C2, C3 or C4 Tension Cords 1 and/or 2 1, 2, 3 and/or 4 : Lying on the Glide board with head on the headrest, place feet approximately hip-width apart on the Footrest bar.
- Page 16 Attach hand straps for this exercise - works shoulders, chest and triceps Glide board incline position Tension Cords 1 and/or 2 1, 2, 3 and/or 4 : Lie on Glide board with head on the Headrest and feet placed approximately hip-width apart on the Footrest.
- Page 17 Attach hand straps for this exercise - works upper and lower back, biceps and abs Glide board incline position Tension Cords 1 and/or 2 1, 2, 3 and/or 4 : Sit on footrest end of Glide board facing the headrest with knees bent and feet on the Glide board.
-
Page 18: Lunge
Works thighs, hips and calves Glide board incline position A or B C1, C2, C3 or C4 Tension Cords 1 and 2 1, 2, 3 and/or 4 : Lie on Glide Board with head on Headrest and arms by your sides. Place feet on Footrest Push up bar approximately a shoulder-width apart. -
Page 19: Fitness Levels
Attach hand straps for this exercise - works hips, thighs and calves Glide board incline position Tension Cords 1 and/or 2 1, 2, 3 and/or 4 : Kneel in the middle of Glide board facing headrest, grasp a hand strap in each hand with your palms facing towards your body. - Page 20 It is information and motivational to keep track of your progress. We recommend that you keep a chart such as the one on the following page to record your workouts so you can see how far you have come! Get a notebook and make your own Workout Diary using the following template.
Need help?
Do you have a question about the FSPLTPWRGM and is the answer not in the manual?
Questions and answers