Lexmark E 250d User Manual
Lexmark printer user's guide
Hide thumbs
Also See for E 250d:
- Quick reference (19 pages) ,
- Instructions manual (6 pages) ,
- Quick start manual (2 pages)
Table of Contents
Advertisement
E250d and E250dn
User's Guide
June 2006
www.lexmark.com
Lexmark and Lexmark with diamond design are trademarks of Lexmark International, Inc.,
registered in the United States and/or other countries.
© 2006 Lexmark International, Inc. All rights reserved.
740 West New Circle Road
Lexington, Kentucky 40550
Advertisement
Chapters
Table of Contents

Related Manuals for Lexmark E 250d


Summary of Contents for Lexmark E 250d
- Page 1 E250d and E250dn User’s Guide June 2006 www.lexmark.com Lexmark and Lexmark with diamond design are trademarks of Lexmark International, Inc., registered in the United States and/or other countries. © 2006 Lexmark International, Inc. All rights reserved. 740 West New Circle Road...
- Page 2 Eire, send to Lexmark International Ltd., Marketing and Services Department, Westhorpe House, Westhorpe, Marlow Bucks SL7 3RQ. Lexmark may use or distribute any of the information you supply in any way it believes appropriate without incurring any obligation to you. To obtain additional copies of publications related to this product, visit the Lexmark Web site at www.lexmark.com.
-
Page 3: Table Of Contents
Utilities menu ... 40 Chapter 4: Print media tasks and tips ... 41 What types of print media can be loaded? ... 41 Where can print media be loaded in the printer? ... 42 Selecting print media ... 43 Paper ... 43 Preprinted forms and letterhead ... - Page 4 Changing the toner cartridge ... 80 Changing the photoconductor kit ... 82 Print your printer menu settings pages. See Printing the menu settings and network setup pages on page 74. If Photoconductor is listed under Warnings, the photoconductor counter has not been properly reset.Recycling Lexmark products ...
-
Page 5: Chapter 1: Printer Overview
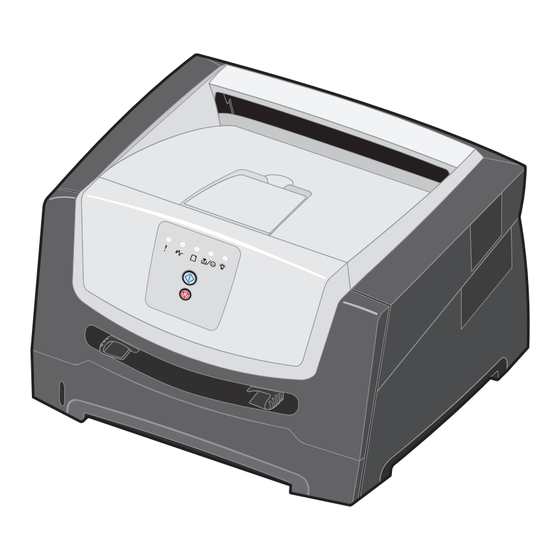
Printer overview 150-sheet output bin 250-sheet tray 550-sheet drawer (optional) Manual feeder Front door Control panel Paper support... - Page 6 Rear exit Power button Power connect Dust cover (not available for some models) USB connect Parallel connect Ethernet connect...
-
Page 7: Chapter 2: Using The Control Panel
Press and release Cancel • Press and hold Cancel Ready Cancel button Continue button to resume printing. twice quickly to display a secondary error code. to cancel the job currently printing. until all of the lights come on to reset the printer. -
Page 8: Understanding The Control Panel Lights
The control panel lights mean different things, depending on their sequence. Lights that are off, on, and/or blinking indicate printer conditions such as printer status, intervention, or service. The following table shows the most common light sequences. Click the indicated page for more information on what it means. - Page 9 Common light sequences (continued) = On Printer Condition Page Continue Complex page Cancel job/ Reset printer 15 Load print media Load manual feeder Toner low Toner cartridge region mismatch Photoconductor kit life warning Replace photoconductor (printer hard stop) Programming engine...
- Page 10 Network interface errors / Host interface disabled Service error Printer error* Paper jam printer error* Short paper Output bin full *See Secondary error codes on page 25 for more information. Following are explanations of what the primary light sequences or codes mean and what you can do to clear them.
-
Page 11: Primary Codes
What this light sequence means: • The printer is busy receiving and processing data or printing. • The printer is printing a directory, font list, menu settings pages, or Print Quality Test Pages. What you can do: • Busy: –... -
Page 12: Hex Trace Ready
Hex Trace Ready Light sequence: Ready—Slow Blinking What this light sequence means: The printer is in the Ready mode, and Hex Trace is active. What you can do: • Advanced users can use Hex Trace to help troubleshoot printing problems. After resolving the problem, turn off the printer to exit Hex Trace. -
Page 13: Not Ready
Press and hold Cancel Not ready Light sequence: Continue—On What this light sequence means: The printer is not ready to receive or process data, or the printer ports are offline. What you can do: • Press and release Continue state. -
Page 14: Close Door
• Error—On What this light sequence means: The page may not print correctly because the print information on the page is too complex (that is, too large for the printer memory). What you can do: • Press Continue continue printing the job. (The job may not print correctly.) -
Page 15: Cancel Job / Reset Printer
Light sequence: • Continue—On • Load Paper—On What this light sequence means: The printer is out of print media at the indicated source. What you can do: • Load print media into the indicated tray, and press Continue to resume printing. -
Page 16: Toner Low
Load manual feeder Light sequence: • Load Paper—On What this light sequence means: The printer prompts you to load a single sheet of print media in the manual feeder. What you can do: • Load print media into the manual feeder. - Page 17 What you can do: Remove the toner cartridge, and install a new toner cartridge that matches the region of the printer (see What supplies do I need and how do I order them? on page 76). Photoconductor kit life warning Light sequence: •...
- Page 18 • Toner Low/Replace PC Kit—Blinking • Error—Blinking What this light sequence means: The photoconductor kit is full and must be replaced. The printer will not print any more pages until the photoconductor kit is replaced. What you can do: •...
-
Page 19: Service Error
What this light sequence means: The printer has a service error and printing has stopped. What you can do: Turn the printer off and back on. If the lights are still blinking, contact the place where you bought your printer. -
Page 20: Printer Error
Continue—On • Error—On What this light sequence means: The printer has one of the following errors: • Memory is full, insufficient to save what is in the buffer. • A page is too complex to print or is shorter than the set page margins. -
Page 21: Output Bin Full
What this light sequence means: The paper length is too short to print the formatted data. This occurs when the printer does not know the print media size loaded in the tray, or when there is a problem feeding the print media. -
Page 22: Secondary Errors
The following table shows what these light sequences mean and where to go for help. Secondary light sequences = On Printer Condition Page Continue Paper jam at the input sensor*... - Page 23 Secondary light sequences (continued) = On Printer Condition Page Continue Paper jam (duplex - unsupported size) Complex page Insufficient collation area 32 Network interface errors Font error Insufficient printer memory ENA connection lost Host interface disabled Memory full Short paper...
- Page 24 Missing / Defective toner cartridge Unsupported toner cartridge *Paper jams at the input sensor can be either after the paper leaves the tray and enters the printer or in the manual feeder. = Blinking = Slow blink Toner Low /...
-
Page 25: Secondary Error Codes
Paper Jam—On What this light sequence means: A paper jam has occurred at the input sensor, which can be either after the print media leaves the tray and enters the printer or in the manual feeder. What you can do: Clear the paper jam. -
Page 26: Paper Jam In The Manual Feeder
Load Paper—On • Paper Jam—On What this light sequence means: A paper jam has occurred as the print media is exiting the printer. What you can do: Clear the paper jam. See Clearing jams on page 56 for more information. -
Page 27: Paper Jam In The 250-Sheet Tray
• Load Paper—Blinking • Paper Jam—On What this light sequence means: A paper jam has occurred in the rear area of the printer. What you can do: Clear the paper jam. See Clearing jams on page 56 for more information. - Page 28 Paper jam (duplex - unknown location) Light sequence: • Continue—On • Paper Jam—On • Ready—Blinking What this light sequence means: A paper jam has occurred somewhere in the duplex unit. What you can do: Clear the paper jam. See Clearing jams on page 56 for more information.
-
Page 29: Complex Page
• Error—On What this light sequence means: The page may not print correctly because the print information on the page is too complex (that is, too large for the printer memory). What you can do: • Press Continue continue processing the print job (some of the print data may be lost). -
Page 30: Insufficient Collation Area
Toner Low/Replace PC Kit—On • Error—On What this light sequence means: The printer memory does not have the free space necessary to collate the print job. This may happen due to one of these errors: • Memory is full. •... -
Page 31: Insufficient Printer Memory
Continue—On • Toner Low/Replace PC Kit—Blinking • Error—On What this light sequence means: The printer has received a request for a font (PPDS) which is not installed. What you can do: • Press and release Cancel • Press and hold Cancel •... -
Page 32: Host Interface Disabled
Enable the USB or parallel port by selecting a value other than Disabled for the USB Buffer or Parallel Buffer item in the Local Printer Settings Utility (see Using the Local Printer Settings Utility on page 75). -
Page 33: Memory Full
What this light sequence means: The paper length is too short to print the formatted data. This occurs when the printer does not know the print media size loaded in the tray, or there is a problem feeding the print media. -
Page 34: Invalid Engine Code
What you can do: Remove the toner cartridge, and install a new toner cartridge that matches the region of the printer (see What supplies do I need and how do I order them? on page 76). -
Page 35: Change Toner Cartridge/Invalid Refill
• Replace the toner cartridge. (See Changing the toner cartridge on page 80 for help. • Turn the printer back on. Missing / Defective toner cartridge Light sequence: • Toner Low/Replace PC Kit—On •... -
Page 36: Unsupported Toner Cartridge
Toner Low/Replace PC Kit—On • Load Paper—On • Error—On What this light sequence means: The toner cartridge is not supported by your printer. What you can do: • Press and release Continue sequence and continue processing the print job. •... -
Page 37: Chapter 3: Understanding The Printer Configuration Menus
Printing the Printer Settings Configuration sheet To help resolve printing problems or to change printer configuration settings, advanced users can print the Printer Settings Configuration sheet for instructions on advancing through the configuration menus to select and save new settings. -
Page 38: Configuration Menus Overview
Press and hold Cancel • Turn off the printer to exit the menus. Network menu Use the Network menu to change printer settings on jobs sent through a network port. Setting Use this setting to NPA Mode Send print jobs to the printer and query printer status information simultaneously. -
Page 39: Parallel Menu
Macintosh binary PostScript print jobs. * Factory default Setup menu Use the Setup menu to configure how the printer formats the end of a line depending on the computer system being used. Setting Use this setting to Auto CR after LF Specify whether the printer automatically performs a carriage return after a line feed control command. -
Page 40: Usb Menu
USB menu Use the USB menu to change printer settings on jobs sent through a Universal Serial Bus (USB) port. Setting Use this setting to NPA Mode Send print jobs to the printer and query printer status information simultaneously. Mac Binary PS Configure the printer to process Macintosh binary PostScript print jobs. -
Page 41: Chapter 4: Print Media Tasks And Tips
Print media tasks and tips What types of print media can be loaded? Get the most from your printer by properly loading the trays. Never mix media types within a tray. Source Sizes 250-sheet tray A4, A5, A6 (grain long... -
Page 42: Where Can Print Media Be Loaded In The Printer
The output bin on top of the printer holds up to 150 sheets. The single-sheet rear exit provides a straight-through path to help reduce curling and potential jams. This is especially useful for specialty media, such as transparencies, envelopes, paper labels, card stock, or index cards. -
Page 43: Selecting Print Media
Power cord connect Dust cover (not available for some models) Selecting print media Selecting the appropriate paper or other print media reduces printing problems. The following sections contain guidelines for choosing the correct print media for the printer: • Paper •... -
Page 44: Paper Characteristics
Condition paper while it is still in the original wrapper. To condition it, store it in the same environment as the printer for 24 to 48 hours before printing to let the paper stabilize in the new conditions. Extend the time several days if the storage or transportation environment is very different from the printer environment. -
Page 45: Preprinted Forms And Letterhead
Recycled paper Lexmark supports US executive order 13101 which strongly encourages the use of recycled papers in government agencies. Ask for warranty information and performance claims from your paper supplier, and/or test small quantities before buying large amounts. -
Page 46: Transparencies
Use transparencies designed specifically for laser printers. Transparencies must be able to withstand temperatures of 210°C (410°F) without melting, discoloring, offsetting, or releasing hazardous emissions. We recommend Lexmark laser printer transparencies: part number 70X7240 for letter-size transparencies; part number 12A5010 for A4-size transparencies. -
Page 47: Card Stock
• Do not place anything on top of paper packages. Storing supplies Choose a cool, clean storage area for printer supplies. Store supplies right side up in their original packaging until needed. Do not expose supplies to: • Direct sunlight •... -
Page 48: Tips On Preventing Jams
Have any exposed adhesive when the flap is in the sealed position • Use only recommended paper. See the Card Stock & Label Guide available on our Lexmark Web site at www.lexmark.com/publications for more information about which paper provides optimum results for your printing environment. -
Page 49: Loading The 250-Sheet Tray
Loading the 250-sheet tray Follow these instructions to load paper in the 250-sheet tray. Remove the 250-sheet tray. maximum paper fill indicator Note: To load legal- or folio-size paper, extend the length of the tray. See Extending the tray for legal- or folio-size paper on page 52 for instructions. - Page 50 Adjust the rear paper guide for the print media size you will be loading. Note: There should be a slight gap between the rear paper guide and the paper stack. Insert the paper stack with the print side facing down. Note: Make sure the paper stack is laying flat in the tray and is not above the maximum paper fill indicators.
- Page 51 Adjust the side paper guides to fit lightly against the paper stack. Insert the 250-sheet paper tray.
-
Page 52: Extending The Tray For Legal- Or Folio-Size Paper
Extending the tray for legal- or folio-size paper To load legal- or folio-size paper, extend the tray. You may also attach a dust cover (if available on your printer model) on the back of the printer to protect the tray while it is extended. -
Page 53: Attaching The Dust Cover
The dust cover helps protect the tray from the environment. It also keeps the tray from being knocked out of position while it is extended. Attach the dust cover to the back of the printer by aligning the tabs on the cover to the holes on the printer, then snap the cover into place. -
Page 54: Loading The Manual Feeder
Loading the manual feeder The manual feeder is located at the front of the printer and can only feed one sheet of print media at a time. You can use the manual feeder to make quick runs of paper types or sizes that are not currently loaded in the tray. You must set the paper size before using the manual feeder. -
Page 55: Using The Rear Exit
To use the rear exit, open the rear exit door. When the rear exit door is open, all print media comes out the rear exit. When closed, all media is sent to the output bin on top of the printer. -
Page 56: Clearing Jams
Clearing jams When a paper jam occurs, the printer stops and the control panel Paper Jam Press and release Continue twice quickly to display the specific secondary error paper jam light sequence. See Secondary error codes on page 25 for more information. - Page 57 With the tray removed, press down on the green duplex flap to remove the jammed pages from the duplex area. Install the 250-sheet paper tray.
- Page 58 Open the front door, and remove the print cartridge assembly. Lift the green flap at the front of the printer, and remove the jammed pages from behind the flap. CAUTION:The fuser or fuser area may be hot.
- Page 59 Open the rear exit door, and remove the jammed pages. After you have cleared the jammed pages, reinstall the print cartridge assembly, and securely close all the printer doors. Press Continue to resume printing. Note: Jam recovery is set to Auto by default. When jam recovery is set to Auto, the memory that holds the image of a page may be reused after the page is printed but before it has successfully exited the printer if that memory is needed for another use.
-
Page 60: Chapter 5: Printing Tasks
Manually feeding a print job The manual feeder is located at the front of the printer and can only feed one sheet of print media at a time. For information on acceptable print media to use in the manual feeder, see What types of print media can be loaded? on page 41. - Page 61 Manually feeding a print job Adjust the paper guides to the print media width. Hold both sides of the print media close to the manual feeder, and push it into the printer until it automatically engages. There is a brief pause between the time the printer engages the print media and when it feeds into the printer.
-
Page 62: Printing On Both Sides Of The Paper (Duplex Printing)
Note: The duplex unit only supports certain sizes and types of print media. Only A4, letter, legal and folio size paper can be used for duplex printing. The printer does not support duplex printing on any other type of print media. - Page 63 To duplex a print job: From the computer software application, select File Click Properties (or Options, Printer, or Setup, depending on the application) to view the printer driver settings. From the Page Layout tab, select 2-sided printing. Select either Long Edge or Short Edge.
-
Page 64: Printing Multiple Page Images On One Page (N-Up Printing)
4-up means four page images are printed on one page, and so on. The printer uses the Multipage Order, Multipage View, and Multipage Border settings to determine the order and orientation of the page images, and whether a border is printed around each page image. -
Page 65: Printing A Booklet
Sheets per Bundle option to specify how many physical pages are put into one bundle. The printer will print the necessary number of bundles, which you can then bind into one booklet. Printing in bundles helps the outside edge of the pages line up more evenly. -
Page 66: Printing On Letterhead
Printed letterhead facedown Manual feeder Note: If you are using the manual feeder, first send the job to print, then load the letterhead when the printer displays the Load Manual Feeder light sequence (see Manually feeding a print job on page 60). -
Page 67: Using A Watermark
Click OK. Using a watermark From the computer software application, select File Click Properties (or Options, Printer, or Setup, depending on the application) to view the printer driver settings. Click the Other Options tab. Click Watermark. Select which pages receive the watermark. -
Page 68: Canceling A Job From A Macintosh Computer
Canceling a job from a Macintosh computer Canceling a print job from a computer running Mac OS 9 When you send a job to print, the printer icon for your selected printer appears on the desktop. Double-click the printer icon on your desktop. -
Page 69: Chapter 6: Installing Options
Installing options Accessing the system board To install memory, you must access the printer system board. CAUTION: Turn the printer off, and unplug the power cord from the wall outlet before continuing. Remove the 250-sheet tray. - Page 70 Press the button on the left side of the printer to release and lower the front door. Open the rear exit door.
- Page 71 Press the two detents on the front right side of the machine, and swing the side door back. Loosen the four screws on the cover, but do not remove them completely. Slide the cover to the left until the screws fit into the keyholes on the cover. Remove the cover and set it aside.
-
Page 72: Adding A Memory Card
Adding a memory card The system board has one connector for an optional memory card. The printer can support up to 64MB of additional memory (for a total of 80MB). CAUTION: If you are installing a memory card after setting up the printer, turn the printer off, and unplug the power cord from the wall outlet before continuing. -
Page 73: Installing An Optional 550-Sheet Drawer
Turn the printer off, and unplug the power cord from the wall outlet before continuing. Recognizing installed options The printer driver should automatically recognize the newly installed option when the printer is turned on. If it does not, you can add the appropriate option manually. -
Page 74: Chapter 7: Software Tasks
On the menu settings page: – Verify that the options you installed are correctly listed under “Installed Features.” If an option is not listed under Installed Features, turn off the printer, unplug the power cord from the wall outlet, and reinstall the option. –... -
Page 75: Using The Local Printer Settings Utility
The Local Printer Settings Utility lets you change printer settings not available from your printer driver (for example, activating Alarm Control if you want the printer to sound an alarm when it needs attention). To access the Local Printer Settings Utility from the computer software application, select Start Settings Utility. -
Page 76: Chapter 8: Supplies Information
Within the United States or Canada, you can order Lexmark supplies from any authorized Lexmark supplies dealer. To locate the dealer nearest you, call 1-800-539-6275. In other countries or regions, visit the Lexmark online store at www.lexmark.com, or contact the place where you bought your printer. -
Page 77: Storing Supplies
Storing supplies Choose a cool, clean storage area for your printer supplies. Store supplies right side up in their original packaging until you are ready to use them. Do not expose supplies to: • Direct sunlight • Temperatures above 35°C (95°F) •... -
Page 78: Knowing When You Need New Supplies
To ensure print quality and to avoid damage to the printer, the printer stops operating after the photoconductor has reached a maximum of 110% of its life. (See Replace photoconductor (printer hard stop) on page 9 for the light sequence associated with this stop.) The printer automatically notifies you before the photoconductor reaches this point. -
Page 79: Recognizing The Control Panel Light Sequences
(printer hard stop)* * If the control panel lights display this sequence, the printer will not print any more jobs until the photoconductor kit is replaced. Note: The control panel may also display other light sequences in conjunction with the “Toner low” and “Replace photoconductor”... -
Page 80: Changing The Toner Cartridge
Changing the toner cartridge Turn the printer off. Press the button on the left side of the printer to release and lower the front door. Remove the toner cartridge. Press the release button on the base of the print cartridge assembly. - Page 81 Note: You can use the packing material from the new toner cartridge to ship the old toner cartridge back to Lexmark for recycling. See Changing the photoconductor kit on page 82 for more information. Firmly shake the toner cartridge in all directions to distribute the toner.
-
Page 82: Changing The Photoconductor Kit
Extended light exposure can cause print quality problems. Turn the printer off. Remove the print cartridge assembly. Press the button on the left side of the printer to release the front door. Lower the front door. Grasp the toner cartridge handle, and pull up and out. - Page 83 Remove the toner cartridge: Press the button on the base of the print cartridge assembly. Grasp the toner cartridge handle, and pull up and out. Unpack the new photoconductor kit. nstall the toner cartridge into the new print cartridge assembly by aligning the white rollers on the toner cartridge with the white arrows on the tracks of the photoconductor and pushing the toner cartridge in as far as it will go.
-
Page 84: Print Your Printer Menu Settings Pages. See Printing The Menu Settings And Network Setup Pages On
Install the print cartridge assembly into the printer by aligning the green arrows on the guides of the print cartridge assembly with the green arrows on the tracks in the printer and pushing the print cartridge assembly in as far as it will go. -
Page 85: Chapter 9: Troubleshooting
If print remains faded, replace the toner cartridge. with the low cartridge? The printer seems to print This is normal. The printer sometimes prints at a slightly slower speed when feeding print slower when using the media from the manual feeder. -
Page 86: Selecting Printer Operating Mode
Turning on Reduced Curl mode If print media is curled once it exits the printer, Reduced Curl mode can be turned on to help alleviate the problem. However, before turning this mode on, you should try the possible solutions offered in Troubleshooting (see The paper is curled once it exits the printer.) -
Page 87: Print Quality Problems
ABCDE ABCDE ABCDE To replace the fuser, call a service technician. † This setting can be changed using the Local Printer Settings Utility. Cause • The printhead lens is dirty. • Either the toner cartridge or the fuser is defective. - Page 88 ABCDE ABCDE To replace the fuser, call a service technician. † This setting can be changed using the Local Printer Settings Utility. Cause • The Toner Darkness setting is too light or too dark. • Paper that does not meet the printer specifications is being used.
- Page 89 (Print is inappropriately slanted.) Blank pages To replace the fuser, call a service technician. † This setting can be changed using the Local Printer Settings Utility. Cause • The Form Type setting in the printer driver is set incorrectly. • Toner level is low in the toner cartridge.
- Page 90 Print media curls badly once it prints and exits to the output bin To replace the fuser, call a service technician. † This setting can be changed using the Local Printer Settings Utility. Cause • The toner cartridge is defective. • The printer requires servicing.
-
Page 91: Cleaning The Printhead Lens
Some print quality problems can be solved by cleaning the printhead lens. Turn the printer off. Press the button on the left side of the printer to release and lower the front door. Remove the print cartridge assembly by pulling on the toner cartridge handle. - Page 92 Install the print cartridge assembly into the printer by aligning the arrows on the guides of the print cartridge assembly with the arrows on the tracks in the printer and pushing the print cartridge assembly in as far as it will go.
-
Page 93: Notices
Federal Communications Commission (FCC) compliance information statement The Lexmark E250d and E250dn (4512-220 and 4512-230) have been tested and found to comply with the limits for a Class B digital device, pursuant to Part 15 of the FCC Rules. Operation is subject... - Page 94 Warning: Electrical surges can be very destructive to equipment connected to AC power sources. If you plan to operate your printer at a voltage exceeding the voltage range(s) in the following table, you must attach a suitably rated and certified power-regulating device (such as a voltage stabilizer or UPS device) to the printer power supply. Your warranty may not cover damages caused by power surges.
-
Page 95: Noise Emission Levels
Noise emission levels The following measurements were made in accordance with ISO 7779 and reported in conformance with ISO 9296. 1-meter average sound pressure, dBA Printing Idling Quiet Mode Sleep / Power Saver Mode Product energy consumption The following table documents the power consumption characteristics of the product Mode Description Ready... -
Page 96: Waste From Electrical And Electronic Equipment (Weee) Directive
This limited warranty applies to the United States and Canada. For customers outside the U.S., refer to the country-specific warranty information that came with your product. This limited warranty applies to this product only if it was originally purchased for your use, and not for resale, from Lexmark or a Lexmark Remarketer, referred to in this statement as “Remarketer.”... - Page 97 Your sole remedy under this limited warranty is set forth in this document. For any claim concerning performance or nonperformance of Lexmark or a Remarketer for this product under this limited warranty, you may recover actual damages up to the limit set forth in the following paragraph.
- Page 98 This limited warranty gives you specific legal rights. You may also have other rights that vary from state to state. Statement of Limited Warranty for Lexmark E250d and E250dn...
-
Page 99: Index
Parallel MAC Binary PS 39 Mode 2 39 NPA Mode 39 Protocol 39 printing the Printer Settings Configuration sheet 37 Setup Auto CR after LF 39 Auto LF after CR 39 MAC Binary PS 38, 40 NPA Mode 38, 40... - Page 100 16 loading 250-sheet tray 49 550-sheet drawer 49 letterhead 66 manual feeder 54 Local Printer Setup Utility 75 MAC Binary PS Parallel menu 39 USB menu 38, 40 maintaining the printer cleaning the printhead lens 91 manual duplex...
- Page 101 Paper jam in the 250-sheet tray 27 Paper jam in the manual feeder 26 Paper jams as a printed job exits the tray 26 Paper jams as it exits the tray into the printer 26 PPDS font error 31 Short paper 33...
Need help?
Do you have a question about the E 250d and is the answer not in the manual?
Questions and answers