Advertisement
Advertisement

Related Manuals for Lava Aire Aviator X2

Summary of Contents for Lava Aire Aviator X2
- Page 1 INSTRUCTIONS MANUAL ELECTRIC COMMERCIAL GRADE PATIO COOLER...
-
Page 2: Table Of Contents
Aviator X2 Page 2 of 15 @2012.11-V1.1 Contents Instruction................3 Ø Outline Drawing...............3 Ø Wiring Diagram..............4 Ø Installation Instructions............5-8 Ø Checking after Installation............8 Ø Trial Operation..............9-10 Ø Attentions ................11-12 Ø Common Malfunction Analysis and Maintenance....13-15 Ø PICTURES ARE ONLY FOR INFORMATION, TAKE MATERIAL OBJECT AS STANDARD... -
Page 3: Instruction
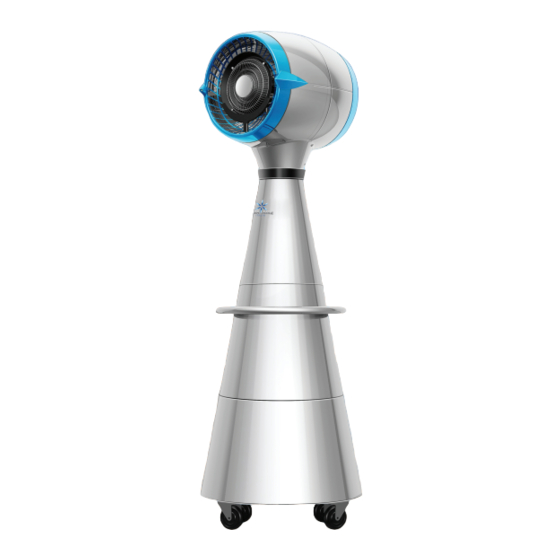
@2012.11-V1.1 ■Instruction Aviator X2 Misting Air Coolers adopt user-friendly design and appearance. The mist particles (diameter of 10-25 microns) emitted by misting device will take away the heat through evaporation, which travel to target area when the fan blows. In the effective area, it can decrease temperature by 3-8℃and help increase relative humidity, reduce... -
Page 4: Wiring Diagram
Aviator X2 Page 4 of 15 @2012.11-V1.1 ■ Wiring Diagram Aviator X2 Aviator X4... -
Page 5: Installation Instructions
Aviator X2 Page 5 of 15 @2012.11-V1.1 ■ Installation Instructions 1、 Wheels Installation Take out the Water Tank from the box, overturn it, and then fasten the 4 wheels on the corresponding position with 16 sets of M8X16 Hex Head Cap Screw, spring washer and flat washer. - Page 6 Aviator X2 Page 6 of 15 @2012.11-V1.1 fasten by sucks installed beneath the pump. Fasten the Level Sensor with the Nut into the corresponding trench. Make sure the floater is flapped down like the picture shows. 3、 Combine Main Part and Water Tank Lock the 4 wheels, and then place the Main Part on the Water Tank.
- Page 7 Aviator X2 Page 7 of 15 @2012.11-V1.1 Connect the blue outlet pipe to the quick coupling of the Mist Regulating Switch, and then tie up the orange return pipe and blue outlet pipe with ribbon. (see Picture 5) Picture 5 Connect the 2-core interface from the Submersible Pump and Level Sensor with the corresponding interface from the Electricity Box, and fasten the Nuts.
-
Page 8: Checking After Installation
Aviator X2 Page 8 of 15 @2012.11-V1.1 After ensuring all the cables are connected right, fasten TWO button positions to the fan body firstly, then fix the electric box with TWO 5x16 screws and flat washers (shown as picture 7). Installation completed. -
Page 9: Trial Operation
Aviator X2 Page 9 of 15 @2012.11-V1.1 n Trial Operation After installation, fill the water tank with water to the depth of 20 cm. Then you can try to operate it. Manual Adding Water: Insert a hose to the tank through the hole (as shown). DON’T go away while adding water. - Page 10 Aviator X2 Page 10 of 15 @2012.11-V1.1 Electric Control Box: Misting Switch Swaying Switch Blowing Switch Way of trial operation: Power on, switch to the Speed 1. The product would begin blowing. Observe whether the fan blows normally, by switching the speed 1 / 2 / 3.
-
Page 11: Attentions
Aviator X2 Page 11 of 15 @2012.11-V1.1 ■ Attentions: Please carefully read the following items: Caution:The product MUST be connected to the power with leakage protection device. ¨ Make sure firmly plugged ¨ Be sure not to take off the plug ¨... - Page 12 Aviator X2 Page 12 of 15 @2012.11-V1.1 ■ Attentions Caution:The product MUST be connected to the power with leakage protection device. Earthing: Make sure the Power off the product if you Please keep the product more ◆ ◆ ◆ earthing wire is connected to don’t use for a long time.
-
Page 13: Common Malfunction Analysis And Maintenance
Aviator X2 Page 13 of 15 @2012.11-V1.1 ■ Common Malfunction Analysis and Maintenance Common Malfunction Analysis Warning: Wrong operation and maintenance will cause electric shock or a fire. Please contact the agent or dealer to repair the product by professionals. It can save your time and expense to check the following before calling service. - Page 14 Aviator X2 Page 14 of 15 @2012.11-V1.1 ~ There is abnormal noise when the device is running ~There is smoke or unpleasant smell Stop it and disconnect the ~There is water leakage power plug ~Leakage protector is tripping ~ Power cord is abnormally hot and become abnormally soft.
- Page 15 Aviator X2 Page 15 of 15 @2012.11-V1.1 Thoroughly Cleaning ( Suitable for cleaning after 60 hours’ operation) ² Take the main body apart with the water tank. 1.1 Loosen the 4 butterfly screws on the plate inside the tank (Refer to the Installation Instruction—Step 3 / Picture 4) 1.2 Take the main body apart with the water tank;...
- Page 16 • Requires Technical Support • Requires Parts • Or If You Have A Sales Question Or You Would Like To Offer Product Feedback Please contact the manufacturer: LAVA AIRE ITALIA 888.779.5282 or CS@LAVAAIRE.COM DO NOT RETURN PRODUCT TO RETAILER! LAVA AIRE ITALIA Toll free No.: 1.888.779.LAVA 1.888.779.5282...
- Page 17 Lava Aire was originally founded by lead designer and chief engi- neer, Mr. JR Zioni in Modena, Italy in 1997. Today Lava Aire Italia has expanded to the USA and o ers well over 100 innovative heating, cooling and home appliance products worldwide.