Subscribe to Our Youtube Channel
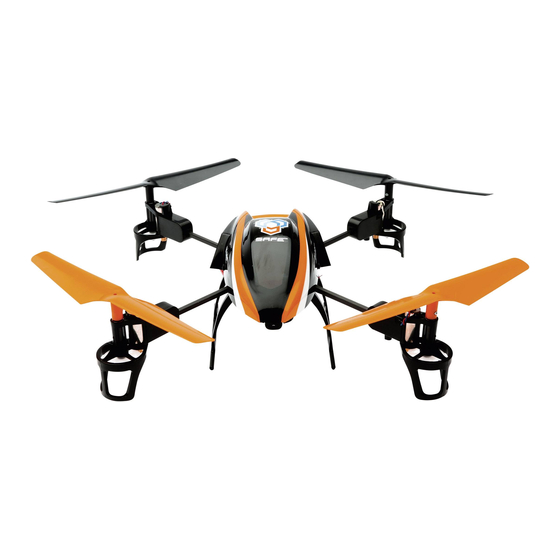
Summary of Contents for Blade 180 QX HD
- Page 1 Instruction Manual Bedienungsanleitung Manuel d’utilisation Manuale di Istruzioni READY-TO-FLY...
- Page 2 NOTICE All instructions, warranties and other collateral documents are subject to change at the sole discretion of Horizon Hobby, Inc. For up-to-date product literature, visit horizonhobby.com and click on the support tab for this product. Meaning of Special Language The following terms are used throughout the product literature to indicate various levels of potential harm when operating this product: NOTICE: Procedures, which if not properly followed, create a possibility of physical property damage AND a little or no possibility of injury.
-
Page 3: Table Of Contents
Table of Contents First Flight Preparation .............4 Flying the 180 QX HD .............13 Flying Checklist ...............4 Post-Flight Inspection and Maintenance Checklist ..13 Charging Warnings............4 Operating the Camera ...........13 Installing the Landing Gear ..........5 Troubleshooting Guide ...........15 Installing the Transmitter Batteries (RTF) ......5 Exploded View ...............16... -
Page 4: First Flight Preparation
First Flight Preparation Flying Checklist • Remove and inspect contents ❏ Always turn the transmitter on fi rst • Begin charging the fl ight battery ❏ Plug the fl ight battery into the lead from the 5-in-1 • Install the fl ight battery in the quadcopter control unit (once it has been fully charged) ❏... -
Page 5: Installing The Landing Gear
Installing the Landing Gear Install the landing gear using the four included screws. Installing the Transmitter Batteries (RTF) Replace the transmitter batteries when the power LED fl ashes and the transmitter beeps. Installing the Flight Battery 1. Lower the throttle and throttle trim to the lowest settings. 2. -
Page 6: Transmitter And Receiver Binding
Transmitter and Receiver Binding To bind or re-bind your quadcopter to your chosen transmitter, please follow the directions below. General Binding Procedure 1. Disconnect the fl ight battery from the quadcopter. 2. Select a clean model memory on your transmitter (computer radios only). 3. -
Page 7: Safe Technology
Technology ™ Revolutionary SAFE™ (Sensor Assisted Flight Envelope) technology uses an innovative combination of multi-axis sensors and software that allows model aircraft to know its position relative to the horizon. This spatial awareness is utilized to create a controlled fl ight envelope the aircraft can use to maintain a safe region of bank and pitch angles so you can fl y more safely. Far beyond stability, this level of protection offers multiple modes so the pilot can choose to develop his or her skills with a greater degree of security and fl... -
Page 8: Flight Mode And Rate Selection (Rtf)
• In high-rate mode, the controls can reach their maximum values. If you purchased a BNF 180 QX HD, the channel 5 switch on your transmitter will select fl ight modes. When the LED on the control board is solid blue, the fl ight mode is set to stability low angle mode. When the LED is slowly blinking blue, the quadcopter is in stability high angle mode. -
Page 9: Transmitter Setup Table
Transmitter Setup Table... -
Page 12: Led Codes
Solid Hi Rate Understanding the Primary Flight Controls If you are not familiar with the controls of your 180 QX HD, take a few minutes to familiarize yourself with them before attempting your fi rst fl ight. Throttle Left Side View... -
Page 13: Flying The 180 Qx Hd
Flying the 180 QX HD Takeoff Increase the throttle until the model is approximately 2 ft. (600mm) off the ground and check the trim so the model fl ies as desired. Once the trim is adjusted, begin fl ying the model. - Page 14 Installation 1. Install the included hook and loop tape on the bottom of the camera, as shown. 2. Install the camera on the model using the included hook and loop strap. 3. Connect the servo lead from the main board to the camera servo lead port.
-
Page 15: Troubleshooting Guide
Troubleshooting Guide Problem Possible Cause Solution Aircraft not initialized on a level sur- Disconnect the fl ight battery, center the Quadcopter control response face. control trim and re-initialize the quadcopter. is inconsistent or requires extra trim to neutralize move- Battery not correctly placed in Adjust battery position so quadcopter bal- ment. -
Page 16: Exploded View
Part # Description Propellers, CW & CCW Rotation, White (2): DX5e DSMX 5-Channel Transmitter Only BLH7407 180 QX HD, mQX, 1 Propeller, White (CW), DX6i DSMX 6-Channel Transmitter Only 1 Propeller, White (CCW), 2 Screws DX7 DSMX 7-Channel Transmitter Only EFLC3025/... -
Page 17: Limited Warranty
Limited Warranty What this Warranty Covers questions and service you in the event that you may need any assistance. For questions or assistance, please visit our website Horizon Hobby, Inc., (Horizon) warrants to the original purchaser at www.horizonhobby.com, submit a Product Support Inquiry, or that the product purchased (the "Product") will be free from call the toll free telephone number referenced in the Warranty defects in materials and workmanship at the date of purchase. -
Page 18: Warranty And Service Contact Information
Warranty and Service Contact Information Country of Horizon Hobby Contact Information Address Purchase Horizon Service Center servicecenter.horizonhobby. (Repairs and Repair Requests) com/RequestForm/ www.quickbase.com/db/ Horizon Product Support United States of 4105 Fieldstone Rd bghj7ey8c?a=GenNewRecord (Product Technical Assistance) America Champaign, Illinois, 61822 USA 888-959-2304 sales@horizonhobby.com Sales... -
Page 19: Compliance Information For The European Union
Declaration of Conformity (in accordance with ISO/IEC 17050-1) (in accordance with ISO/IEC 17050-1) No. HH2013091401 No. HH2013091202 Product(s): 180 QX HD BNF Product(s): 180 QX HD RTF Item Number(s): BLH7400, BLH7400M1 Item Number(s): BLH7480 Equipment class: 1 Equipment class: 1...


Need help?
Do you have a question about the 180 QX HD and is the answer not in the manual?
Questions and answers