Table of Contents
Advertisement
Quick Links
Advertisement
Table of Contents

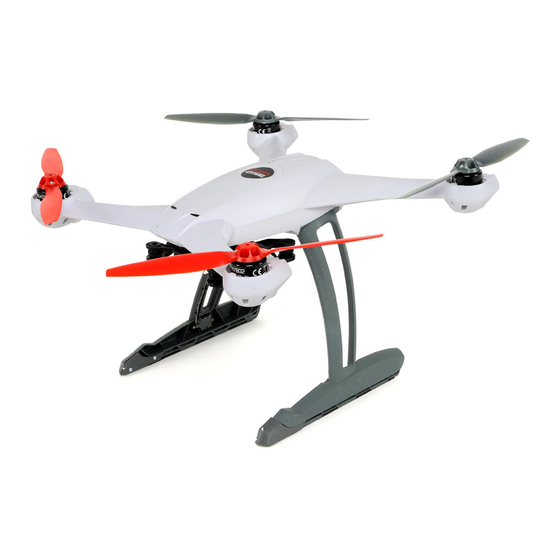
Summary of Contents for Blade Blade 350 QX2 AP Combo
- Page 1 ® Instruction Manual...
- Page 2 NOTICE All instructions, warranties and other collateral documents are subject to change at the sole discretion of Horizon Hobby, LLC. For up-to-date product literature, visit horizonhobby.com and click on the support tab for this product. Meaning of Special Language The following terms are used throughout the product literature to indicate various levels of potential harm when operating this product: NOTICE: Procedures, which if not properly followed, create a possibility of physical property damage AND a little or no possibility of injury.
-
Page 3: Table Of Contents
® ® Table of Contents Box Contents ......................4 GPS Functionality of the 350 QX2 AP ..............11 Charging Warnings....................4 Flight Guidelines and Warnings .................11 Low Voltage Cutoff (LVC) ..................4 Preparing the 350 QX2 AP for Flight ..............12 Charging the Flight Battery .................5 Flying the 350 QX2 AP ..................12 Installing the Gimbal ...................5 Airframe Maintenance..................14... -
Page 4: Box Contents
Box Contents • Blade 350 QX2 AP • GB200 2-Axis Brushless Gimbal • 3000mAh 3S 11.1V 20C Li-Po Battery • 3S DC Li-Po Balancing Charger with 5A AC Power Supply • Spektrum DX4 DSMX 4-Channel Transmitter • 4 AA Batteries •... -
Page 5: Charging The Flight Battery
Charging the Flight Battery Charger Specifi cations • Input Voltage: 10.5–15V DC • Charge Current: 3.5A The Battery Charging Process 1. Connect the AC power supply to the charger. 2. Connect the AC power supply to an AC power source. The green LED blinks. -
Page 6: Attaching The Cell Phone Mount
Attaching the Cell Phone Mount * The cell phone mount included with the product may differ from the mount shown. Transmitter Control Layout Mode Switch Return Home Switch 0 - Smart Mode 1 - AP Mode 2 - Stability Mode Bind Button/ Motor Stop Rudder/Yaw... -
Page 7: Binding
Binding The transmitter is bound to the model at the factory. If Entering Bind Mode for any reason the model needs to be re-bound, follow the directions below. The Binding Process Bind button 1. With the transmitter and quadcopter powered off, connect the battery to the 350 QX2 AP. -
Page 8: Flight Mode Switches
Flight Mode Switches GPS Enabled Functions Smart Mode (Solid Green LED on the 350 QX2 AP) Return Home AP Mode (Rapid Red fl ashing LED (Solid Purple LED on the 350 QX2 AP) on the 350 QX2 AP) Stability Mode (Solid Blue LED on the 350 QX2 AP) Flight Modes Explained Stick Relativity... -
Page 9: Audible Alerts And Led Codes
Audible Alerts and LED Codes Audible Alerts The motors will beep under the following conditions: • Any time the props stop spinning after they have Event Audible Alert been initialized. ESC power on one short beep • After 30 seconds of no throttle input (waiting armed on the ground). - Page 10 Flying LED Codes Sequence Smart Mode, with GPS lock Solid green Smart Mode, no GPS lock 3 green fl ashes, pause Stability Mode, with pressure Slow green fl ash AP Mode, with GPS lock Solid purple AP Mode, no GPS lock 3 purple fl...
-
Page 11: Gps Functionality Of The 350 Qx2 Ap
GPS Functionality of the 350 QX2 AP To acquire a reliable GPS signal, it is important the 350 QX2 AP has a clear view With GPS OFF of the sky. Obstructions that can affect the aircraft’s ability to acquire an accept- •... -
Page 12: Preparing The 350 Qx2 Ap For Flight
Preparing the 350 QX2 AP For Flight 1. Power on the transmitter with the fl ight mode set to Smart Mode Flying Front Smart Mode and the throttle stick down. 2. Install a charged battery, plug it in and close the hatch. 350 QX2 AP home location 3. - Page 13 Landing To land the 350 QX2 AP there are two options: • Guide the aircraft to where you wish to land and re- duce the throttle. Hold the bind button for 1 second after landing to disarm the motors. • Activate the Return Home function to return the 350 QX2 AP to the assigned home location and land automatically.
-
Page 14: Airframe Maintenance
Airframe Maintenance Replacing the body Body Screw Disassembly of the old airframe Locations 1. Ensure the battery is disconnected from the quadcopter. 2. Remove the 2 machine screws from each propeller and remove the propellers. 3. Remove the 32 1.5mm hex screws from the bottom of the frame to separate the upper and lower body pieces. -
Page 15: Compass Calibration
Compass Calibration The Flight Controller on the 350 QX2 AP has automatic magnetic declination calibra- 6. Continue facing north and yaw the quad 45 degrees left so the quad is now tion, so you will not have to worry about looking up the magnetic declination at your facing north-west. -
Page 16: Esc And Motor Assignment Procedure
ESC and Motor Assignment Procedure 1. Begin with the transmitter off and connect a fl ight Motor Numbers battery to the 350 QX2 AP. 2. Power on the quadcopter on a level surface and wait for the rapid blue fl ashing LED to indicate the aircraft Motor number 1 Motor number 2 has entered bind mode. - Page 18 ©2014 Horizon Hobby, LLC. Blade, SAFE, SAFE Circle, the SAFE logo, Bind-N-Fly, the BNF logo, E-fl ite, Celectra, DSM, DSM2, DSMX, and the Horizon Hobby logo are trademarks or registered trademarks of Horizon Hobby, LLC. The Spektrum trademark is used with permission of Bachmann Industries, Inc. US 7,391,320.


Need help?
Do you have a question about the Blade 350 QX2 AP Combo and is the answer not in the manual?
Questions and answers