
Related Manuals for Blade Blade 180QX HD


Summary of Contents for Blade Blade 180QX HD
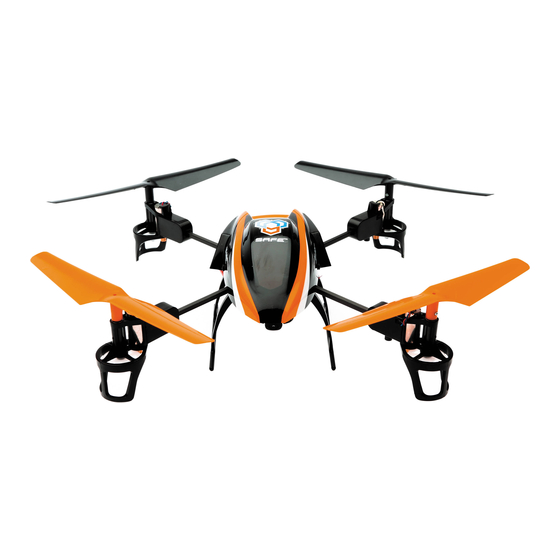
- Page 1 Instruction Manual Bedienungsanleitung Manuel d’utilisation Manuale di Istruzioni READY-TO-FLY...
-
Page 2: Safety Precautions And Warnings
NOTICE All instructions, warranties and other collateral documents are subject to change at the sole discretion of Horizon Hobby, LLC. For up-to-date product literature, visit horizonhobby.com and click on the support tab for this product. Meaning of Special Language The following terms are used throughout the product literature to indicate various levels of potential harm when operating this product: NOTICE: Procedures, which if not properly followed, create a possibility of physical property damage AND a little or no possibility of injury. -
Page 3: Table Of Contents
Table of Contents First Flight Preparation .............4 Flying the 180 QX HD .............13 Flying Checklist ...............4 Post-Flight Inspection and Maintenance Checklist ..13 Charging Warnings............4 Operating the Camera ...........13 Installing the Landing Gear ..........5 Flight Mode Calibration ..........14 Installing the Transmitter Batteries (RTF) ......5 Troubleshooting Guide ...........15 Installing the Flight Battery ..........5 Exploded View ...............16... -
Page 4: First Flight Preparation
First Flight Preparation Flying Checklist • Remove and inspect contents ❏ Always turn the transmitter on fi rst • Begin charging the fl ight battery ❏ Plug the fl ight battery into the lead from the 5-in-1 • Install the fl ight battery in the quadcopter control unit (once it has been fully charged) ❏... -
Page 5: Installing The Landing Gear
Installing the Landing Gear Install the landing gear using the four included screws. Installing the Transmitter Batteries (RTF) Replace the transmitter batteries when the power LED fl ashes and the transmitter beeps. Installing the Flight Battery 1. Lower the throttle to the lowest setting. 2. -
Page 6: Binding Procedure
Transmitter and Receiver Binding To bind or re-bind your quadcopter to your chosen transmitter, please follow the directions below. General Binding Procedure 1. Disconnect the fl ight battery from the quadcopter. 2. Select a clean model memory on your transmitter (computer radios only). 3. -
Page 7: Safe Technology
Technology ™ Revolutionary SAFE™ (Sensor Assisted Flight Envelope) technology uses an innovative combination of multi-axis sensors and software that allows model aircraft to know its position relative to the horizon. This spatial awareness is utilized to create a controlled fl ight envelope the aircraft can use to maintain a safe region of bank and pitch angles so you can fl y more safely. Far beyond stability, this level of protection offers multiple modes so the pilot can choose to develop his or her skills with a greater degree of security and fl... -
Page 8: Flight Mode And Rate Selection
Flight Mode and Rate Selection Change fl ight modes by moving the three-position fl ight mode switch. Ensure the fl ight mode switch is in the desired position before fl ying. • In stability low angle mode (switch position 0), the controls provide a minimum bank angle. -
Page 9: Transmitter Setup Table
Transmitter Setup Table... -
Page 12: Led Codes
LED Codes Equipment LED Color LED Status Operation Rapid Blink Bind Mode Blue Solid Stability Mode low angle Slow Blink Stability Mode high angle Quadcopter Solid Agility Mode Solid Low Battery Red and Blue Blink Loss of RF/TX Off Blink Low Rate RTF Transmitter Solid... -
Page 13: Flying The 180 Qx Hd
Flying the 180 QX HD Takeoff Increase the throttle until the model is approximately 2 ft. (600mm) off the ground and check the trim so the model fl ies as desired. Once the trim is adjusted, begin fl ying the model. Typical fl... -
Page 14: Flight Mode Calibration
Installation 1. Install the included hook and loop tape on the bottom of the camera, as shown. 2. Install the camera on the model using the included hook and loop strap. 3. Connect the servo lead from the main board to the camera servo lead port. -
Page 15: Stability Mode Calibration
Stability Mode Calibration 1. Ensure all trims are centered. 2. Power on the transmitter and move the throttle stick to full throttle. 3. Ensure the transmitter is in Stability High or Low Angle Mode. 4. Hold full up elevator. 5. Connect the fully charged fl ight battery in the quadcopter. 6. -
Page 16: Exploded View
Problem Possible Cause Solution Less than a 5-second wait between fi rst Leave the transmitter powered on. Discon- powering on the transmitter and connect- nect and reconnect the fl ight battery to the ing the fl ight battery to the quadcopter. quadcopter. -
Page 17: Optional Parts
Product, (iv) attempted service by anyone other warranty support or service. Once assembly, setup or use of the than a Horizon Hobby authorized service center, (v) Product not Product has been started, you must contact your local distributor purchased from an authorized Horizon dealer, or (vi) Product not or Horizon directly. -
Page 18: Warranty And Service Contact Information
Horizon Hobby Limited +44 (0) 1279 641 097 Kingdom Horizon Technischer Service service@horizonhobby.de Christian-Junge-Straße 1 Germany 25337 Elmshorn, Germany Sales: Horizon Hobby GmbH +49 (0) 4121 2655 100 infofrance@horizonhobby.com Service/Parts/Sales: 11 Rue Georges Charpak France Horizon Hobby SAS 77127 Lieusaint, France +33 (0) 1 60 18 34 90 info@horizonhobby.com.cn... -
Page 19: Compliance Information For The European Union
EN55022:2010 + AC:2011 EN55024:2010 EN55024:2010 Signed for and on behalf of: Signed for and on behalf of: Robert Peak Horizon Hobby, LLC Horizon Hobby, LLC Robert Peak Chief Financial Offi cer Champaign, IL USA Champaign, IL USA Chief Financial Offi cer... - Page 20 Blade, E-fl ite, Celectra, SAFE, DSM, DSM2, DSMX, the BNF logo, ModelMatch and the Horizon Hobby logo are trademarks or registered trademarks of Horizon Hobby, LLC. The Spektrum trademark is used with permission of Bachmann Industries, Inc. Futaba is a registered trademark of Futaba Denshi Kogyo Kabushiki Kaisha Corporation of Japan.
Need help?
Do you have a question about the Blade 180QX HD and is the answer not in the manual?
Questions and answers