Table of Contents
Advertisement
Quick Links
802.11b/g/n Wireless Access Point
Use the XAP-1010 to:
Provide an Unobtrusive Wireless Network that Eliminates
Unsightly Cables or Equipment
AP
Deliver "Whole Home" or Offi ce 802.11n Wi-Fi Coverage With a
Single Access Point
Increase Mobile Client Device Network Sensitivity and
Performance
Simplify Installation While Minimizing Setup Time and Expense
Eliminate Client Device Roaming Issues
luxul.com
Simply Connected
User Guide
Luxul Flush Mount
XAP-1010
Advertisement
Table of Contents

Related Manuals for Luxul XAP-1010


Summary of Contents for Luxul XAP-1010
-
Page 1: User Guide
Simply Connected User Guide XAP-1010 Luxul Flush Mount 802.11b/g/n Wireless Access Point Use the XAP-1010 to: Provide an Unobtrusive Wireless Network that Eliminates Unsightly Cables or Equipment Deliver “Whole Home” or Offi ce 802.11n Wi-Fi Coverage With a ... -
Page 2: Document Conventions
(1) this device may not cause harmful interference, and (2) this device must accept any interference received, including interference that may cause undesired operation. © Copyright 2014 Luxul. All rights reserved. Trademarks & Registered Trademarks are property of respective holders. -
Page 3: Table Of Contents
User Guide CONTENTS 1 INTRODUCTION 1.1 Warnings 1.2 Site Preparation 2 XAP-1010 SPECIFICATIONS 3 GETTING STARTED 3.1 System Requirements 3.2 Package Contents 3.3 Safety Information 4 HARDWARE FEATURES AND INSTALLATION 4.1 Front View 4.2 Rear View 4.3 Environmental Requirements 4.4 Hardware Installation 5 CONFIGURATION 5.1 Login... -
Page 4: Introduction
Install inside Wall or Ceiling Paintable Cover Plate Unobtrusively Blends Into the Room Décor Enabled for Maximum Compatibility and Performance with Other Luxul Products © Copyright 2014 Luxul. All rights reserved. Trademarks & Registered Trademarks are property of respective holders. -
Page 5: Warnings
1.1 Warnings Read all installation instructions and site survey reports, and verify correct equip- ment installation before connecting the XAP-1010 to its power source. Remove jewelry and watches before installing this equipment. Verify that the unit is grounded before connecting it to the power source. -
Page 6: Xap-1010 Specifications
WPA-PSK/WPA2-PSK Auto (TKIP&AES) Web Based Firmware Upgrade QoS: Wireless Multi-Media (WMM) Extensions Certifi cations FCC Part 15, Class B © Copyright 2014 Luxul. All rights reserved. Trademarks & Registered Trademarks are property of respective holders. -
Page 7: Getting Started
AC Power Socket (100 – 240 V, 50/60 Hz) Internet Connection to View Documentation Online 3.2 Package Contents XAP-1010 Wireless Access Point Paintable Faceplate and Mounting Screws 2 Gang Remodel Electrical Box POE Injector and Power Adapter ... -
Page 8: Safety Information
Typically this would be in a top fl oor ceiling pointed downwards in a multi-story installation; or for single level or two level © Copyright 2014 Luxul. All rights reserved. Trademarks & Registered Trademarks are property of respective holders. -
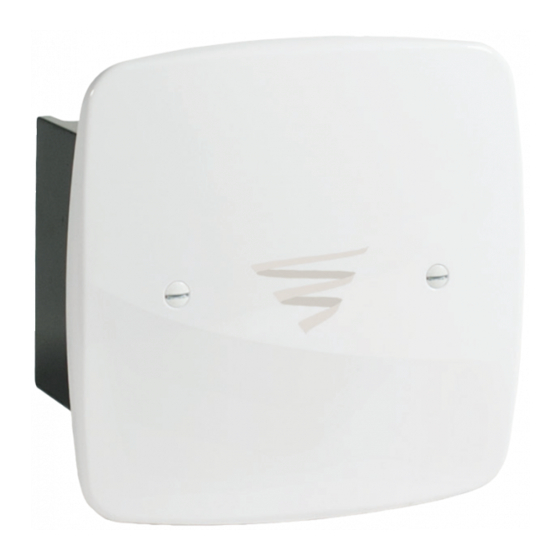
Page 9: Front View
XAP-1010 Front View Status Indicators: The XAP-1010 has four LEDs, positioned vertically on the right side of the front of the access point. When viewed from top to bottom, LEDs are as follows: 1) Bridge Mode (Green); 2) WLAN Status (Blue); 3) LAN Link/Activity (Amber); and 4) Power... -
Page 10: Rear View
No power, check power connections At startup, the Green Power LED will stay on while the amber LAN Link light fl ashes. The blue LED will come on once the XAP-1010 wireless radio is active. 4.2 Rear View The rear of the XAP-1010 provides one RJ-45 connection that is used to deliver both power and data to the access point. -
Page 11: Reset Button
To Restore the Default Settings: With the XAP-1010 powered on, press and hold the Reset button for 15 seconds. When all the LEDs except the power LED turn off, release the reset button. The power LED will stay solid. The XAP-1010 will be set to factory defaults. -
Page 12: Environmental Requirements
fl oor ceiling pointed downwards. © Copyright 2014 Luxul. All rights reserved. Trademarks & Registered Trademarks are property of respective holders. - Page 13 4.4.2 Mounting the Access Point within a Wall or Ceiling The XAP-1010 is designed to be installed within a standard 2 gang electrical box. A remodel box is included with this kit. If you choose to use your own electrical box, be sure it is UL listed and provides suffi...
-
Page 14: Applying Power
4.4.4 Connecting to the Internet Source The Luxul device is not a router and in most installations will be connected to a Router or Switch in order to deliver Internet access. To do so, connect the POE injector (or switch) to the desired Internet source using another Ethernet cable. -
Page 15: Configuration
LAN Link light fl ashes, indicating Ethernet activity. Once the WLAN LED is solid blue the XAP-1010 is ready to receive connections from wireless devices. The Green LED at the top of the stack will only be on if the access point is set to function in bridge mode. -
Page 16: Quick Setup
Quick Setup: For most installations, it is expected that the Quick Setup page will be suffi cient to optimally confi gure and deploy the XAP-1010 Wi-Fi network. The Quick Setup page consists of the following: © Copyright 2014 Luxul. All rights reserved. Trademarks & Registered Trademarks are property of respective holders. - Page 17 IP Address: An IP address is a numerical label assigned to each device on the network. This fi eld shows the IP address that is assigned to the XAP-1010. To ensure plug and play capability with other Luxul networking products, the IP Address is automatically defaulted to 192.168.0.10.
- Page 18 The available options for the selected mode will then appear. AFTER all © Copyright 2014 Luxul. All rights reserved. Trademarks & Registered Trademarks are property of respective holders. options are complete, click Save, and then Reboot for the change to take effect.
-
Page 19: Wireless
User Guide Encryption: This fi eld sets the type of encryption to be used by the Security Mode. The encryption options are dependent upon the Security Mode selected and this fi eld only shows while in WPA mode. For WEP and WPA2, and WPA/ WPA2 Personal, encryption is automatically set to 128 bits, AES, and TKIP &... - Page 20 The default (and recommended) setting is 20 MHz to provide maximum perfor- mance to all client devices and to avoid any potential client issues. © Copyright 2014 Luxul. All rights reserved. Trademarks & Registered Trademarks are property of respective holders.
- Page 21 User Guide Channel: This fi eld allows the user to set which 2.4GHz channel to use. The default is set to Channel 6 and is the recommended setting due to the Access Point being optimized to run on Channel 6. However, any other channel (1-11) may be selected.
-
Page 22: Bridge Setup
NOTE: If no Network Name (SSID) is specifi ed, the profi le is not active. 5.4 Bridge Setup 5.4.1 Client Mode Client: Connects to an existing wireless network as a client device © Copyright 2014 Luxul. All rights reserved. Trademarks & Registered Trademarks are property of respective holders. - Page 23 When setting the AP in Client Mode you will enter the Name (SSID) of the Network it will connect to, the Security Mode that Network uses and the Passphrase needed to connect. Then simply click Save and Reboot to apply the changes, the Luxul AP will now connect as a client device.
- Page 24 Bridge Clients will be able to connect. 5.4.3 Bridge Mode with Client Access Client device access when running in Bridge Mode: © Copyright 2014 Luxul. All rights reserved. Trademarks & Registered Trademarks are property of respective holders.
-
Page 25: Administration
User Guide To allow devices to connect to any Luxul AP in Bridge Mode we recommend setting a second SSID to allow client devices to connect. In the AP’ s management page select Wireless >> Settings, then select SSID 2 and confi gure the Client network. -
Page 26: Firmware Upgrade
1. Go to the Luxul website and download the new version of fi rmware 2. Click Browse to locate the fi rmware fi le on your computer 3. Click Upgrade to perform the update © Copyright 2014 Luxul. All rights reserved. Trademarks & Registered Trademarks are property of respective holders. -
Page 27: Factory Defaults
5.5.2 Factory Defaults Factory Defaults: Use this page to return the XAP-1010 to the original default set- tings. Please note that using this feature will reset ALL values and custom changes or settings that have been made to default settings. -
Page 28: Qos
WMM will be given top priority. There are 4 priority levels, from highest to lowest: 1. Voice 2. Video 3. Background 4. Best Effort 5.7 Status 5.7.1 Basic Status © Copyright 2014 Luxul. All rights reserved. Trademarks & Registered Trademarks are property of respective holders. - Page 29 User Guide Basic Status: This page displays basic setup information of the confi guration and status of the AP including: Firmware Version, Hardware Model, Uptime, Connection Type, IP Address, Subnet Mask, Default Gateway, LAN MAC Address, Wireless Mode, Wireless MAC Address, Network Name (SSID), Channel Width, Channel, and type of Security 5.7.2 Connected Clients Connected Clients: This page displays the MAC Address, Speed and Signal...
-
Page 30: Regulatory Compliance
The end user must avoid any extended human RF exposure directly in front of the device, up to a distance of 20cm, when unit is on. © Copyright 2014 Luxul. All rights reserved. Trademarks & Registered Trademarks are property of respective holders. -
Page 31: Radio Frequency Interference Requirements-Fcc
User Guide When servicing the equipment and selecting a location for the antennas, it is im- portant to note that a minimum distance of 20cm is required between personnel and the device or antenna to comply with the radio frequency exposure limit. The antenna used for this transmitter must be installed to provide a separation ... -
Page 32: Radio Transmitters (Part 15)
Cet appareil numérique de la classe B est conforme à la norme NMB-003 du Canada. Information on this document supersedes all previous versions. Products and documents subject to change without notice. Products may be discontinued without notice. LUX-UG-XAP-1010 a: 14203 Minuteman Drive, Suite 201, Draper, UT 84020-1685 073141101 p: 801-822-5450...
Need help?
Do you have a question about the XAP-1010 and is the answer not in the manual?
Questions and answers