
Subscribe to Our Youtube Channel
Related Manuals for ATV VLBTIR


Summary of Contents for ATV VLBTIR
- Page 1 VLBTIR Waterproof Infrared Illumination Camera Instruction Manual VER.:1.0, NO.: R040057A...
- Page 2 Thank you very much for purchasing our product. Before operating this product, please read this instruction manual carefully to ensure proper use. 1. Safety Precautious CAUTION RISK OF ELECTRIC SHOCK. DO NOT OPEN! CAUTION : TO REDUCE THE RISK OF ELECTRICAL SHOCK, DO NOT OPEN COVERS. NO USER SERVICEABLE PARTS INSIDE.
- Page 3 3. Feature Built-in high quality CCD camera and high performance infrared illuminator module. Total pixels of sensor: NTSC=380K / PAL=440K pixels. High sensitivity, low smear, excellent anti-blooming, and high S/N ratio. Supports functions: Auto Electronic Shutter (AES), Auto Gain Control (AGC), Auto White Balance (AWB), Back Light Compensation (BLC), and Flickless mode (FL).
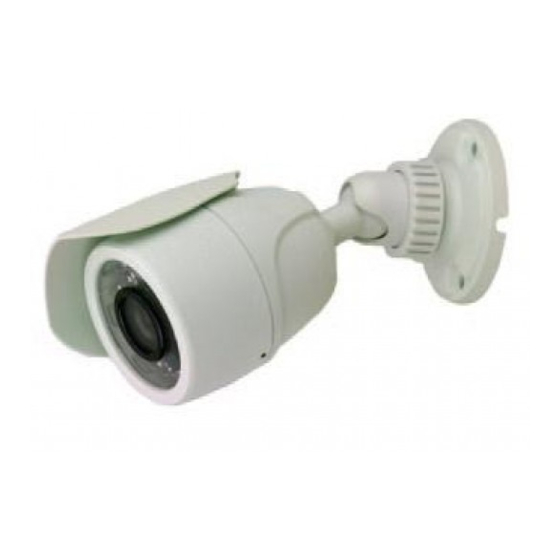
- Page 4 5. Installation & Operation 1. Inst all Preparation Drill holes on wall if wires need to go through the wall. 2. Inst all Camera Use the 3 screws provided to attach the camera and bracket to the ceiling, surface or wall.
- Page 5 3. Adjust 3-Axis Bracket Adjust the bracket while checking the view angle from the monitor. Loosen the bracket lock knob by turning counterclockwise, after adjusting the 3-Axis bracket (X-Y-Z Axis) to get the desired viewing angle, tighten the lock knob by turning it clockwise. 4.
-
Page 6: Specifications
6. SPECIFICATIONS According to the camera purchased, select and refer to the appropriate specification below: Color Camera 1/3” Hi-Res. 1/3” Ultra Hi- Res. 1/3” Color CCD 1/3” Hi- Res. 1/4” Color CCD Image Device Color CCD Color CCD (Sony Chipset) (Sony Chipset) (Sony Chipset) (Sony Chipset) - Page 7 B/W Camera 1/3” B/W CCD 1/3” Hi-Res. B/W CCD Image Device 1/3” B/W CCD (Sony Chipset) (Sony Chipset) EIA: 510X492 EIA: 768x494 EIA: 510X492 Picture Elements CCIR: 500x582 CCIR: 752x582 CCIR: 500x582 Resolution 420 TVL 600 TVL 400 TVL 0.01Lux/ F2.0 (Day) 0.02Lux/ F2.0 (Day) 0.03Lux/ F2.0 (Day) Min Illumination...
Need help?
Do you have a question about the VLBTIR and is the answer not in the manual?
Questions and answers