ACTi D71 Hardware Manual
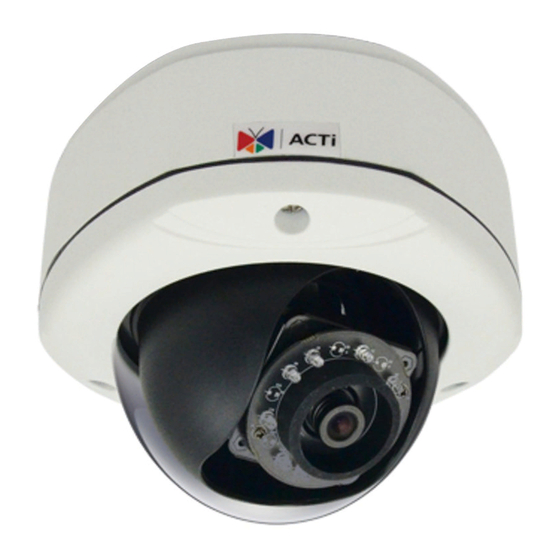
4” outdoor dome series
Hide thumbs
Also See for D71:
- Hardware manual (36 pages) ,
- Manual manual (36 pages) ,
- User manual (23 pages)

Subscribe to Our Youtube Channel
Related Manuals for ACTi D71


Summary of Contents for ACTi D71
- Page 1 Encoder Firmware V4.06.09 User’s Manual 4” Outdoor Dome Series Hardware Manual D71, D72, D81, D82, E71, E72, E73, E74, E81, E82, E83, E84, E85, E86, 2013/06/20 www.acti.com...
-
Page 2: Table Of Contents
Camera Installation .................. 12 Mount the IP Outdoor Dome (Surface) ..........13 Mount the IP Outdoor Dome (Flush) ............. 14 Mount the IP Indoor Dome (Wall) ............15 How to Do the Waterproof with Conduit Installation ......16 Accessing Camera ................... 19 www.acti.com... -
Page 3: Precautions
Every reasonable care has been taken during the writing of this manual. Please inform your local office if you find any inaccuracies or omissions. We cannot be held responsible for any typographical or technical errors and reserve the right to make changes to the product and manuals without prior notice. www.acti.com... - Page 4 This product has been tested and found to comply with the limits for Class B Information Technology Equipment according to European Standard EN 55022 and EN 55024. In a domestic environment, this product may cause radio interference in which cause the user may be required to take adequate measures. www.acti.com...
-
Page 5: Introduction
3MP Outdoor Dome with D/N, IR, Superior WDR, Vari-focal lens 1.3MP Outdoor Dome with D/N, IR, Extreme WDR, SLLS, Vari-focal lens From the installation perspective these models are very similar; therefore you can use one manual for all of them. www.acti.com... -
Page 6: Package Contents
Hardware Manual Package Contents 1. Camera D71, D72, E71, E72, E73, D81, D82, E81, E82, E83, E84, E85, E86, E87 2. Lens Focus Tuner 3. Conduit Gland 4. Screw Pack (Watertight Fitting) These screws are for surface Only provided with following mounting. -
Page 7: Safety Instructions
Safety Check Upon completion of any service or repairs to this video product, ask the service technician to perform safety checks to determine if the video product is in proper operating condition. www.acti.com... -
Page 8: Physical Description
This slot only supports MicroSDHC standard. Do not use the MicroSD standard card. The card is not included. For more information about how to operate with MicroSDHC card, please refer to the Firmware User Manual. 3) Ethernet Port The IP device connects to the Ethernet via a standard RJ45 connector. www.acti.com... - Page 9 Hardware Manual 4) Conduit Hole Conduit holes are openings where cables pass through. There are two conduit holes on this device, used for different mounting angles. www.acti.com...
-
Page 10: Installation And Access
Remove the plug if your cable will go through the one at the side of the outdoor dome 3) Adjust viewing angle and focus The illustration shows where to adjust each axis. D71, D72, E71, E72, E73, E74 D81, D82, E81, E82, E83, E84, E85, E86, E87 www.acti.com... - Page 11 For D8x and E8x series models, they are zoom lens cameras, please loosen the zoom and focus lock screws first, then adjust the zoom and focus. And please tighten these screws gently until the image is satisfactory. Attach the dome cover to the camera. www.acti.com...
-
Page 12: Camera Installation
For more information about mounting solutions and accessories, please refer to the Buyer’s Guide. Mount Types Accessories Surface Accessories not required Mount Flush Mount PMAX-1003 L Type Wall PMAX-0308 Mount Pendant PMAX-0101+ PAMX-0103 Mount Gooseneck PMAX-0101+ PMAX-0303 + PMAX-0503 Pole Mount www.acti.com... -
Page 13: Mount The Ip Outdoor Dome (Surface)
If you need to drill the holes to the surface first, such as concrete wall or ceiling, please use the drill template, provided in the camera package. www.acti.com... -
Page 14: Mount The Ip Outdoor Dome (Flush)
Hardware Manual Mount the IP Outdoor Dome (Flush) www.acti.com... -
Page 15: Mount The Ip Indoor Dome (Wall)
Hardware Manual Mount the IP Indoor Dome (Wall) www.acti.com... -
Page 16: How To Do The Waterproof With Conduit Installation
Clamping Nut as shown below. Lock Nut of this conduit gland is not accessory on our outdoor dome camera. The following images show the step-by-step procedure of completing the water-proof installation. 1. Disassemble the conduit gland as shown on the photo. www.acti.com... - Page 17 Whichever you pick, remember to seal off the other one with the metal patch (included in the camera set). Example – using the side hole 5. Screw the body with washer of the conduit gland into the camera and fix it . www.acti.com...
- Page 18 9. Adjust the viewing angle and focus of the camera and put the dome cover back on, and tighten it by using the screws. 10. You have completed a fully waterproof installation, the camera is now ready to withstand even the most severe rain storms. www.acti.com...
-
Page 19: Accessing Camera
The quickest way to discover the cameras in the network is to use the simplest network search, built in the Windows system – just by pressing the “Network” icon, all the cameras of the local area network will be discovered by Windows thanks to the UPnP function support of our cameras. www.acti.com... - Page 20 The IP Utility can be downloaded for free from http://www.acti.com/IP_Utility With just 1 click, you can launch the IP Utility and there will be an instant report as follows: You can quickly notice the D11 model in the list.
- Page 21 PC has to be configured to match the network segment of the camera. Manually adjust the IP address of the PC: In the following example, based on Windows 7, we will configure the IP address to 192.168.0.99 and set Subnet Mask to 255.255.255.0 by using the steps below: www.acti.com...
- Page 22 In such case, please plug in only one camera at a time, and change its IP address by using the Web browser before plugging in the next one. This way, the Web browser will not be confused about two devices having the same IP address at the same time. www.acti.com...
-
Page 23: Access The Camera
– the user just has to accept the use of such control when prompted so. No other third party utilities are required to be installed in such case. The following examples in this manual are based on Internet Explorer browser in order to cover all functions of the camera. www.acti.com... - Page 24 HTTP port of the camera is 80, which can be omitted from the address for convenience. Before logging in, you need to know the factory default Account and Password of the camera. Account: Admin Password: 123456 For further operations, please refer to the Firmware User Manual. www.acti.com...
Need help?
Do you have a question about the D71 and is the answer not in the manual?
Questions and answers