Table of Contents
Advertisement
Advertisement
Table of Contents

Subscribe to Our Youtube Channel
Related Manuals for ACTi D31


Summary of Contents for ACTi D31
-
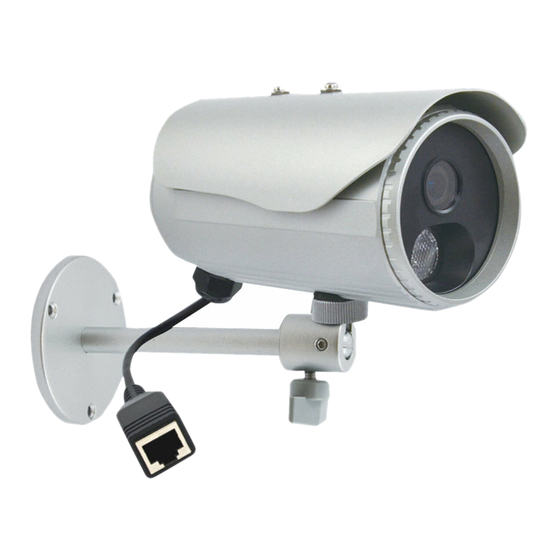
Page 1: Bullet Camera
Bullet Camera Hardware Manual D31, D32 Ver. 2013/12/24... -
Page 2: Table Of Contents
Using DHCP Server to Assign IP Addresses ........ 15 Using the Default Camera IP Address .......... 17 Access the Camera ................. 19 Other Adjustments and Accessories Adjust Camera Focus ..............22 Attach the Sunshield ..............24 Reset the Camera ................25 www.acti.com... -
Page 3: Precautions
Every reasonable care has been taken during the writing of this manual. Please inform your local office if you find any inaccuracies or omissions. We cannot be held responsible for any typographical or technical errors and reserve the right to make changes to the product and manuals without prior notice. www.acti.com... - Page 4 This product has been tested and found to comply with the limits for Class B Information Technology Equipment according to European Standard EN 55022 and EN 55024. In a domestic environment, this product may cause radio interference in which cause the user may be required to take adequate measures. www.acti.com...
-
Page 5: Safety Instructions
Safety Check Upon completion of any service or repairs to this video product, ask the service technician to perform safety checks to determine if the video product is in proper operating condition. www.acti.com... -
Page 6: Introduction
Hardware Manual Introduction List of Models This hardware manual contains the following models: 1MP Bullet with D/N, IR, Fixed lens 3MP Bullet with D/N, IR, Fixed lens www.acti.com... -
Page 7: Package Contents
Hardware Manual Package Contents Bullet Camera Sunshield Lens Focus Tuner Mounting Screw Kit Sunshield Screw Kit Quick Installation Guide Bracket Bracket Plate Warranty Card www.acti.com... -
Page 8: Physical Description
Basic Connections on page 13 for more instructions. 2) Reset Button Press and hold the Reset button for 5 seconds to reset the camera to its default factory settings. See Reset the Camera on page 25 for more instructions. www.acti.com... -
Page 9: Installation Procedures
NOTE: Depending on the surface where you will install the camera, it may be necessary to drill the holes and use the supplied screw tox. 2. Attach the plate to the surface using the three (3) supplied screws. 3. Attach the bracket to the plate. www.acti.com... - Page 10 (2) holes on top of the camera to mount the bracket to the ceiling. First, remove the pre-installed screw nut using a wrench (not included in the package). Below is an example of this type of installation. 5. Adjust the camera viewing angle and tighten the knob to fix the camera position. www.acti.com...
- Page 11 If the camera will be installed outdoors, be sure to waterproof the cable connection by enclosing it inside a junction box or wrap it using a moisture-sealant tape, such as 3M PRODUCTS Core Series 4-1000 (not included in the package) or equivalent. See example below. www.acti.com...
-
Page 12: Other Mounting Options
PMAX-0503 NOTE: For more information about the mounting solutions and accessories, please check the Mounting Accessory Selector in our website (http://www.acti.com/mountingselector). The above mounting accessories are not included in the package. Contact your sales agents to purchase. www.acti.com... -
Page 13: Basic Connections
AC Power (Data + Power) Source Camera 4. After making the connections, access the camera live view to adjust the focus and configure the camera settings according to your preference. See Accessing the Camera on page 15 for more information. www.acti.com... -
Page 14: Connecting Multiple Cameras
AC Power Source Ethernet Cables (Data+Power) Cameras 4. After making the connections, access the cameras live view to adjust the focus and configure the camera settings according to your preference. See Accessing the Camera on page 15 for more information. www.acti.com... -
Page 15: Accessing The Camera
Windows system – just by pressing the “Network” icon, all the cameras of the local area network will be discovered by Windows thanks to the UPnP function support of our cameras. In the example below, we successfully found the camera that we had just connected to the network. www.acti.com... - Page 16 The IP Utility can be downloaded for free from http://www.acti.com/IP_Utility With just one click, you can launch the IP Utility and there will be an instant report as follows: You can quickly see the camera model in the list. Click on the IP address to automatically launch the default browser of the PC with the IP address of the target camera filled in the address bar of the browser already.
-
Page 17: Using The Default Camera Ip Address
PC has to be configured to match the network segment of the camera. Manually adjust the IP address of the PC: In the following example, based on Windows 7, we will configure the IP address to 192.168.0.99 and set Subnet Mask to 255.255.255.0 by using the steps below: www.acti.com... - Page 18 In such case, please plug in only one camera at a time, and change its IP address by using the Web browser before plugging in the next one. This way, the Web browser will not be confused about two devices having the same IP address at the same time. www.acti.com...
-
Page 19: Access The Camera
VLC player or QuickTime – since these are third party softwares. The third parties have the right to modify their utility any time which might affect the compatibility. In such cases, please use Internet Explorer browser instead. www.acti.com... - Page 20 HTTP port of the camera is 80, which can be omitted from the address for convenience. Before logging in, you need to know the factory default Account and Password of the camera. Account: Admin Password: 123456 www.acti.com...
- Page 21 Hardware Manual To check the firmware version through the Web Configurator, access the Setup page and click System > System Info. For further operations, please refer to the Firmware User Manual. www.acti.com...
-
Page 22: Other Adjustments And Accessories
NOTE: For cameras with Design #2, remove the whole sticker from the front cover after adjusting the focus. The sticker cannot be reattached to the front cover. If the focus needs to be adjusted in the future, use a suction cup or adhesive tape to detach the front cover. www.acti.com... - Page 23 15 to view the camera). 5. When done, attach the front cover and the front cover ring. CAUTION: The front cover and front cover ring must be tightly closed to ensure water or dust does not go through any opening. www.acti.com...
-
Page 24: Attach The Sunshield
1. Loosely secure the supplied screws and washers to attach the sunshield. 2. Slide to adjust the sunshield to cover the lens as far as possible but out of the camera’s live view. 3. Tighten the screws to fix the position of the sunshield. www.acti.com... -
Page 25: Reset The Camera
3. When done, ensure the rubber seal is aligned and attached to the back cover and then close the back cover by tightening the three (3) screws. CAUTION: Make sure the rubber seal is properly attached and the back cover is closed to ensure water or dust cannot enter the camera. www.acti.com...
Need help?
Do you have a question about the D31 and is the answer not in the manual?
Questions and answers