Table of Contents
Advertisement
Quick Links
Advertisement
Table of Contents

Subscribe to Our Youtube Channel
Summary of Contents for ACTi D11
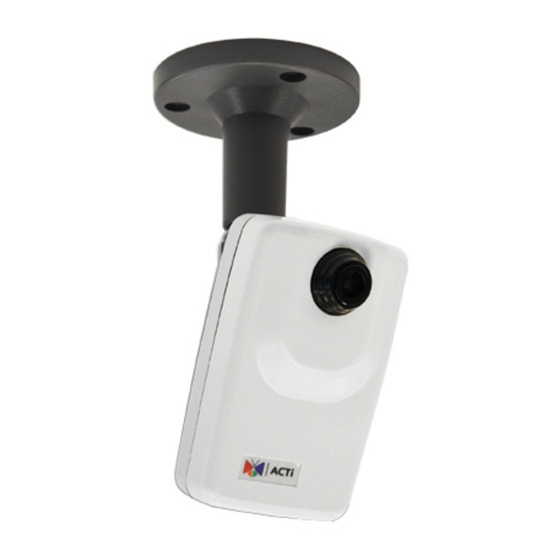
- Page 1 Cube Camera with Fixed Lens Hardware Manual D11, D12 Ver. 2013/12/04...
-
Page 2: Table Of Contents
Step 3: Access the Camera and Adjust the Focus ....... 16 Accessing Camera Configure the IP Addresses ............17 Using DHCP Server to Assign IP Addresses ........ 17 Using the Default Camera IP Address .......... 19 Access the Camera ................. 21 www.acti.com... -
Page 3: Precautions
Every reasonable care has been taken during the writing of this manual. Please inform your local office if you find any inaccuracies or omissions. We cannot be held responsible for any typographical or technical errors and reserve the right to make changes to the product and manuals without prior notice. www.acti.com... - Page 4 This product has been tested and found to comply with the limits for Class B Information Technology Equipment according to European Standard EN 55022 and EN 55024. In a domestic environment, this product may cause radio interference in which cause the user may be required to take adequate measures. www.acti.com...
-
Page 5: Safety Instructions
Safety Check Upon completion of any service or repairs to this video product, ask the service technician to perform safety checks to determine if the video product is in proper operating condition. www.acti.com... -
Page 6: Introduction
Hardware Manual Introduction List of Models This hardware manual contains the following models: 1MP Cube with Fixed Lens 3MP Cube with Fixed Lens www.acti.com... -
Page 7: Features And Benefits
Software Development Kit Support This IP Camera can be integrated or controlled by applications from third party software developers. Software developers can save considerable efforts by using our Streaming Library or ActiveX control. Please contact us for details on integration support. www.acti.com... -
Page 8: Package Contents
Hardware Manual Package Contents Cube Camera Bracket Screw kit Warranty Card www.acti.com... -
Page 9: Physical Description
The unit will start up with factory default settings automatically. 2) Ethernet Port The IP device connects to the Ethernet via a standard RJ45 connector. Supporting NWAY, this IP device can auto detect the speed of local network segment (10Base-T/100Base-TX Ethernet). www.acti.com... -
Page 10: Mount Type
Hardware Manual Mount Type Ceiling Mount Wall Mount www.acti.com... -
Page 11: Installation Procedures
When mounting on a concrete wall or ceiling 1. Mark the location of the three screw holes on the wall or ceiling and drill the holes. 2. Insert the supplied plastic washer into each hole. www.acti.com... - Page 12 When mounting on a wooden wall or ceiling 1. Place the bracket on the desired mounting location on the wall or ceiling. 2. Using a Phillips screwdriver, screw the supplied screws through the screw holes of the bracket and the wall or ceiling. www.acti.com...
-
Page 13: Install The Camera
Hardware Manual 2. Install the Camera 1. Screw the camera to the bracket. 2. Position the camera to face the target view area. www.acti.com... - Page 14 Hardware Manual 3. Tighten the knob to fix the camera position. www.acti.com...
-
Page 15: Step 2: Connect The Camera
2. Connect the PoE switch to the network and an AC power source. 3. Connect a PC to the same network. Network Ethernet Cable Ethernet Cable (Data) Power Cable PoE Injector Ethernet Cable AC Power (Data + Power) Source Camera www.acti.com... -
Page 16: Connecting Multiple Cameras
Ethernet Cables (Data+Power) Cameras Step 3: Access the Camera and Adjust the Focus After installing the camera, access the camera Live View display (see Accessing Camera on page 17) and move the lens knob to adjust the camera focus. www.acti.com... -
Page 17: Accessing Camera
Windows system – just by pressing the “Network” icon, all the cameras of the local area network will be discovered by Windows thanks to the UPnP function support of our cameras. In the example below, we successfully found the camera that we had just connected to the network. www.acti.com... - Page 18 The IP Utility can be downloaded for free from http://www.acti.com/IP_Utility With just one click, you can launch the IP Utility and there will be an instant report as follows: You can quickly see the camera model in the list. Click on the IP address to automatically launch the default browser of the PC with the IP address of the target camera filled in the address bar of the browser already.
-
Page 19: Using The Default Camera Ip Address
PC has to be configured to match the network segment of the camera. Manually adjust the IP address of the PC: In the following example, based on Windows 7, we will configure the IP address to 192.168.0.99 and set Subnet Mask to 255.255.255.0 by using the steps below: www.acti.com... - Page 20 In such case, please plug in only one camera at a time, and change its IP address by using the Web browser before plugging in the next one. This way, the Web browser will not be confused about two devices having the same IP address at the same time. www.acti.com...
-
Page 21: Access The Camera
When using Internet Explorer browser, the ActiveX control for video stream management will be downloaded from the camera directly – the user just has to accept the use of such control when prompted so. No other third party utilities are required to be installed in such case. www.acti.com... - Page 22 HTTP port of the camera is 80, which can be omitted from the address for convenience. Before logging in, you need to know the factory default Account and Password of the camera. Account: Admin Password: 123456 www.acti.com...
- Page 23 Hardware Manual To check the firmware version through the Web Configurator, access the Setup page and click System > System Info. For further operations, please refer to the Firmware User Manual. www.acti.com...


Need help?
Do you have a question about the D11 and is the answer not in the manual?
Questions and answers