Table of Contents
Advertisement
Advertisement
Table of Contents

Related Manuals for Lennox WING


Summary of Contents for Lennox WING
- Page 1 APPLICATION GUIDE WING...
-
Page 3: Table Of Contents
Congratulations you have made a wise choice with the purchase of your Lennox This product has been designed, assembled and supplied in one of our world class manufacturing facilities and we feel sure that it will meet your expectations. Lennox an international organisation with world wide distribution takes pride in supplying you with this CONTENTS CONTENTS . -
Page 4: Product Range
PRODUCT RANGE LTX INDOOR UNIT IN COMBINATION, WITH AXIAL FAN OUTDOOR UNIT OUTDOOR MODEL UNIT WING 2,8TFK KJF 2,8K WING 3TFK KJF 3K WING 3TFK KJF 3K WING 3TFK KJF 3K WING 4TFK KJF 4K WING 4TFK KJF 4K WING 5TFK... -
Page 5: Product Range
PRODUCT RANGE HEAT PUMP LTX INDOOR UNIT IN COMBINATION, WITH AXIAL FAN OUTDOOR UNIT OUTDOOR MODEL UNIT KJB 2,8 WING 2,8TB KJB 3 WING 3TB KJB 3 WING 3TB KJB 3 WING 3TB KJB 4 WING 4TB KJB 4 WING 4TB... -
Page 6: System Configuration
SYSTEM CONFIGURATION (INDOOR UNIT) Prior of making the electrical connections, set the switch for heat pump unit or for cooling only unit. This unit is valid for operating as a cold only or heat pump application. The unit should be configured prior to making the electrical connections, by setting the configuration Check page 8 for more information about the situation of this switch. -
Page 7: General Description
(units KJF/KJB), or one centrifugal fan (units KCF/ KCB),with exceptional features in noise level and flow . The ceiling air conditioner SPLIT, on version cooling only and INDOOR heat pump, are units air condensed. The indoor unit with direct... -
Page 8: Specifications Cooling Only
(1) Charge of refrigerant, factory charged on outdoor unit. See page 22, to calculate model refrigerant charge. (2) Use the coupling fittings included in indoor unit for refrigerant connection with outdoor unit. DB.- Dry Bulb WB.- Wet Bulb WING 2,8TFK 7.350 KJF 2,8K 1 / ALT. - Page 9 (1) Charge of refrigerant, factory charged on outdoor unit. See page 22, to calculate model refrigerant charge. (2) Use the coupling fittings included in indoor unit for refrigerant connection with outdoor unit. DB.- Dry Bulb WB.- Wet Bulb WING 2,8CFK 7.180 KCF 2,8K 1 / ALT.
-
Page 10: Specifications Heat Pump
(**) Air entry temperature into the outdoor unit 7ºC DB/6ºCWB (1) Charge of refrigerant, factory charged on outdoor unit. See page 22, to calculate model refrigerant charge (2) Use the coupling fittings included in indoor unit for refrigerant connection with outdoor unit.. WING 2,8TB 7.350 7.800... - Page 11 (**) Air entry temperature into the outdoor unit 7ºC DB/6ºCWB (1) Charge of refrigerant, factory charged on outdoor unit. See page 22, to calculate model refrigerant charge (2) Use the coupling fittings included in indoor unit for refrigerant connection with outdoor unit.. WING 2,8CB 7.180 8.150...
-
Page 12: Specifications
INDOOR UNIT Voltage Nominal total input power cooling capacity Nominal total input power heat pump Rated current Starting current max. WING 2,8TFK WING 3TFK WING 2TB 41/46 (*) 41/46 (*) WING 2,8TFK WING 3TFK WING 2TB 230V / 1 Ph... - Page 13 Starting current max. INDOOR UNIT Voltage Nominal total input power cooling capacity Nominal total input power heat pump Rated current Starting current max. WING 2,8CFK WING 2CB 41/46 (*) WING 2,8CFK WING 2CB 230V / 1 Ph 3,07 2,77 14,92...
-
Page 14: Electrical Connections
ELECTRICAL CONNECTIONS ELECTRIC WIRING DIAGRAM For electrical connection refer to wiring diagram in the unit Power supply Connection indoor unit with outdoor unit Sensor connection MODEL VOLTAGE 230 V / 1Ph 400 V / 3Ph 230 V / 1Ph 230 V / 3Ph 400 V / 3Ph 230 V / 3Ph 400 V / 3Ph... - Page 15 ELECTRICAL CONNECTIONS AND SYSTEM CONFIGURATION Prior of making the electrical connections, set the switch for heat pump unit or for cooling only This unit is valid for operating as a cold only or heat pump application. The unit should be configured prior to making the electrical connections, by setting the configuration switch as follows: Remove the front details at the corners and unit cover panel.
-
Page 16: Electrical Connections
ELECTRICAL CONNECTIONS LTX 3-5 PE L N PE L1 L2 L3 400V/50HZ 3Ph + N CONTROL SENSOR PE L N PE L1 L2 L3 230V/50HZ 3Ph CONTROL SENSOR PE L N PE L1 L2 L3 N 230V/50HZ 3Ph COOLING ONLY PE L N PE L N 230V/50HZ 1Ph + N... -
Page 17: Indoor Motor Fan Characteristics
OUTDOOR UNIT MOTOR-FAN CHARACTERISTICS OUTDOOR UNIT WITH CENTRIFUGAL FAN STATIC PRESSUERE AVIALABLE AIR FLOW m /h STATIC PRESSUERE AVIALABLE AIR FLOW m /h AIR FLOW KCF2,8K / KCB 2,8S 1500 1700 2500 2900 KCF 4K / KCB 4S 2800 3100 3400 3800 KCF 3K / KCB 3S... -
Page 18: Operating Limits
OPERATING LIMITS OPERATING LIMITS COOLING ONLY UNITS Supply air temperature into the outdoor unit ºC Supply air temperature into the indoor unit ºC DB.- Dry Bulb WB.- Wet Bulb THE ON/OFF LOW AMBIENT CONTROL IS STANDARD THE PROPORTIONAL LOW AMBIENT CONTROL IS OPTIONAL Supply air temperature into the outdoor unit ºC Supply air temperature into the... -
Page 19: Refrigerant Connections
REFRIGERANT CONNECTIONS Service valve OUTDOOR UNIT REFRIGERANT CONECTION FOR UNITS WITH COUPLINGS AND SERVICE VALVES NOTE: THE REFRIGERANT LINES GAS AND LIQUID, MUST BE INSULATED Make the refrigerant connections between the outdoor and indoor unit, as follows: -With the valves closed on outdoor unit, unscrew the flare nuts, removing all the protective hoods. -Unscrew the flare nuts and the coupling on indoor unit, removing the protecting hoods. - Page 20 REFRIGERANT CONNECTIONS To locate the outdoor and the indoor units, refer to the following information. L : Distance length between both units. 1 = Refrigerant vapour line. 2 = Liquid aspiration line. OUTDOOR U. INDOOR UNIT MODEL Tube size Refrigerant lines sizes Refrigerant lines sizes L Max.
-
Page 21: Refrigerant Connections
(***) If line is different to meters indicated on table put more or less charge of refrigerant per meter indicated. If you need to install a group WING 5CFK, with distance of line between indoor and outdoor unit of 6 meter. The... -
Page 22: Dimensions And Setting Up Templates Outdoor Unit
DIMENSIONS OF OUTDOOR UNIT WITH CENTRIFUGAL FAN (mm.) MAXIMUM DIMENSIONS KCF-K / KCB-S- 4-5 SETTING UP TEMPLATE (mm) UNITS 2-2,5-2,8-3 AIR OUT OPTIONAL KCF / KCB-S- 2,8 - 3 MODELS AIR OUT STANDARD Use 4 rod of a diameter of 10mm if the unit is fixed in the roof , or screw M.10 if the unit is fixed on the ground. -
Page 23: Description Outdoor Unit
DESCRIPTION OUTDOOR UNIT KCF-K / KCB 2,8-3 EXCHANGER COMPRESSOR CONNETION PIPE ACCESS PANEL TO COMPRESSOR AND PIPES COMPONENTS ELECTRICAL BOX ACCESS PANEL TO ELECTRICAL BOX MAIN SWITCH (OPTIONAL) ELECTRICAL SUPPLY ENTRY ELECTRICAL SUPPLY ACCESS TO ELECTRICAL BOX In the electrical box is included the mechanism of high pressostat rearm. -
Page 24: Description Outdoor Unit
DESCRIPTION OUTDOOR UNIT KCF / KCB-S 4 - 5 EXCHANGER COMPRESSOR ELECTRICAL BOX CONNETION PIPE ACCESS PANEL TO COMPRESSOR AND PIPES COMPONENTS ACCESS PANEL TO ELECTRICAL BOX AIR OUT POSICIÓN STANDARD POSICIÓN OPCIONAL AIR IN POSITION STANDARD POSTION OPTIONAL DRAINGE ( O 16 EXTERNAL) ELECTRICAL SUPPLY ENTRY ELECTRICAL SUPPLY MAIN SWITCH (OPTIONAL) -
Page 25: Entrance Standard/ Optional Outdoor Unit
ENTRANCE STANDARD/ OPTIONAL OUTDOOR UNIT KCF-K / KCB ENTRANCE STANDARD RETURN AIR ENTRANCE OPTIONAL (TO BE REALISE BY THE INSTALLATOR RETURN AIR ENTRANCE STANDARD RETURN AIR ENTRANCE OPTIONAL (TO BE REALISE BY THE INSTALLATOR) RETURN AIR To change entrances from standard position to optional position, you must sustitute the entrance panel correspondent, and refixe using the same fixation screw. -
Page 26: Dimensions And Setting Up Templates Indoor Unit
DIMENSIONS AND SETTIING UP TEMPLATES OF OUTDOOR UNIT WITH AXIAL FAN KJF-K (**) ALWAYS KEEP FREE DIMENSIONS AND SETTING TEMPLATES OF INDOOR UNIT LTX LTX 3 LTX 5 1.409 1.719 1.104 1.330 1.076 261,5 359,5 267,5 312,5 177,5 177,5 162,5 KJF-2.8K KJB-2.8 176,4... -
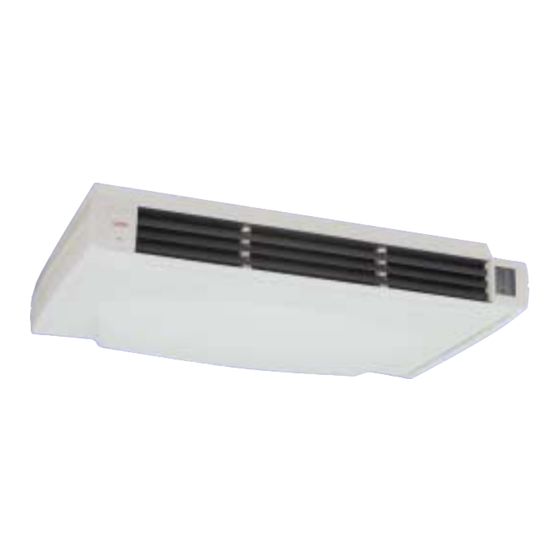
Page 27: Installation Indoor Unit
INSTALLATION INDOOR UNIT INSTALLATION UNIT Install the unit in a way that the discharge air would not be direct to persons, differences of temperature can create disturbs. Keep in mind in the installation of the unit, some ambient can supply electromagnetic radiation that can affect the good function of the unit, follow then the following instruction recommended in this document. -
Page 28: Electrical Heater
INDOOR UNIT OPTIONALS ELECTRICAL HEATER BEFORE ATTEMPTING TO PERFORM ANY SERVICE OR MAINTENANCE, TURN OFF THE ELECTRICAL POWER, AND CHECK THAT THE FAN HAS STOPPED To remove the casing, slide them over the rolling sides and remove horizontally Remove the filters. Remove drain pan. -
Page 29: Options
OUTDOOR UNIT OPTIONALS MAIN SWITCH The main swicth is located on the access panel to the electrical box, in such a way that the unit is disconnected when the panel is opened, for the models KCF and KCB. (Refer to the size diagram on pages 25 to 30, to see the position of the electrical box access panel) WINTER CONTROL The low ambient kit should be fitted to the cooling units, when the outdoor temperature is lower then 19 ºC. -
Page 30: Maintenance
MAINTENANCE OF THE UNIT POSSIBLE PROBLEMS PROBLEM • Check electrical supply of the unit. 1.- Unit do not work. • Check electrical connexion. • Check the remote controller and parameter works correctly. 2.- The fan of the unit works quicker without any •... -
Page 31: Points To Keep In Mind
POINTS TO KEEP IN MIND Abrasive surfaces temperatures WARNING Electric shock hazard can cause injury or death. Before attempting to perform any service or maintenance on the unit, turn OFF the electrical power, and check that the fan has stopped. FILTER CLEANING Check the air filter and make sure it is not blocked with dust... - Page 34 info@lennoxpolska.pl w w w. L e n n oxe u ro p e . c o m MIL55S-101 05-2001...
Need help?
Do you have a question about the WING and is the answer not in the manual?
Questions and answers