Advertisement
Advertisement
Table of Contents

Subscribe to Our Youtube Channel
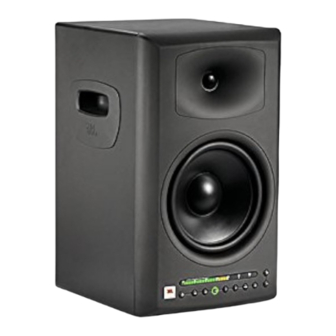
Summary of Contents for JBL LSR4300
- Page 1 LSR4300 Control Center Software User’s Guide...
-
Page 2: Table Of Contents
Table Of Contents Introduction ..................3 System Requirements ..............3 Installation ..................4 Launching The Software ...............4 Reference ..................5 Main Screen ...................5 Room View .....................6 Speaker Pop-Up Window ...............8 Control Panel ..................9 Equalization Controls ................12 Options Menu ..................15 Technical Support ...............18 Copyright © Harman International Industries, Incorporated. All Rights Reserved. -
Page 3: Introduction
Introduction - System Requirements Introduction LSR4300 Control Center Software is a useful system set-up utility that allows you to ac- cess any of the functions of your LSR4300 speakers using a computer. Without leaving your mix position, LSR4300 Control Center Software gives you the ability to modify sys- tem settings, and also view multiple speaker parameters at once in an easy-to-understand, user-configurable graphic display. -
Page 4: Installation
An installer will appear. Follow the prompts to complete the installation. There is no need to restart your computer. Launching The Software 1. Following installation, a shortcut to the LSR4300 Control Center Software is placed on your desktop and in your computer’s Start menu. -
Page 5: Reference
USB cable to make a connection between your computer and the LSR4300 speaker labeled “Left” (LEFT DIP switch up). Finally, press the “Left” speaker Power button so that the JBL logo is glowing brightly. All networked speakers should power up at the same time. -
Page 6: Room View
A Room View, which allows you to view settings and make changes to individual speakers • A Control Panel, which allows you to make global changes to your entire LSR4300 system. Room View The upper area of the Main Screen is the “Room View.” It provides a graphic display showing all the connected LSR4300 speakers in your network, along with meters for each. - Page 7 Room View can be changed if desired. See “Options Tab” below. *In LSR4300 firmware version 1.1, delay for all speakers is set to 0. Delay will be enabled in future firmware releases to enhance functionality for surround sound production.
-
Page 8: Speaker Pop-Up Window
(RMC Trim and RMC Delay) that has been applied by RMC calibration. For more information about input selection and RMC calibration, refer to the LSR4300 Owner’s Manual. 3. The “Correction” section shows a simulated graph representing the effect of filters applied by RMC calibration. -
Page 9: Control Panel
Control Panel The bottom area of the Main Screen houses the Control Panel, which allows you to make global changes to all LSR4300 speakers in your network. - Page 10 Options Menu. Using a calibrated signal and the Save Configuration function, it is possible to store and recall calibrated volume settings for the system. For more infor- mation, see Appendix E in the LSR4300 Owner’s Manual. Clicking on the red, amber and green squares above the volume control reveals a set of meters that you can position on your desktop.
- Page 11 2. Source – displays the currently selected input source, and allows you to change it. When changing input selection, signal is muted in all connected LSR4300 speakers for approxi- mately 3 seconds to allow you to confirm your selection. The 3-second wait time can be bypassed and selection can be initiated immediately by pressing the INPUT button on the remote control or the speaker itself.
-
Page 12: Equalization Controls
Reference - Control Panel/Equalization Controls The RMC window can be moved anywhere onscreen by clicking and dragging. 4. System EQ - allows you to switch equalization on or off and make changes to the equalization of all networked speakers. User settings can then be saved to disk or uploaded to any speaker Preset. - Page 13 As you make onscreen changes, they are automatically uploaded to a temporary memory area in your connected LSR4300 speakers and so become instantly active. These settings will remain active in the speakers even if they are powered off. However, because they reside only in a temporary “edit buffer,”...
- Page 14 LEFT speaker retains the custom presets. NOTE: You can restore factory settings in any speaker (including the equalization data in all six Presets) using this simple procedure, as described in the LSR4300 Owner’s Manual: 1. Turn the speaker off and disconnect its power cable.
-
Page 15: Options Menu
Reference - Equalization Controls/Options Menu The “Recall” dialog also allows you to load equalization data previously stored to disk. Simply select “Disk,” then click on “Recall,” and a standard Windows dialog will allow you to select the location and name of the file you wish to load. Data recalled from disk becomes immediately active. - Page 16 Reference - Equalization Controls/Options Menu Configuration files do NOT contain parameters set during RMC calibration such as frequency, Q, gain, RMC level trim, and delay. The Brightness control allows you to set the illumination level of the buttons and display meter in all connected speakers.
- Page 17 Finally, double-click on the “About This Software” section at the bottom of the Options menu to view the version number of the software currently installed. This dialog also provides a hot-link to the JBL Pro website in order to enable you to get technical support information.
-
Page 18: Technical Support
For technical support in the USA, contact JBL Customer Service Monday through Friday, 8:00am - 5:00pm Pacific Coast Time Call (800) 8JBLPRO (800-852-5776) or go to our website at www.jblproservice.com LSR4300 Control Center Software © 2005 Harman International Industries, Incorporated. All Rights Reserved. - Page 19 Notes...
- Page 20 Notes...


Need help?
Do you have a question about the LSR4300 and is the answer not in the manual?
Questions and answers