Table of Contents
Advertisement
Quick Links
ADP-1122A Display
User Manual
Release Date
Revision
Jan. 2013
V1.0
® 2013 Aplex Technology, Inc.
All Rights Reserved.
Published in Taiwan
Aplex Technology, Inc.
15F-1, No.186, Jian Yi Road, Zhonghe District, New Taipei City 235, Taiwan
Tel: 886-2-82262881
Fax: 886-2-82262883
E-mail:
aplex@aplex.com.tw
URL: www.aplex.com.tw
ADP-1224 User Manual
1
Advertisement
Table of Contents

Subscribe to Our Youtube Channel
Related Manuals for Aplex ADP-1122A


Summary of Contents for Aplex ADP-1122A
-
Page 1: User Manual
ADP-1122A Display User Manual Release Date Revision Jan. 2013 V1.0 ® 2013 Aplex Technology, Inc. All Rights Reserved. Published in Taiwan Aplex Technology, Inc. 15F-1, No.186, Jian Yi Road, Zhonghe District, New Taipei City 235, Taiwan Tel: 886-2-82262881 Fax: 886-2-82262883 E-mail: aplex@aplex.com.tw... -
Page 2: Warning
Disclaimer This information in this document is subject to change without notice. In no event shall Aplex Technology Inc. be liable for damages of any kind, whether incidental or consequential, arising from either the use or misuse of information in this document or in any related materials. -
Page 3: Table Of Contents
3.1 Introduction to Touch Screen Controller board…………………………..14 3.2 Windows 2000/XP/2003/Vista Universal Driver Installation for PenMount 6000Series…………………………………..……………….…………….14 Figures Figure 1.1: Dimensions of ADP-1122A……………………………………….5 Figure 1.2: Front View of ADP-1122A………………………………………….6 Figure 1.3: Rear View of ADP-1122A………………………………………….6 Figure 3.1: Bird Eye‟s View of Control Board………………………………13 ADP-1224 User Manual... -
Page 4: Features
Chapter 1_____________________________ 1.1 Features 12.1” TFT LCD ● Aluminum die-casting front bezel and steel back Overlay resistive touch screen VGA/DVI/RCA/S-video Default: DC 11~32V input 1.2 Specifications Display ● 12.1” XGA(1024X768) color TFT LCD ● Maximum resolution: 1024 (H) × 768(V) ●... -
Page 5: Dimensions
1.3 Dimensions Figure 1.1: Dimensions of ADP-1122A ADP-1224 User Manual... -
Page 6: Brief Description
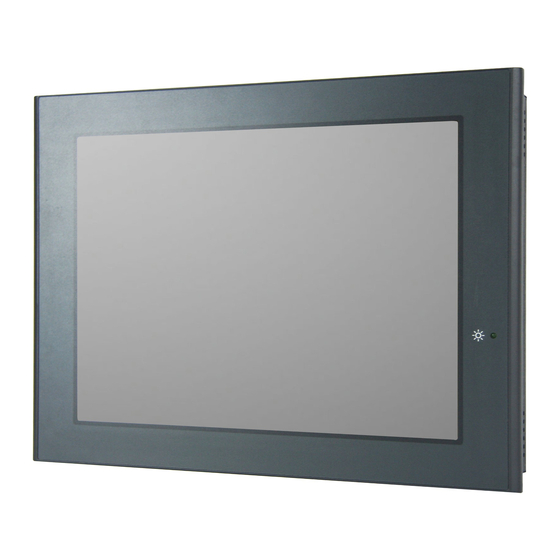
1.4 Brief Description of ADP-1122A ADP-1122A is a 12.1” TFT LCD monitor that comes with viewing angle of 160 (H) degrees and 140 (V) degrees, and more outstanding features, thus giving you the best in monitoring and control applications. The front panel of the display monitor is sealed with gasket for NEMA 4/IP 65 rating when it is panel-mounted in a NEMA rated cabinet or enclosure. -
Page 7: Display Mode
1.5 Display Mode Display Mode Hori. Sync (KHz) Vert. Sync. (Hz) VGA 640 x 480 SVGA 800 x 600 XGA 1024 x 768 1152 x 864 SXGA 1280 x 1024 Full HD 1920 x 1080 ADP-1224 User Manual... -
Page 8: Front Panel Controls
Chapter 2_____________________________ 2.1 Front Panel OSD Functions Auto Adjust Up/Left Down/Right Power Menu/Entry Power Indicator Power switch: To turn ON or OFF the power Shift the icon to the right side or shift it up Shift the icon to the left side or shift it down Menu: To enter OSD menu for related icon and item. -
Page 9: Osd Controls
2.2 OSD Controls To make any adjustment, select the following: 1. Press (Menu) to show the OSD menu or disable the OSD menu. 2. Select the icon that you wish to adjust with the ( or +/-) key in the menu. 3. -
Page 10: Main Menu
2.3 Main Menu In the Main menu, there are the following items: Color Image Setting Position OSD Menu Language Misc Exit For Color, check out the following: Contrast Brightness Color Adjust ... - Page 11 In the Position, there are the following: H. Position V. Position Back In the OSD menu, there are: OSD H. Pos. OSD V. Pos. OSD Timer Back In the Language menu, there are: ...
-
Page 12: Ad Board (Va-3600) Osd Functions
2.4 AD Board (VA-3600) OSD Functions 2.) Getting into Burn-in Mode Before setting into a burn-in mode, first disconnect the AC power cord. Then press (don‟t let them go) buttons until the AC power cord is connected and the “RGB” appears on the top left corner of your screen. -
Page 13: Introduction To Touch Screen Controller Board
Chapter 3_____________________________ This chapter describes how to install drivers and other software that will allow your PenMount 6000 Controller Board to work with different operating systems. NOTE: PenMount USB drivers support up to 15 USB controllers. 3.1 Introduction to Touch Screen Controller Board PenMount 6300 USB control board is a touch screen control board designed for USB interface and specific for 4, 5, 8-wire touch screens. - Page 14 3.2.1 Installing Software If you have an older version of the PenMount Windows 2000/XP driver installed in your system, please remove it first. Follow the steps below to install the PenMount DMC6000 Windows 2000/XP driver. Step 1. Please make sure your PenMount 6000 device had plugged in advance. If your device uses RS232 interface, please plugged in before the machine is turned on.
- Page 15 Step 3. A License Agreement appears. Click “I Agree…” and “Next” Step 4. Choose the folder in which to install PenMount Windows Universal Driver. Click Install. ADP-1224 User Manual...
- Page 16 Step 5. Wait for installation. Click Next to continue. Step 6. Click OK. ADP-1224 User Manual...
-
Page 17: Software Functions
Step 7. Click Finish to complete installation. 3.2.2 Software Functions Upon rebooting, the computer automatically finds the new 6000 controller board. The touch screen is connected but not calibrated. Follow the procedures below to carry out calibration. 1. After installation, click the PenMount Monitor icon “PM” in the menu bar. 2. - Page 18 Calibrate This function offers two ways to calibrate your touch screen. „Standard Calibration‟ adjusts most touch screens. „Advanced Calibration‟ adjusts aging touch screens. Standard Calibration Click this button and arrows appear pointing to red squares. Use your finger or stylus to touch the red squares in sequence.
- Page 19 Command Calibration Command call calibration function. Use command mode call calibration function, this can uses Standard, 4, 9, 16 or 25 points to calibrate E.g. Please run ms-dos prompt or command prompt c:\Program Files\PenMount Universa Driver\Dmcctrl.exe -calibration 0 ( Standard Calibration) Dmcctrl.exe - calibration ($) 0= Standard Calibration 4=Advanced Calibration 4 9=Advanced Calibration 9 16=Advanced...
- Page 20 NOTE: The older the touch screen, the more Advanced Mode calibration points you need for an accurate calibration. Use a stylus during Advanced Calibration for greater accuracy. Please follow the step as below: Step 3.Come back to “PenMount Control Panel” and select “Tools” then Click “Advanced Calibration”.
- Page 21 Select “Device” to calibrate, then you can start to do “Advanced Calibration”. NOTE: Recommend to use a stylus during Advanced Calibration for greater accuracy. ADP-1224 User Manual...
- Page 22 Setting ADP-1224 User Manual...
- Page 23 About This panel displays information about the PenMount controller and driver version. ADP-1224 User Manual...
- Page 24 Multiple Monitors supports two to six touchscreen displays for one system. PenMount drivers for Windows 2000, XP 32/64bit, and 2003 support Multiple Monitors. This function supports from two to six touchscreen displays for one system. Each monitor requires its own PenMount touchscreen control board, either installed inside the display or in a central unit.
- Page 25 2. When the mapping screen message appears, click “OK”. 3. Touch each screen as it displays “Please touch this monitor. Press „S‟ to skip”. Follow this sequence and touch each screen to map the touchscreens. 4. After the setting procedure is finished, maybe you need to calibrate for each panel and controller. NOTES: 1.
- Page 26 About You can see how many devices of PenMount controller that are plugged to your system ADP-1224 User Manual...
- Page 27 PenMount Monitor Menu Icon The PenMount monitor icon (PM) appears in the menu bar of Windows 2000/XP system when you turn on PenMount Monitor in PenMount Utilities. PenMount Monitor has the following function PenMount Rotating Functions The PenMount driver for Windows 2000/XP supports several display rotating software packages. ADP-1224 User Manual...
- Page 28 Windows Me/2000/XP support display rotating software packages such as: • Portrait‟s Pivot Screen Rotation Software • ATI Display Driver Rotate Function • nVidia Display Driver Rotate Function • SMI Display Driver Rotate Function • Intel 845G/GE Display Driver Rotate Function Configuring the Rotate Function 1.
Need help?
Do you have a question about the ADP-1122A and is the answer not in the manual?
Questions and answers