Table of Contents
Advertisement
Quick Links
ADP-1XX8P Display
User Manual
Release Date
Revision
Jan. 2013
V1.0
® 2013 Aplex Technology, Inc.
All Rights Reserved.
Published in Taiwan
Aplex Technology, Inc.
15F-1, No.186, Jian Yi Road, Zhonghe District, New Taipei City 235, Taiwan
Tel: 886-2-82262881
Fax: 886-2-82262883
E-mail:
aplex@aplex.com.tw
URL: www.aplex.com.tw
ADP-1XX8P User Manual
1
Advertisement
Table of Contents

Related Manuals for Aplex ADP-1XX8P


Summary of Contents for Aplex ADP-1XX8P
-
Page 1: User Manual
ADP-1XX8P Display User Manual Release Date Revision Jan. 2013 V1.0 ® 2013 Aplex Technology, Inc. All Rights Reserved. Published in Taiwan Aplex Technology, Inc. 15F-1, No.186, Jian Yi Road, Zhonghe District, New Taipei City 235, Taiwan Tel: 886-2-82262881 Fax: 886-2-82262883 E-mail: aplex@aplex.com.tw... -
Page 2: Warning
Disclaimer This information in this document is subject to change without notice. In no event shall Aplex Technology Inc. be liable for damages of any kind, whether incidental or consequential, arising from either the use or misuse of information in this document or in any related materials. -
Page 3: Table Of Contents
2.4 AD Board (VA-3600) OSD Functions…….………………………………15 Chapter 3 Control Board 3.1 Introduction to Control Board……………….……………………………..16 3.4 Installation of Control Board……………………………………………...16 Chapter 4 Installation 4.1 Windows 2000/XP Driver Installation…………………………………….17 4.2 Configuring eGalax Windows 2000/XP Driver………………………18 Chapter 5 Software 5.1 Software Functions………………………………………………………..23 ADP-1XX8P User Manual... - Page 4 Figure 1.2: Dimensions of front side OSD ADP-1158P…………………….7 Figure 1.3: Dimensions of rear side OSD ADP-1198P……………………..7 Figure 1.4: Dimensions of front side OSD ADP-1198P……………………..8 Figure 1.5: Front View of ADP-1XX8P………………………………………….9 Figure 1.6: Rear View of ADP-1XX8P………………………………………….9 Figure 3.1: Bird Eye’s View of Control Board………………………………16...
-
Page 5: Features
1XUSB for touch Environment ADP-1158P ADP-1198P Model No. Operating -20~60˚C 0~50˚C Temperature Storage -20~70˚C -20~60˚C Temperature 10~90% @40˚C non-condensing Storage Humidity Vibration 1G peak, 5~500Hz (at random) Certifications CE/FCC Class A Shock 15G peak acceleration (11msec. duration)/operation ADP-1XX8P User Manual... -
Page 6: Dimensions
Construction Aluminum Sliver front/Steel Black Back Dimensions 410x333.6x42 484x416.07x42 IP Rating Front Panel IP65 Mounting Panel Mount / VESA Mount 75x75 Panel Mount / VESA Mount 100x100 1.3 Dimensions Figure 1.1: Dimensions of rear side OSD ADP-1158P ADP-1XX8P User Manual... -
Page 7: Figure 1.2: Dimensions Of Front Side Osd Adp-1158P
Figure 1.2: Dimensions of front side OSD ADP-1158P Figure 1.3: Dimensions of rear side OSD ADP-1198P ADP-1XX8P User Manual... -
Page 8: Figure 1.4: Dimensions Of Front Side Osd Adp-1198P
Figure 1.4: Dimensions of front side OSD ADP-1198P ADP-1XX8P User Manual... -
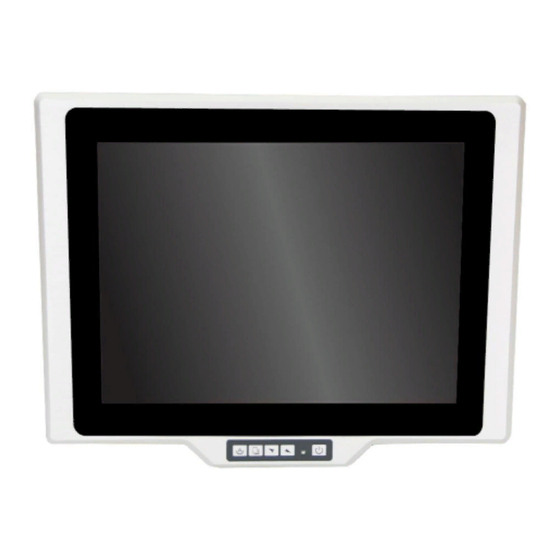
Page 9: Brief Description
1.4 Brief Description of ADP-1xx8 P ADP-1XX8P is a TFT LCD monitor and more outstanding features, thus giving you the best in monitoring and control applications. The front panel of the display monitor is sealed with IP 65 rating when it is panel-mounted in a NEMA rated cabinet or enclosure. It can also be VESA 75-mounted for ADP-1158P or VESA 100-mounted for ADP-1198P. -
Page 10: Display Mode
1.5 Display Mode Display Mode Hori. Sync (KHz) Vert. Sync. (Hz) VGA 640 x 480 SVGA 800 x 600 XGA 1024 x 768 1152 x 864 SXGA 1280 x 1024 Full HD 1920 x 1080 ADP-1XX8P User Manual... -
Page 11: Front Panel Osd Functions
Please don’t let your fingers go until the AC power cord is connected again and the wording of “RGB” appears on the top left corner of your screen, and wait for 3 seconds. Under the non-signal entry situation, if is seen, exit is thus successfully made. Cable Not Connected ADP-1XX8P User Manual... -
Page 12: Osd Controls
2.) If the “RGB” is not found, disconnect the AC power cord first. Then press the buttons (don’t let them go) until the AC power cord is connected, and wait for 2 to 3 seconds. When “RGB” appears, repeat the above steps. 3.) Functions of OSD Keys ADP-1XX8P User Manual... -
Page 13: Main Menu
Exit For Color, check out the following: Contrast Brightness Color Adjust Color Temp Back For Image setting, check out the following: Clock Phase Gamma Sharpness Back ADP-1XX8P User Manual... - Page 14 Simplified Chinese Japanese In the Misc menu, there are: Signal Source Select VGA: Analogue VGA Input Select DVI: Digital DVI-D Input Select AV: Composite Video Input Select SV: S-Video Video Input Reset Back ADP-1XX8P User Manual...
-
Page 15: Ad Board (Va-3600) Osd Functions
(don’t let them go) until the AC power cord is connected, and wait for 2 to 3 seconds. When “RGB” appears, repeat the above steps. 6.) Functions of OSD Keys Auto Adjust Up/Left Down/Right Power Menu/Entry Power Indicator ADP-1XX8P User Manual... -
Page 16: Introduction To Control Board
Windows 7 support. Figure 3.1: Bird’s Eye View of control board 3.2 Installation of Control Board Before installing the Windows 2000/XP driver software, you must have the Windows 2000/XP system installed and running on your computer. ADP-1XX8P User Manual... -
Page 17: Windows 2000/Xp Driver Installation
2000/XP system installed and running on your computer. You must also have eGalaxy Interface controller board installed. Follow the steps below to install eGalaxy Windows 2000/XP driver. Step 1. Insert the CD-ROM. Go to Driver folder. Click Driver. Step 2. There is eGalaxTouch, double click the folder. ADP-1XX8P User Manual... -
Page 18: Configuring Egalax Windows 2000/Xp Driver
Step 3. Click setup. 4.2 Configuring eGalaxTouch Windows 2000/XP Driver After click setup, InstallShield Wizard screen appears click Next to continue. ADP-1XX8P User Manual... - Page 19 Step 1. Tick Install RS232 interface driver. Then click Next. Step 2. Select None. Then click Next to continue. ADP-1XX8P User Manual...
- Page 20 Step 4. If you want to use Multi-Monitor, check Support Multi-Monitor System. Then, click Next to continue the installation. Step 5. Click Browse to create a new folder. Click Next to setup eGalaxTouch in the destination folder you want to install. Click Next to continue the installation. ADP-1XX8P User Manual...
- Page 21 Step 6. Under eGalaxTouch, select Accessories. Step 7. Check Create a eGalaxTouch Utility shortcut on desktop. Click Next to continue. ADP-1XX8P User Manual...
- Page 22 Step 8. The installation files are extracted. Step 9. eGalaxTouch driver has been installed. To do 4 point calibration, click Yes to continue. ADP-1XX8P User Manual...
-
Page 23: Software Functions
5.2.2 Software Functions General In this window, you can see there is a USB Controller. Click OK to continue. Monitor Mapping to adjust touch panel to search for device ADP-1XX8P User Manual... - Page 24 Beep On Release: when you release, it will beep. Beep From System Beep Beep From Sound Card Linearization Style 9 points 25 points Double Click Time Shorter Longer Double Click Area Smaller Bigger Normal mode Simulate the mouse mode ADP-1XX8P User Manual...
- Page 25 Check Enable Constant Touch, Enable Auto Right Click, Enable Touch, Enable Cursor Stabilization. Click OK to continue. Option Function Enable Constant Touch Enable Auto Right Click Enable Touch Enable Cursor Stabilization Constant Touch Area Auto Right Click Time ADP-1XX8P User Manual...
- Page 26 Do 4 points alignment to match display. Clear and Calibrate Clear linearization parameter and do 4 points alignment. Linearization Do 9 points linearization for better touchscreen linearity. Draw Test Do draw test to verify the touch accuracy. ADP-1XX8P User Manual...
- Page 27 In this window, it shows the mode of display. Select Full Screen, click OK to continue. Enable Multiple Monitors. Map to main display if system has only one display monitor Full Screen Lower Screen Left Screen Upper Screen Right Screen ADP-1XX8P User Manual...
- Page 28 Other Other mode of display. Quarter1~4 and Customized area. Active Area Drag active area to enable Active Area Function. ADP-1XX8P User Manual...
- Page 29 Hardware Click OK Hardware Configuration Click OK to continue. ADP-1XX8P User Manual...
- Page 30 About To display information about eGalaxTouch and its version. ADP-1XX8P User Manual...
Need help?
Do you have a question about the ADP-1XX8P and is the answer not in the manual?
Questions and answers