Kärcher KM 90/60 R Bp Manual
Hide thumbs
Also See for KM 90/60 R Bp:
- Manual (18 pages) ,
- Original instructions manual (408 pages) ,
- Manual (28 pages)
Table of Contents
Advertisement
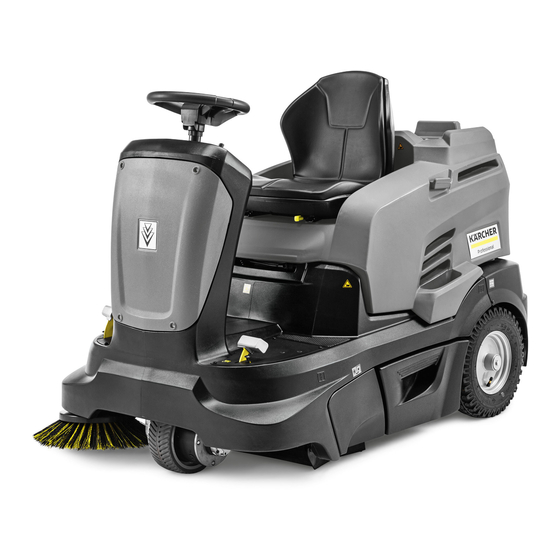
KM 90/60 R Bp
KM 90/60 R Bp Pack
Deutsch
English
Français
Italiano
Nederlands
Español
Português
Dansk
Norsk
Svenska
Suomi
Ελληνικά
Türkçe
Русский
Magyar
Čeština
Slovenščina
Polski
Româneşte
Slovenčina
Hrvatski
Srpski
Български
Eesti
Lietuviškai
Latviešu
Українська
59637250
3
17
31
46
61
76
91
106
120
134
148
162
178
192
208
223
238
253
269
284
299
314
329
345
360
375
390
07/10
Advertisement
Table of Contents

Related Manuals for Kärcher KM 90/60 R Bp


Summary of Contents for Kärcher KM 90/60 R Bp
- Page 1 KM 90/60 R Bp KM 90/60 R Bp Pack Deutsch English Français Italiano Nederlands Español Português Dansk Norsk Svenska Suomi Ελληνικά Türkçe Русский Magyar Čeština Slovenščina Polski Româneşte Slovenčina Hrvatski Srpski Български Eesti Lietuviškai Latviešu Українська 59637250 07/10...
-
Page 2: Table Of Contents
Please read and comply with these – The appliance must not be operated by chil- Symbols on the machine dren, young persons or persons who have original instructions prior to the ini- not been instructed accordingly. tial operation of your appliance and store them Please do not sweep away –... -
Page 3: Function En
– Never vacuum up explosive liquids, brush. ingredients at: combustible gases or undiluted acids – The rotating roller brush (4) moves the http://www.karcher.de/de/unternehmen/ and solvents. This includes petrol, paint dirt and debris directly into the waste umweltschutz/REACH.htm thinner or heating oil which can gener- container (5). -
Page 4: Operating And Functional Ele-En
4 Cover Danger of crushing while closing the ma- 5 Charger (behind front panel) chine cover. Hence, lower the machine cover slowly. (KM 90/60 R Bp Pack) 6 Charger (KM 90/60 R Bp) 7 Battery socket (KM 90/60 R Bp) - Page 5 Operator console 1 Emergency-stop button Colour coding 2 Operating hour counter – The operating elements for the cleaning 3 Horn process are yellow. 4 Indicator lamps – The controls for the maintenance and 5 Filter dedusting service are light gray. 6 Travel direction switch (forward/reverse) 7 Key switch 8 Programme switch...
-
Page 6: Before Startup
Installing and connecting the batteries B=off, C+D+E=red use and in the vehicle operat- Note: With the KM 90/60 R Bp pack, the Battery is being glows yellow ing instructions! battery and charger are already built in. -
Page 7: Start Up
Place the boards on the edge of the pallet. Maximum battery dimensions (single Start up Place the boards in such a way that they lie battery) in front of the four wheels of the machine. General notes Length Width Height Fasten the boards with screws. - Page 8 You must hear the brake being re- – Switch off the machine only after it comes to Note: To achieve an optimum cleaning re- leased. The machine must roll slightly a complete halt (on an even surface) and sult, the driving speed should be adjusted on a plane surface.
-
Page 9: Shutdown En
Check function of seat contact switch. Turn off the appliance. Maintenance and care Check battery acid level. Set programme switch to step 1 (driv- Check tension, wear and function of General notes ing). The side brush and roller brush are drive belts (V-belt and circular belt). - Page 10 Replacing wheel Danger Risk of injury! Park the sweeper on an even surface. Remove the key. When carrying out repairs on public highways, wear warning clothing when working close to passing traffic. Check stability of ground. Also secure the machine with wheel chock(s) to pre- The width of the sweeping track should lie Hook the draw spring out.
- Page 11 Push new roller brush into the roller brush housing and onto the drive pin. Note: When installing the new roller brush, ensure correct positioning of the bristle as- sembly. Position roller brush cover. Fit the fastening screws and nuts. Hook the draw spring in. Screw on side panel.
- Page 12 Accessories Side brushes 6.905-626.0 With standard bristles for indoor and out- door areas. Standard sweep roller 4.762-430.0 Resistant of wear and moisture. Universal bristles for inside and outside cleaning. Check tension, wear and damages on Roller-brush, soft 4.762-442.0 the V-belt of the sweep roller drive. With natural bristles especially for fine Tighten the V-belt at the screw if neces- dust sweeping on smooth indoor floors.
- Page 13 Sit on the driver seat, the seat contact switch gets activated Release emergency-stop button Plug in the battery plug (KM 90/60 R Bp) Set main switch to “1” Check fuse F1, have it replaced by Kärcher customer service if required.
- Page 14 Technical specifications KM 90/60 R Bp KM 90/60 R Bp Pack Machine data Length x width x height 1635 x 980 x 1260 1635 x 980 x 1260 Unladen weight Transport weight Permissible overall weight Driving speed km/h Cleaning speed km/h Climbing capability (max.)
- Page 15 Filter and vacuum system Filter surface area, fine dust filter Category of use – filter for non-hazardous dust Nominal vacuum, suction system mbar Nominal volume flow, suction system Working conditions Temperature °C +5...+45 +5...+45 Air humidity, non-condensing 0 - 90 0 - 90 Values determined as per EN 60335-2-72 Noise emission...
- Page 18 Building, 50-1, 51-1, Sansoo-dong, Mapo-ku, Seoul 121-060, +82-2-322 6598, www.karcher.co.kr AU Kärcher Pty. Ltd., 40 Koornang Road, Scoresby VIC 3179, Victoria, MX Karcher México, SA de CV, Av. Gustavo Baz Sur No. 29-C, +61-3-9765-2300, www.karcher.com.au Col. Naucalpan Centro, Naucalpan, Edo. de México, C.P. 53000 México, BE Kärcher N.V., Industrieweg 12, 2320 Hoogstraten,...