Advertisement
Quick Links
Mode d'emploi et installation
FR
Hotte de Cuisine
Instructions for use and installation
GB
Cooker Hood
Bedienungsanleitung und Einrichtung
DE
Dunstabzugshaube
Istruzioni per l'uso e l'installazione
IT
Cappa
Instrucciones de instalacion e utilizacion
E
Campana
Instructies voor het gebruik en installeren
NL
Dampkap
Galaxy Slim 3 FX
110.0263.116
110.0263.117
110.0263.119
110.0263.120
110.0278.393
110.0278.395
110.0278.394
110.0278.396
FGAS/3 E FX 1000 CE XS WM
FGAS/3 E FX 1400 CE XS WM
FGAS/3 E FX 1000 CE XS
FGAS/3 E FX 1400 CE XS
FGAS/3 FX 1000 CE XS
FGAS/3 FX 1400 CE XS
FGAS/3 FX 1000 CE XS WM
FGAS/3 FX 1400 CE XS WM
Advertisement

Related Manuals for Franke Galaxy Slim 3 FX


Summary of Contents for Franke Galaxy Slim 3 FX
- Page 1 Istruzioni per l’uso e l’installazione Cappa Instrucciones de instalacion e utilizacion Campana Instructies voor het gebruik en installeren Dampkap Galaxy Slim 3 FX 110.0263.116 FGAS/3 E FX 1000 CE XS WM 110.0263.117 FGAS/3 E FX 1400 CE XS WM 110.0263.119 FGAS/3 E FX 1000 CE XS 110.0263.120...
- Page 2 SOMMAIRE CONTENTS RACCORDEMENT ÉLECTRIQUE ELECTRICAL WIRING CONSEILS D’INSTALLATIONS INSTALLATION ADVICE POSE DE L’APPAREIL FITTING THE APPLIANCE FONCTIONNEMENT OPERATION USEFUL HINTS CONSEILS D’UTILISATIONS ENTRETIEN MAINTENANCE GARANTIE ET SERVICE APRÈS-VENTE GUARANTEE AND AFTER-SALES-SERVICES REMARQUES REMARKS INHALT CONTENUTI COLLEGAMENTO ELETTRICO NETZANSCHLUSS MONTAGEHILFEN CONSIGLI DI INSTALLAZIONE MONTAGE DES GERÄTES POSA DELL’...
- Page 3 Thank you for buying a FRANKE product which has been manufactured to the highest quality standards to meet your requirements. We recommend you carefully read this booklet in which you will find instructions for installation, hints for use and maintenance.
- Page 4 or injury and would deem the manufacturers guarantee null and void. IMPORTANT - The wires in this mains lead are coloured in accordance with the following code : green / yellow : earth blue : neutral brown : live As the colours of the wires in the mains lead of this appliance may not correspond with the coloured markings identifying the terminals in your plug, proceed as follows.
- Page 5 e- Check the connectors of the motor (Fig 9). f- Test the lights and the fan motor. g- Fit the metal grease filters and close the deflector. IN THE RECIRCULATION MODE: a- To carry out an inlet for recycling air in the kitchen (Fig.11). b- Connect the ducting 150mm (6 INS) not provided between motors item 6 and the recirculation spigot and secure the connections with appropriate clamping rings or adhesive tape (Fig.
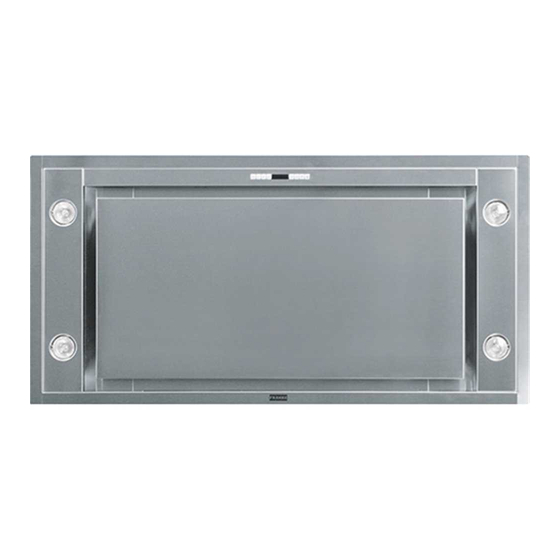
- Page 6 OPERATION Control board On / Off Switches the extractor motor on and off at the latest selected speed. Indicates the selected speed. Speed control Decreases the suction speed. Speed control Increases the suction speed. Intensive speed By pressing this key it is possible to activate the intensive speed from any previously se-lected speed. The intensive speed can be acti-vated even when the motor is OFF.
- Page 7 USEFUL HINTS • To obtain the best performance we recommend you to switch ‘ON’ the cooker hood a few minutes (in the boost setting) before you start cooking and you should leave it running for approximately 15 minutes after finishing. •...
- Page 8 GUARANTEE AND AFTER SALES SERVICE • In the event of any malfunction or anomaly, notify your fitter who will have to check the ap- pliance and its connection. • In the event of damage to the mains supply cable, this can only be replaced by at approved repair centre appointed by the manufacturer who will have the required tools and equipment to carry out any repairs properly.
- Page 10 90° 0° 180° 270°...
- Page 11 1000 / 1400 20 mm...
- Page 13 90° 180° 0° 270°...
- Page 16 ACCESSOIRES ACCESSORI ACCESSORIES ACCESORI 13MC075 ZUBEHÖRE ACCESSOIRES 253 x 300 x 9 mm x 2 (1000) x 3 (1400) 5403004...
- Page 17 SLIM 1000 / 1400 90° 180° 0° 270°...
- Page 18 SLIM Sans Moteur / 1355 1000 / 1400 Ø 200 / 1360 / 551 / 600...
- Page 19 Eclairage Lighting Beleuchtung Illumiazione Iluminación Verlichting 2 x 35 W 2 x 35 W 35 W - 230V 12EC023...
- Page 20 275 W ECLAIRAGE LIGHTING BELEUCHTUNG 4 x 35 W - 230V Halogène A - AZUR - AZUR - AZUR BLAU BK - BLACK - NOIR- SCHWARZ B - BLUE - BLEU - BLAU 2 X LEDS 7 W Br - BROWN - BRUN - BRAUN G-Y - GREEN YELLOW - VERT JAUNE - GRÜN GELB Gr - GREY - GRIS - GRAU L B - LIGHT BLUE - BLEU CLAIR - HELL BLAU...
-
Page 21: Electrical Requirements
The wires in this mains ELECTRICAL CONNECTION lead are coloured in ELECTRICAL REQUIREMENTS accordance with the Any permanent electrical installation must comply following code: with the latest I.E.E. Regulations and local Electricity Green & Yellow Earth Board regulations. For your own safety this should be Blue Neutral undertaken by a qualified electrician e.g. - Page 22 Composants Componenti Components Componentes Bauelemente Onderdelen (2 mm)
- Page 23 Plaque Signalétique de la hotte Rating plate of the cookerhood Typenschild im Inneren der Dunstesse Etichetta all'interno della cappa Etiqueta de la campana Typeplaatje van de afzuigkap Modèle Model Modell Modello Modelo Model Numéro de série Serial number Seriennummer Numero di serie Numero de serie Serienummer...
- Page 24 Réglage serrage charnière Adjustment tightening hinge Einstellung Scharnierfestklemmen Regalazione cerniera serragio Ajuste fricción bisagra Regelen aanspannen scharnier oder...
- Page 25 LR03 / AAA / 1,5V...
- Page 28 Cadre - Renforcement Frame - Reinforcement Faux - plafond (platre) False ceiling (plaster) Cale - Spacer Faux - plafond (MDF) False ceiling (MDF)
- Page 30 20NO412 - 130221...
Need help?
Do you have a question about the Galaxy Slim 3 FX and is the answer not in the manual?
Questions and answers