Table of Contents
Advertisement
Available languages
Available languages
Quick Links
Instructions for use and installation
GB
Cooker Hood
Istruzioni per l'uso e l'installazione
IT
Cappa
Mode d'emploi et installation
FR
Hotte de Cuisine
Bedienungsanleitung und Einrichtung
DE
Dunstabzugshaube
Kullanım ve montaj talimatları
TR
Davlumbaz
Uživatelská Pøíruèka
CZ
Odsavač par
FME 407 XS
FME 407 BK
Advertisement
Table of Contents

Related Manuals for Franke Mercury FME 407 XS


Summary of Contents for Franke Mercury FME 407 XS
- Page 1 Instructions for use and installation Cooker Hood Istruzioni per l’uso e l’installazione Cappa Mode d’emploi et installation Hotte de Cuisine Bedienungsanleitung und Einrichtung Dunstabzugshaube Kullanım ve montaj talimatları Davlumbaz Uživatelská Pøíruèka Odsavač par FME 407 XS FME 407 BK...
-
Page 2: Table Of Contents
INDEX RECOMMENDATIONS AND SUGGESTIONS ........................3 CHARACTERISTICS ................................4 INSTALLATION..................................6 USE ...................................... 14 MAINTENANCE ................................... 16 INDICE CONSIGLI E SUGGERIMENTI............................17 CARATTERISTICHE................................18 INSTALLAZIONE ................................. 20 USO...................................... 28 MANUTENZIONE ................................30 SOMMAIRE CONSEILS ET SUGGESTIONS............................31 CARACTERISTIQUES................................. 32 INSTALLATION..................................34 UTILISATION .................................. - Page 3 RECOMMENDATIONS AND SUGGESTIONS The Instructions for Use apply to several versions of this appliance. Accordingly, you may find descriptions of individual features that do not apply to your specific appliance. INSTALLATION • The manufacturer will not be held liable for any damages resulting from incorrect or improper installation.
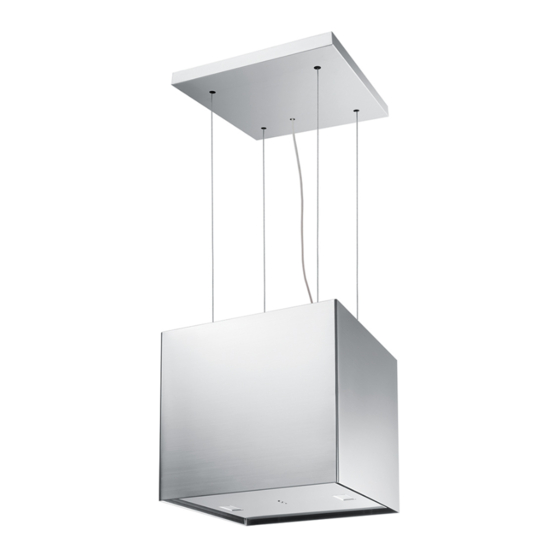
- Page 4 CHARACTERISTICS Components Ref. Q.ty Product Components Hood Canopy complete with: Controls, Light, Filters, Motor. Hood support plate. Ref. Q.ty Installation Components Wall Plugs ø 10 Screws 4.2 x 44.4 Q.ty Documentation Instruction Manual...
- Page 5 Dimensions...
- Page 6 INSTALLATION This hood is designed to be mounted on the ceiling/on a shelf, above a free-standing Hob (min. 650 mm), in: • Recirculation version: Internal recirculation. Sequence of operations - Installation • Preparing for installation • Drilling the Ceiling/Shelf and Fixing the support plate •...
- Page 7 Ceiling/Shelf drilling and Plate Fixing CEILING/SHELF DRILLING • Use a plumb-line and mark the centre of the cooking hob on the Support Ceiling/Shelf • Rest the Plate against the Ceiling/Shelf, making sure it is the right way up, as shown in the figure.
- Page 8 FIXING THE PLATE • Lift up the Fixing plate and fit the slots onto the two screws previously inserted in the ceiling, and turn un- til they are at the centre of the adjustment slot. Warning: The plate must be facing in the direction shown in the figure •...
- Page 9 CONNECTING HOOD-PLATE CABLES N.B. Before proceeding with installation the Hood must be raised to a height of at least 650 mm above the cooker hob by means of a support or with the assistance of another person. Be careful not to exceed the maximum Hood extension indicated in the dimensional drawing.
- Page 10 • Pay attention to the direction in which the Plate is fixed to the ceiling. • Insert the safety knobs (c) into the respective cables, with the thread to the top. • Insert the cable locking screws (b) into the respective cables. 1 10...
- Page 11 • Pass the Cables into the slots on the threaded pawls (a) and tighten the cable locking screws (b) into the pawls themselves. • When the operation has been completed, the result should be as shown in the figure for all 4 cables.
- Page 12 LEVELLING THE HOOD • The hood canopy must be levelled. • The Hood is levelled by adjusting the safety pawls • Rest a spirit level on the hood. • Exerting an upwards pressure on the safety knobs “unlocks” movement of the Cable. By inserting or extracting the cable from the cable locking screw it is possible to make adjustments to level the mobile hood canopy.
- Page 13 FIXING THE POWER SUPPLY CABLE • Tighten the power supply cable and fix it to the Bracket on the ceiling mounted Plate, using the tongue already mounted and 2 screws. • Slot the rubber cable raceway already threaded onto the power cable into the slot to prevent future damage.
- Page 14 Control panel Button Function Turns the lights ON/OFF at maximum intensity. Press and hold the button for approximately 4 LED S1 flashes twice = alarm seconds, with all the loads turned off (Motor and Lights), to turn the Activated Charcoal Filter LED S1 flashes once = alarm alarm on/off.
- Page 15 REMOTE CONTROL The appliance can be controlled using a remote control powered by a 1.5 V carbon-zinc alkaline batteries of the standard LR03-AAA type (not included). • Do not place the remote control near to heat sources. • Used batteries must be disposed of in the proper manner.
- Page 16 MAINTENANCE Grease filter The filter must be cleaned every 2 months of operation, or more frequently for particularly heavy usage, and can be washed in a dishwasher. CLEANING METAL SELF- SUPPORTING GREASE FILTER • Open the lighting unit by pulling on the nocth. •...
- Page 17 CONSIGLI E SUGGERIMENTI Questo libretto di istruzioni per l' u so è previsto per più versioni dell' apparecchio. É possibile che siano descritti singoli particolari della dotazione, che non riguardano il Vostro apparecchio. INSTALLAZIONE • Il produttore declina qualsiasi responsabilità per danni dovuti ad installazione non corretta o non conforme alle regole dell’arte.
- Page 18 CARATTERISTICHE Componenti Rif. Q.tà Componenti di Prodotto Corpo Cappa completo di: Comandi, Luce, Filtri, Motore. Piastra supporto Cappa. Rif. Q.tà Componenti di Installazione Tasselli ø 10 Viti 4,2 x 44,4 Q.tà Documentazione Libretto Istruzioni 1 18...
- Page 19 Ingombro 1 19...
- Page 20 INSTALLAZIONE Questa Cappa è predisposta per essere installata a Soffitto/Mensola, sopra (650 mm min.) un Piano di Cottura a isola in: • Versione Filtrante: Ricircolo interno. Sequenza operazioni Installazione • Preparazione all’Installazione • Foratura Soffitto/Mensola e Fissaggio Piastra di sostegno •...
- Page 21 Foratura Soffitto/Mensola e Fissaggio Piastra FORATURA SOFFITTO/MENSOLA • Con l’ausilio di un Filo a piombo riportare sul Soffitto/Mensola di supporto il centro del Piano Cottura. • Appoggiare al Soffitto/Mensola la Piastra facendo attenzione a posizionarla nel verso giusto, come indicato in figura. •...
- Page 22 FISSAGGIO PIASTRA • Sollevare la Piastra di fissaggio e incastrare le asole sulle due viti predisposte precedentemente al soffitto e ruotare fino al centro dell’asola di regolazione. Attenzione: Il verso della piastra deve essere come quello indicato in figura • Stringere le due viti e avvitare le altre due in dotazio- ne;...
- Page 23 COLLEGAMENTO CAVI CAPPA-PIASTRA N.B. Prima di proseguire con l’Installazione è necessario portare la Cappa all’altezza di almeno 650 mm dal piano di cottura con un supporto o con l’aiuto di una seconda persona. Attenzione a non superare la quota massima di esten- sione della Cappa indicata nel disegno dimensionale.
- Page 24 • Fare attenzione al verso della Piastra fissata al soffitto. • Infilare i pomelli di sicurezza (c) nei ri- spettivi cavi con la filettatura verso l’alto. • Infilare le Viti bloccacavo (b) nei ri- spettivi cavi. 2 24...
- Page 25 • Passare i Cavi nelle asole dei Nottolini filettati (a) ed avvi- tare le Viti bloccacavo (b) ai Nottolini stessi. • Ad operazione terminata il risul- tato deve essere come indicato in figura per tutti e 4 i Cavi. • Arrivati a questo punto abbiamo tutti e 4 i Cavi collegati alla Piastra.
- Page 26 LIVELLAMENTO DELLA CAPPA • E’ necessario effettuare il livellamento del corpo cappa. • Il livellamento della Cappa viene effettuato agen- do sui Nottolini di sicurezza C. • Appoggiare una livella sulla cappa. • Esercitando una pressione, verso l’alto, sui Pomel- li di sicurezza si “sblocca”...
- Page 27 FISSAGGIO DEL CAVO ALIMENTAZIONE • Portare in tensione il Cavo alimentazione e fissar- lo alla Staffa sulla Piastra a soffitto usando la lin- guetta già montata con 2 Viti. • Incastrare il passacavo in gomma già infilato sul Cavo alimentazione all’asola per evitare futuri danneggiamenti.
- Page 28 Quadro comandi Tasto Funzione Accende/Spegne le luci alla massima intensità. Tenendo il tasto premuto per circa 4 secondi, quan- Doppio lampeggio del Led do tutti i carichi sono spenti (Motore + Luce), si S1 = allarme Attivato. Attiva/Disattiva l’Allarme dei Filtri al Carbone At- Singolo lampeggio del Led tivo.
- Page 29 TELECOMANDO Questo apparecchio può essere comandato per mezzo di un telecomando, alimentato con pile alcaline zinco- carbone da 1,5 V del tipo standard LR03-AAA (non incluse). • Non riporre il telecomando in prossimità di fonti di calore. • Non disperdere le pile nell’ambiente, depositarle ne- gli appositi contenitori.
- Page 30 MANUTENZIONE Filtro antigrasso metallico Lavabile in lavastoviglie, necessita di essere lavato almeno ogni 2 mesi circa di utilizzo o più frequentemente, per un uso partico- larmente intenso. PULIZIA FILTRO ANTIGRASSO METALLICO • Aprire il gruppo illuminazione tirandolo sull’apposita intacca. • Togliere il Filtro spingendolo verso la parte posteriore del gruppo e tirando contemporaneamente verso il basso.
-
Page 31: Conseils Et Suggestions
CONSEILS ET SUGGESTIONS La présente notice d' e mploi vaut pour plusieurs versions de l' a ppareil. Elle peut contenir des descriptions d' a c- cessoires ne figurant pas dans votre appareil. INSTALLATION • Le fabricant décline toute responsabilité en cas de dommage dû à une installation non correcte ou non conforme aux règles de l’art. -
Page 32: Caracteristiques
CARACTERISTIQUES Composants Réf. Q.té Composants du produit Corps de hotte équipé de : commandes, lumière, filtres, moteur. Plaque support hotte Réf. Q.té Composants de l’installation Chevilles ø 10 Vis 4,2 x 44,4 Q.té Documentation Manuel d’instructions 3 32... - Page 33 Encombrement 3 33...
-
Page 34: Installation
INSTALLATION Cette hotte est prévue pour être installée au plafond/étagère, au-dessus (650 mm min.) d’un plan de cuisson en îlot en : • Version filtrante Recirculation intérieure. Séquence opérations d’installation • Préparation à l’installation • Perçage plafond/étagère et fixation plaque de support •... - Page 35 Perçage plafond/étagère et fixation plaque PERÇAGE PLAFOND/ÉTAGÈRE • À l’aide d’un fil à plomb, ramener sur le plafond/étagère de support le centre du plan de cuisson. • Appuyer la plaque au plafond/étagère en veillant de la positionner dans le bon sens, comme indiqué...
- Page 36 FIXATION PLAQUE • Soulever la plaque de fixation, emboîter les trous sur les deux vis précédemment prévues au plafond et tourner jusqu’au centre du trou de réglage. Attention : le sens de la plaque doit être celui indiqué dans la figure. •...
- Page 37 CONNEXION CÂBLES HOTTE-PLAQUE N.B. Avant de commencer l’installation, il est nécessaire d’amener la hotte à une hauteur d'au moins 650 mm du plan de cuisson, avec un support ou en se faisant aider par une autre personne. Prendre garde de ne pas dépasser la cote maximum d’extension de la hotte indiquée dans le croquis coté.
- Page 38 • Faire attention au sens d’orientation de la plaque fixée au plafond. • Enfiler les pommeaux de sécurité (c) dans leurs câbles correspondants, en veillant à ce que le filetage soit orienté vers le haut. • Enfiler les vis serre-câble (b) dans leurs câbles respectifs.
- Page 39 • Faire passer les câbles dans les trous des cliquets filetés (a) et serrer les vis serre-câble (b) à ces mêmes cliquets. • À la fin de l’opération, le résultat doit être celui représenté dans la figure pour tous les 4 câbles. •...
- Page 40 NIVELLEMENT DE LA HOTTE • Il est nécessaire d’effectuer le nivellement du corps de hotte. • Le nivellement de la hotte s’effectue en intervenant sur les cliquets de sécurité C. • Appuyer un niveau sur la hotte. • Pour « débloquer » le mouvement du câble, exercer une pression vers le haut, sur les pommeaux de sécurité.
- Page 41 FIXATION DU CÂBLE D’ALIMENTATION • Tendre le câble d’alimentation et le fixer à la bride sur la plaque de plafond, en utilisant la languette déjà montée avec 2 vis. • Emboîter le passe-câble en caoutchouc déjà enfilé sur le câble d’alimentation dans le trou, pour éviter tout endommagement futur.
-
Page 42: Utilisation
UTILISATION Tableau des commandes Touche Fonction Allume/Éteint l’éclairage à l’intensité maximum. Appuyer sur cette touche pendant environ 4 Deux clignotements de la led S1 secondes, lorsque toutes les charges sont étein- = alarme activée tes (Moteur+Éclairage), pour activer / désacti- Un clignotement de la led S1 = ver l’alarme filtres à... - Page 43 TELECOMMANDE Il est possible de commander cet appareil au moyen d’une télécommande, alimentée avec des piles alcalines zinc-charbon 1,5 V du type standard LR03-AAA25 (ne fournis pas). • Ne pas ranger la télécommande à proximité de sour- ces de chaleur. •...
-
Page 44: Entretien
ENTRETIEN Filtre à graisse métallique Il est lavable même au lave-vaisselle. Il doive être lavé environ tous les 2 mois d’utilisation ou plus fréquemment en cas d’utilisation particulièrement intensive. NETTOYAGE FILTRE À GRAISSE MÉTALLIQUE • Ouvrir le groupe d’éclairage en le tirant sur l’encoche prévue à cet effet. -
Page 45: Empfehlungen Und Hinweise
EMPFEHLUNGEN UND HINWEISE Di e se Gebrauchsanl e i t ung gi l t für mehrere Geräte-Ausführungen. Es i s t mögl i c h, dass ei n zel n e Ausstattungsmerk- mal e beschri e ben si n d, di e ni c ht auf Ihr Gerät zutreffen. MONTAGE •... -
Page 46: Charakteristiken
CHARAKTERISTIKEN Komponenten Bez. Menge Produktkomponenten Haubenkörper, komplett mit: Bedienelemente, Beleuchtung, Filter, Motor Platte der Haubenhalterung Bez. Menge Installationskomponenten Dübel ø 10 mm Schrauben 4,2 x 44,4 Menge Dokumentation Betriebsanleitung 4 46... - Page 47 Platzbedarf 4 47...
-
Page 48: Montage
MONTAGE Diese Haube ist für die Installation an einer Decke/Konsole über (Mindestabstand 650 mm) einer Kochinsel vorbereitet: • Umluftversion: Innere Rezirkulation. Sequenz der Installationsarbeiten • Vorbereitung zur Installation • Bohren von Decke/Konsole und Befestigung der Halteplatte • Anschlüsse • Montage des Haubenkörpers •... - Page 49 Bohren von Decke/Konsole und Befestigung der Platte BOHREN VON DECKE/KONSOLE • Mit Hilfe eines Lotfadens an Decke/Haltekonsole die Mitte des Kochfelds anzeichnen. • Die Platte in der korrekten Einbaurichtung an der Decke/Konsole anlegen. • Die Mitte der Löcher der Platte markieren. •...
- Page 50 BEFESTIGUNG DER PLATTE • Die Platte anheben, die Langlöcher an den zwei zu- vor an der Decke angebrachten Schrauben einhängen und bis zur Mitte der Einstellöse drehen. Achtung: Die Einbaurichtung der Platte muss wie in der Abbildung gezeigt sein. • Die beiden Schrauben festziehen und die beiden anderen mitgelieferten Schrauben einschrauben.
- Page 51 VERBINDUNG DER SEILE ZWISCHEN HAUBE UND PLATTE NB:Vor der Installation muss die Haube mit Hilfe einer Stütze oder einer zweiten Person auf eine Höhe von mindestens 650 mm vom Kochfeld gebracht werden. Darauf achten, dass die in der bemaßten Zeichnung angegebene max. Extension der Haube nicht überschritten wird. Diese Maßnahme ist sehr wichtig, weil das Gewicht der Haube beim Verbinden der Seile mit der an der Decke montierten Platte keinesfalls auf der Struktur lasten darf.
- Page 52 • Auf die Richtung der an der Decke befestigten Platte achten. • Die Sicherheitsknäufe (c) mit nach oben zeigendem Gewinde auf die entsprechenden Seile stecken. • Die Klemmschrauben (b) auf die entsprechenden Seile aufstecken. 5 52...
- Page 53 • Die Kabel durch die Langlöcher der Sperrklinke mit Gewinde (a) ste- cken und die Kabelklemmschrauben (b) an den Sperrklinken selbst festschrauben. • Das Ergebnis dieser Operation muss bei allen 4 Kabeln wie abgebildet aussehen. • Damit sind alle 4 Kabel an die Platte angeschlossen.
- Page 54 NIVELLIEREN DER ABZUGSHAUBE • Der Haubenkörper muss nivelliert werden. • Die Nivellierung der Haube erfolgt durch Einwir- ken auf die Sicherheits-Sperrklinke C. • Eine Wasserwaage auf die Haube legen. • Die Sicherheitsknäufe nach oben drücken, so dass das Kabel beweglich wird. Durch Hin- und Herschieben des Kabels in der Kabelklemmschraube kann der bewegliche Körper der Haube nivelliert werden.
- Page 55 BEFESTIGUNG DES STROMKABELS • Das Stromkabel spannen und mittels der bereits mit 2 Schrauben montierten Lasche an dem Bügel an der Deckenplatte befestigen. • Die bereits am Stromkabel aufgesteckte Lippklampe aus Gummi an der Öse fixieren, damit zukünftige Beschädigungen vermieden werden. •...
-
Page 56: Bedienung
BEDIENUNG Schalttafel Taste Funktion Schaltet die Beleuchtung bei maximaler Inten- sität ein/aus. Mit zirka 4 Sekunden langem Gedrückthalten Zweimaliges Blinken der LED der Taste bei abgeschalteten Verbrauchern S1 = Alarm Aktiviert. (Motor+Licht) wird der Alarm der Aktivkohle- Einmaliges Blinken der LED S1 filter aktiviert / deaktiviert. - Page 57 FERNBEDIENUNG Dieses Gerät kann mit einer Fernbedienung gesteuert werden, welche mit alkalischen Zink-Kohle-Batterien 1,5 V des Standardtyps LR03-AAA versorgt wird (nicht mitgeliefert). • Die Fernbedienung nicht in die Nähe von Hitzequel- len legen. • Batterien müssen vorschriftsmäßig entsorgt werden. Schalttafel Taste Funktion Display Stellt den Motor an/ab.
-
Page 58: Wartung
WARTUNG Metallfettfilter Der Filter sollte mindestens alle 2 Monate von Hand oder in der Spülmaschine gewaschen werden, bei intensiver Nutzung auch öfter. REINIGUNG DES METALLFETTFILTERS • Die Beleuchtungseinheit öffnen, indem sie zur entsprechenden Kerbe gezogen wird • Den Filter zu dem hinteren Teil der Gruppe schieben und gleichzeitig nach unten ziehen. -
Page 59: Tavsiyeler Ve Öneriler
TAVSIYELER VE ÖNERILER Bu kullanma talimatι birden fazla cihaz modeli için geçerlidir. Cihazιnιza uymayan bazι donanιm özellikleri tarif edilmiş olabilir. MONTAJ • Yalnιş veya eksik montajdan doğan herhangi bir zararιn sorumluluğu üreticiye ait değildir. • Davlumbaz ile pişirici cihazιn ocak kιsmι arasιndaki minimum güvenlik mesafesi 650 mm.dir (bazı... -
Page 60: Özellikler
ÖZELLIKLER Parçalar Ref. Miktar Ürün Aksamı Davlumbaz Gövdesi şunlardan oluşur: Kumandalar, Işıklar, Filtreler, Motor. Davlumbaz destek plakası. Ref. Miktar Kurulum Aksamı Dübel ø 10 Vida 4,2 x 44,4 Miktar Dokümantasyon Kullanım Kitapçığı 6 60... - Page 61 Boyutlar 6 61...
-
Page 62: Montaj
MONTAJ Bu Davlumbaz bir Pişirme Düzleminin üzerinde (en az 650 mm) Tavana/Rafa monte edilmek üzere ve aşağıdaki şekilde tasarlanmıştır: • Filtreli Sistem: Havayı içeride dolaştırır. Kurulum İşlem Sırası • Kurulum Hazırlığı • Tavan/Raf Delme ve Montaj Destekleme Plakası • Bağlantılar •... - Page 63 Tavan/Raf Delme ve Montaj Plakası TAVAN/RAF DELME • Bir şakül yardımıyla Pişirme Düzleminin merkezini destek Tavanı/Rafı üzerinde işaretleyin. • Şekilde gösterildiği gibi doğru yönde yerleştirmeye özen göstererek Plakayı Tavana/Rafa dayayın. • Plaka Deliklerinin merkezlerini işaretleyin. • Aşağıdaki delikleri delin: • Sağlam beton tavanda: kullanılan Beton Dübellerine göre. •...
- Page 64 MONTAJ PLAKASI • Montaj plakasını kaldırın ve daha önceden tavana açılmış deliklere iki vidayı yerleştirin ve ayarlama deliğinin ortasına kadar çevirin. Dikkat: Plakanın yönü şekilde gösterildiği gibi olmalı- dır. • İki vidayı sıkın ve ürünle birlikte gelen diğer iki vidayı takın; vidaları iyice sıkmadan önce vidaların ayarlama deliğinin yuvasından dışarı...
- Page 65 DAVLUMBAZ-PLAKA KABLO BAĞLANTISI NOT Kurulum işlemine geçmeden önce Davlumbazın bir destekle veya ikinci bir kişinin yardımıyla pişirme düzleminden en az 650 mm yüksekliğe kaldırılması gerekir. Lütfen boyut çiziminde gösterilen davlumbaz için gerekli en yüksek genişlemeyi aşmayın. Bu uygulama gereklidir çünkü Davlumbaz Kablolarının tavana monte edilmiş Plakaya yapıya ağır gelecek Davlumbaz ağırlığı...
- Page 66 • Tavana sabitlenen yönüne dikkat edin. • Güvenlik topuzlarını (c) yukarı doğru dişlerle ilgili kablolara yerleştirin. • Kablo sabitleme vidalarını (b) ilgili kablolara yerleştirin. 6 66...
- Page 67 • Kabloları dişli Mandalların deliklerinden (a) geçirip, kablo tutucu Vidaları (b) Mandallara vidalayın. • İşlem tamamlandığında sonuç 4 Kablonun her biri için şekilde gösterildiği gibi olmalıdır. • Bu noktaya geldiğimizde 4 Kablonun hepsini Plakaya bağlamış oluruz. Kablo tutma Vidalarının içinden ve dişli Mandalların deliğinden dışarı...
- Page 68 DAVLUMBAZIN DENGELENMESİ • Davlumbaz gövdesinin dengelenmesi gerekir. • Davlumbazın dengeleme işlemi güvenlik Mandalları C kullanılarak gerçekleştirilir. • Bir teraziyi davlumbazın üzerine yerleştirin. • Güvenlik topuzlarının üzerinde yukarıya doğru baskı uyguladığınızda Kablo hareketinin “kilidi açılır”. Kabloları kablo tutma vidalarından ileri veya geri yönde geçirerek davlumbazın hareketli gövdesini dengelemenize izin veren ayarlama işlemlerini gerçekleştirebilirsiniz.
- Page 69 GÜÇ KABLOSUNUN MONTAJI • Güç kablosunu gerginleştirin ve 2 vida ile monte edilmiş olan dili kullanarak plaka askısına sabitleyin. • Daha ileride zarar görmesini önlemek için güç kablosunun üstüne geçirilmiş olan kauçuk halkayı yuvasına yerleştirin. • Davlumbazı, en az 3 mm kontak açılmalı...
-
Page 70: Kullanim
KULLANIM Kumanda panosu Tuş İşlev Işıkları tam yoğunlukta açar/kapar. Bütün bağlantılar (Motor + Işık) kapalı oldu- Led çift yanıp söndüğünde S1 = ğunda, 4 saniyeliğine tuşu basılı tuttuğunuzda Alarm devrede. Aktif Karbon Filtre alarmı Devreye Girer / Led tek yanıp söndüğünde S1 = Devreden Çıkar. - Page 71 TELEKUMANDA Bu cihaza bir telekumanda ile de komut verilebilir; bu kumanda 1,5 Voltluk çinko-karbonlu LR03-AAA tipi standart alkalin pillerle çalışır (dahil değildir). • Telekumandayı ısı kaynakları yakınında bırakmaynız. • Pilleri çevreye atmayınız, bunlara ayrılmış çöp top- lama kaplarına atınız. Kumanda panosu Tuş...
-
Page 72: Bakim
BAKIM Metal yağ filtresi Bulaşık makinesinde yıkanabilir, en azından yaklaşık her 2 aylık kullanımdan sonra veya daha sık yıkanması gerekir, özellikle yoğun kullanım içindir. METAL YAĞ FİLTRESİ TEMİZLİĞİ • Aydınlatma grubunu özel girintisinden çekerek açın • Filtreyi grubun arka bölümüne doğru iterek ve aynı anda aşağıya doğru çekerek çıkartın. -
Page 73: Rady A Doporučení
RADY A DOPORUČENÍ Tento návod k použití je společný pro několik verzí přístroje. Je tedy možné, že bude obsahovat popis některých komponentů, které jsou součástí vybavení jiného přístroje než je Váš. INSTALACE • Výrobce odmítá jakoukoli odpovědnost za škody způsobené nesprávnou instalací, která neodpovídá příslušným předpisům. -
Page 74: Hlavní Parametry
HLAVNÍ PARAMETRY Součásti Poz. Součásti přístroje Tělo odsavače Nosný stropní talíř Poz. Montážní součásti Hmoždinka ø 10 Šrouby 4.2 x 44.4 Dokumentace Návod k obsluze 7 74... - Page 75 Prostorový rozměr 7 75...
-
Page 76: Instalace
INSTALACE Tento odsavač je projektován pro montáž do stropu nebo podhledu nad varnou desku v ostrůvku (min. 650 mm): • Recirkulace - vyčištěný vzduch se vrací zpátky do místnosti. Instalace • Příprava pro instalaci • Montáž stropního talíře • Napojení •... - Page 77 Děrovací schéma strop/konzola a připevnění kostry DĚROVACÍ SCHÉMA STROP/KONZOLA • Pomocí olovnice zjistěte a vyznačte na stropě nebo nosníku střed varné desky. • Přiložte na strop/nosník nosný talíř a to tak, jak je znázorněno na obrázku. • Vyznačte středy otvoru pro vrtání. •...
- Page 78 UCHYCENÍ NOSNÉHO TALÍŘE • Nosný talíř nasaďte na dva připravené vruty a poo- točte tak, aby vruty zapadly do drážky. Pozor! Talíř musí být namontován tak, jak je znázorně- no na obrázku. • Dotáhnete oba šrouby a zašroubujte oba další dodané šrouby.
- Page 79 MONTÁŽ NOSNÝCH LANEK Upozornění: Před montáží je nezbytné nastavit výšku odsavače tak, aby minimální vzdálenost od varné desky byla 650 mm. Pro toto nastavení je potřeba použít pomocnou plošinu nebo asistenci druhé osoby. Pozor! Nosné lanka a přívodní kabel musejí být instalovány v nezatíženém stavu, tzn. lanka a kabel nesmí...
- Page 80 • Dejte pozor, aby pozice krycího ple- chunosného talíře korespondovala s pozicínosného talíře. • Navlékněte na jednotlivá lanka bezpeč- nostní matičky (c) a poté lankové svor- ky (b). 8 80...
- Page 81 • Provlečte lanko do drážky v těle kotvy (a) a zajistěte ho tak,že zašroubujete svorku (b) do těla kotvy. • Tento postup proveďte u všech zbývajícíchtřech lanek a výsledek musí odpovídatvýsledku na uve- deném obrázku. K regulaci délky lanek mužete zatáhnout- za jejich horní...
- Page 82 VYVÁŽENÍ TĚLA ODSAVAČE • Aby byla zajištěna správná funkce odsavače, je třeba tělo odsavače dát do vodováhy. • Vyvážení se provádí pomocí bezpečnostních mati- ček (c). • Položte vodováhu na tělo odsavače dle obrázku. • Pokud bezpečnostní matičku povolíte, je možno pohybovat lanky směrem nahoru nebo dolu.
- Page 83 UCHYCENÍ NAPÁJECÍHO KABELU • Připevněte za pomocí 2 šroubu přívodní kabel do svorkyna nosném talíři. • Správně nainstalujte gumovou ochranu přívodního kabelu,která je již na kabelu umístěna.Před instalací přístroje vypněte jistič nebo hlavní vypínač. • Odsavač musí být připojen k elektrické...
-
Page 84: Použití
POUŽITÍ Ovládací panel Tlačítko Funkce Vypíná a zapíná osvětlení na maximální výkon. Stiskněte tlačítko na dobu cca. 4 vteřin LED S1 2 x bliká = alarm (motor i světla musí být vypnuta), akti- zapnut. vuje/deaktivuje se alarm tukového filtru. LED S1 1 x bliká = alarm vypnut. - Page 85 DÁLKOVÝ OVLADAČ Tento spotřebič je možné ovládat dálkovým ovladačem napájeným dvěma alkalickými zinko-karbonovými ba- teriemi 1,5 v typu standard LR03-AAA (nezahrnutý). • Dálkový ovladač nepokládejte do blízkosti tepelných zdrojů. • Použité baterie nevyhazujte, ale zlikvidujte je ve spe- ciálních kontejnerech. Dálkový...
-
Page 86: Údržba
ÚDRŽBA Tukový filtr Tukový filtr je nutné čistit každé 2 měsíce nebo i častěji, v závis- losti na intenzitě používání odsavače. Filtr je možné umývat bud ručně ve vodě se saponátovým přípravkem nebo v myčce nádobí. ČIŠTĚNÍ SAMONOSNÉHO TUKOVÉHO FILTRU •... - Page 88 Franke S.p.a. Via Pignolini,2 37019 Peschiera del Garda (VR) www.franke.it 991.0272.562_ver3...
Need help?
Do you have a question about the Mercury FME 407 XS and is the answer not in the manual?
Questions and answers