Table of Contents
Advertisement
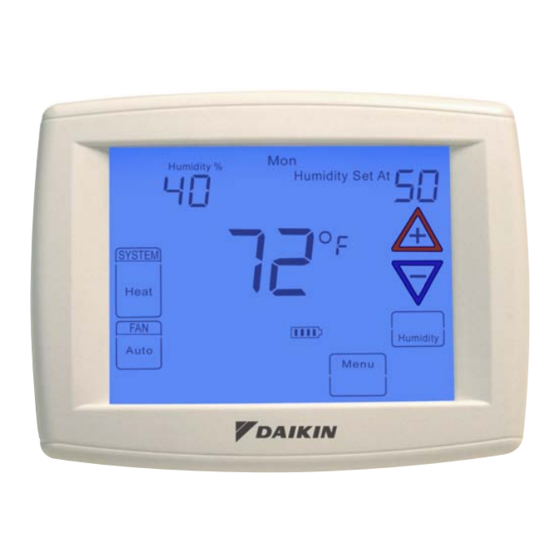
Programmable Touch-Screen Thermostat (Part No. 910121750)
Used With:
Accessory Remote Sensors
▪ Indoor (Part No. 910129095)
▪ Outdoor (Part No. 910129096)
Contents
Introduction ..........................................................................2
Overview . ..........................................................................2
Applications ......................................................................2
Safety ....................................................................................3
Installation ............................................................................3
Remove Old Thermostat ...................................................3
Installing New Thermostat ................................................3
Battery Location . ...............................................................3
Power Stealing Switches ..................................................3
Wiring ...................................................................................4
Thermostat Quick Reference..............................................5
Programming And Configuration Items .............................6
Installer/Configuration Menu ..............................................7
©2013 Daikin Applied • www.DaikinApplied.com • 800.432.1342
Installation Operation & Maintenance Data
Operating Your Thermostat ..............................................10
Heating . ..........................................................................10
Cooling/Dehumidifier . .....................................................11
Choose The Fan Setting (Auto or On) . ...........................11
Manual Operation For Non-Programmable Mode . .........11
Mode . ..............................................................................11
Program Override (Temporary Override) . .......................11
Set Current Time And Day . .............................................11
Automatic Daylight Saving Calculation ...........................12
Enter the Heating Program .............................................12
Enter The Cooling Program ............................................12
Automatic Schedule ........................................................12
Programming . ....................................................................13
Wired Remote Temperature Sensing ..............................14
Averaging or Weighing Remote Sensors ........................15
Reset Operation..............................................................16
IOM 1178-1
Group: WSHP
Part Number:
910138061
Date: October 2013
Advertisement
Table of Contents

Related Manuals for Daikin 910121750


Summary of Contents for Daikin 910121750
-
Page 1: Table Of Contents
Installation Operation & Maintenance Data IOM 1178-1 Group: WSHP Part Number: 910138061 Date: October 2013 Programmable Touch-Screen Thermostat (Part No. 910121750) Used With: Accessory Remote Sensors ▪ Indoor (Part No. 910129095) ▪ Outdoor (Part No. 910129096) Contents Introduction ................2 Operating Your Thermostat ..........10 Overview . -
Page 2: Introduction
Unit Controller SmartSource 2-Stage W. GTH, GTV Vertical SmartSource Inverter W. DFW Daikin Inverter Controller The programmable touch screen thermostat for water source heat pump applications is shown in Table 2 Table 2: Water source heat pump application guide Applications Water-... -
Page 3: Safety
Safety Fasten base snugly to wall using mounting holes shown WARNING Figure 1 on page 4 and two mounting screws. Lev- eling is for appearance only and will not affect thermostat Wiring connections must be made in accordance with all applicable electrical codes. -
Page 4: Wiring
Installation Thermostat Base Figure 1: Base & rear view of thermostat "AA" batteries (2) Mounting holes Stack Power Stealing Switch Power stealing switches Thermostat Base Place level across mounting tabs Rear View of Thermostat (for appearance only) Wiring Table 4: Thermostat wiring terminals & systems operation System Thermostat Terminal HP1 Operation... -
Page 5: Thermostat Quick Reference
Terminal Label Description Thermostat Programmable Touch Screen (Part No. 910121750) Heat Pump Connections The thermostat can be configured for use with the following heat pump systems: • Heat Pump Type 1 (HP1) – Single stage compressor system with electric backup •... -
Page 6: Programming And Configuration Items
Thermostat Quick Reference Figure 4: Programming and configuration items Programming And Configuration Items 12. “Humidity” indicates that the “Set At” display is 1. Displays and “Keypad Lockout” when in keypad Humidity setpoint. lockout mode. Displays and “Temperature Limit” and “Keypad 13. -
Page 7: Installer/Configuration Menu
Installer/Configuration Menu To enter the configuration menu: Press the Menu touch key. Press and hold for 5 seconds the Installer Config touch key. This dis- plays screen reference #1 in the table below. Screen Reference numbers appear in top right corner of display. Press to advance to the next menu item or to return to a previous menu item. - Page 8 Installer/Configuration Menu 1. This control can be configured for: 10. Select Continuous Display Lighting (dL) – In low HP1 – Heat Pump with one stage of compressor lighting conditions, display backlight improves the display contrast. When C terminal is connected, selecting dL On (2 heat/1 cool) HP2 –...
- Page 9 Installer/Configuration Menu “Keypad Lockout and P” = Partial Lockout. 17 & 18. Select Cool Savings™ – Cool Savings™ Partial Lockout allows only the keys to provides an energy saving temperature offset operate within your set temperature limits. (from 1-6 degrees) under peak cooling load “Temperature Limit/Keypad Lockout”...
-
Page 10: Operating Your Thermostat
Installer/Configuration Menu 26. Select Remote Sensor as Indoor or Outdoor – If 30 be adjusted in 25 day increments. This should be is enabled, select the remote to be Remote In (Indoor, adjusted with respect to the bulb’s recommended P/N 910129095) or Outdoor Remote (Outdoor, P/N maintenance schedule. -
Page 11: Cooling/Dehumidifier
Operating Your Thermostat and cool temperatures. When using AUTO, be sure to set the Cooling/Dehumidifier Cooling temperatures more than 1° Fahrenheit higher than the 1. Press SYSTEM to select “Cool”. heating temperature. 2. Press to adjust the thermostat setting below room Manual Operation For Non-Programmable temperature. -
Page 12: Automatic Daylight Saving Calculation
Operating Your Thermostat 10. Press and hold either the touch key until you Enter the Heating Program reach the correct day of the month and day of the week 1. Press the Menu key and then press Set Schedule. Press displayed at the top row. -
Page 13: Programming
Operating Your Thermostat Heating Example: Energy Saving Factory Pre-Program 1. In Heat mode, press Auto Schedule once. The thermostats are programmed with the energy saving set- tings shown in the table below for all days of the week. 2. Press to select a comfortable day time tempera- If this program suits your needs, simply set the thermostat ture (example 72°). -
Page 14: Wired Remote Temperature Sensing
Programming Table 5: Worksheet for re-programming 5+1+1 and 7-day program (Heating) Heating Program Occupied Unoccuped 8:00 AM 62°F Auto 10:00 PM 62°F Auto Monday Tuesday Wednesday Thursday Friday 8:00 AM 62°F Auto 10:00 PM 62°F Auto Saturday 8:00 AM 62°F Auto 10:00 PM 62°F Auto Sunday... -
Page 15: Averaging Or Weighing Remote Sensors
Programming Example: Local sensor temperature is 80° and the remote Averaging or Weighing Remote Sensors sensor is 70°. The thermostat will weight or average the temperature of the If weight is selected H4, the averaged temperature of 72° will indoor remote sensor with the local sensor in the thermostat be displayed. -
Page 16: Troubleshooting
20 seconds. This unlocks the thermostat. Blank display any or keypad 1. Voltage Spike or static discharge Use the Reset Operation shown above. not responding Thermostat does not have 1. Earlier version of thermostat Contact your local Daikin factory representative. Menu Screen Numbers ©2013 Daikin Applied • www.DaikinApplied.com • 800.432.1342 IOM 1178-1 / Page 16 of 16...
Need help?
Do you have a question about the 910121750 and is the answer not in the manual?
Questions and answers