Table of Contents

Subscribe to Our Youtube Channel
Related Manuals for Fuller Brush FB-GIM


Summary of Contents for Fuller Brush FB-GIM
- Page 1 Owner’s Manual For the Fuller Brush PORTABLE CANISTER V acuum Model FB-GIM Thank you for purchasing this Fuller Brush Canister Vacuum. To ensure the best results, please read this manual first and keep it for future reference.
-
Page 3: Table Of Contents
Index IMPORTANT SAFETY INSTRUCTIONS .............. Polarization Instructions .................. Description of the Vacuum ................Operation Turning the Vacuum On/Off ................Carrying the Vacuum ..................Storing the Power Cord ..................Vacuuming Floors ................... Attachment Cleaning Cleaning Tools ....................Cleaning Tools Holder ..................Adjusting the Suction Power ................ -
Page 4: Important Safety Instructions
IMPORTANT SAFETY INSTRUCTIONS When using an electrical appliance, basic precautions should always be followed, including the following: READ ALL INSTRUCTIONS BEFORE USING THIS APPLIANCE The manufacturer cannot accept responsibility for damage caused when the appliance is not used according to the instructions or for uses other than those for which it was intended. -
Page 5: Polarization Instructions
Two-Wire Polarized Cord POWER CORD, 2-WIRE POLARIZED CORD To reduce the risk of electric shock, this product is equipped with a polarized alternating current line plug (a plug having one blade wider than the other). This plug will fit into the power outlet only one way. This is a safety feature. -
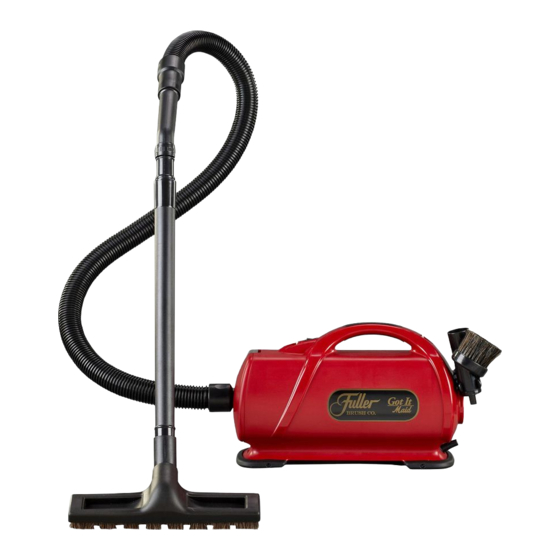
Page 6: Description Of The Vacuum
Description of the Vacuum... - Page 7 Description of the Vacuum Carrying Handle Crevice Tool Dusting Brush Shoulder Strap Main On/Off Power Switch Bag Compartment Cover and Retaining Latch Suction Intake Port Power Cord / Cord Storage Suction Relief Ring Hose Assembly Cleaning Tools Holder Blower Exhaust Port Upholstery Tool/Slide on Brush Extension Wands Bare Floor Tool...
-
Page 8: Operation
Operation Turning the Vacuum On/Off (Fig. 1) • To start the vacuum cleaner, push the “On/Off” switch located on the handle to the “On” (I) position. • To stop the vacuum cleaner, push the “On/Off” switch to the “Off” (O) position. •... -
Page 9: Vacuuming Floors
Operation Vacuuming Floors With the cleaning tools and vacuum wands, your vacuum is a comprehensive cleaning system. • Attach the vacuum hose to the suction inlet port and twist to lock into place (Fig. 4). • Attach the extension wand(s) to the curved handle end of the hose (Fig. -
Page 10: Attachment Cleaning
Attachment Cleaning Cleaning Tools Your vacuum is equipped with a dusting brush, upholstery tool and crevice tool. Other tools are available at a Fuller Brush Service Center. • Attach the vacuum hose to the suction inlet port and twist to lock into place (Fig. 4). Fig. -
Page 11: Adjusting The Suction Power
Attachment Cleaning Adjusting the Suction Power for Tool Cleaning (Fig. 11) On the hose handle, locate the suction relief ring and turn it to the desired position. This reduces the suction power coming through the hose. Close the suction relief ring when finished to restore Fig. -
Page 12: Maintenance And Care
Maintenance and Care Replacing the Vacuum Bag • Lift up the cover retaining clip to remove the cover (Fig. 13). • Remove and discard the used bag. • Install a new bag with the arrow on the cardboard pointing to the top of the vacuum (Fig. -
Page 13: When To Change The Filter
Maintenance and Care When to Change the Filter At a minimum, it’s recommended to replace the filters once a year or after using 12 vacuum bags, whichever comes first. If someone in your household is sensitive to airborne allergens, it is recommended to change the filter after every six vacuum bags. -
Page 14: Problem Solving Guide
Problem Solving Guide Trouble shooting PROBLEM POSSIBLE REASON POSSIBLE SOLUTION Vacuum won’t turn on • Power cord not firmly • Plug unit in firmly plugged in • Blown fuse or tripped • Check house fuse or breaker breaker. Replace fuse / reset breaker. -
Page 15: Warranty
Warranty What is Covered: This warranty covers any defects in material and workmanship in your new Fuller Brush Got It Maid vacuum. How Long Coverage Lasts: Warranty coverage for the Fuller Brush Got It Maid vacuum lasts one years. Household models used commercially are only warranted for 90 days. - Page 16 Owner’s Warranty Information keep this for your records… The model and serial number of this product may be found on the back of the unit. Register your Fuller Brush vacuum online at www.FullerBrushVacuums.com as soon as possible for your protection. Also, note the model and serial numbers of your unit in the spaces provided below, and retain this book as a permanent record of your purchase.
- Page 17 Fuller Brush Vacuum Cleaners PO Box 730 Fenton, MO 63026 www.FullerBrushVacuums.com ©2013 Fuller Brush Vacuum Cleaners Item B503-7600...
Need help?
Do you have a question about the FB-GIM and is the answer not in the manual?
Questions and answers