
Related Manuals for Viscount RD-70


Summary of Contents for Viscount RD-70
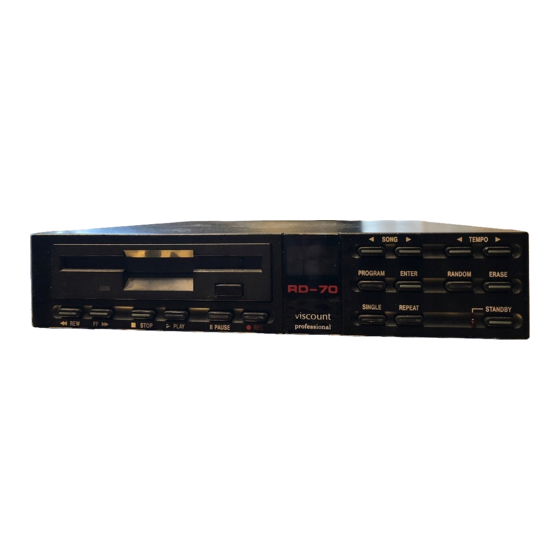
- Page 1 RD-70 Midi Data Filer SONG TEMPO PROGRAM ENTER RANDOM ERASE RD-70 STOP PLAY PAUSE SINGLE REPEAT STANDBY viscount professional D I V I S I O N...
- Page 2 CAUTION RISK OF ELECTRIC SHOCK DO NOT OPEN WARNING! TO REDUCE THE DANGER OF ELECTRIC SHOCK: DO NOT REMOVE COVER (OR BACK) DO NOT EXPOSE THIS APPLIANCE TO RAIN OR MOISTURE NO USER SERVICEABLE PARTS INSIDE REFER SERVICING TO QUALIFIED SERVICE PERSONNEL This simbol is intended to This simbol is intended to alert alert the user to the presence...
- Page 3 Professional t an s ou for c oosin t e RD-70 a fe si ple precautions Never appl e cessive force to t e ec anical parts e s or dis drive Do not position t e unit near eat sources or in e cessivel...
-
Page 7: Table Of Contents
Contents 5.1 Disk format 1.1 General Function INTRODUCTION FLOPPY-DISKS 5.2 Initialization 1.2 Memory 5.3 Copying a song 1.3 MIDI Code 5.4 Copying a whole disk 1.4 Standard MIDIFILE 5.5 Deleting a song 2.1 Preliminary Operation 5.6 Deleting a whole disk PLAYBACK 2.2 Playing Back a song 5.7 Song protection... -
Page 10: General Function
The messages are made permanent by using back-up floppy-disks (3.5", 2DD and 3.5", HD) and storing the data as a standard MIDIFILE. The RD-70 cannot generate sounds itself, it can only handle MIDI information needed for the sounds to be produced by other instruments (keyboards, expanders, drum-machines, etc.). -
Page 11: Midi Code
INTRODUCTION 1.3MIDI Code The word MIDI is an abbreviation for Musical Instrument Digital Interface. The MIDI language was originally designed by NASA for scientific purposes, and it is only since 1983 that it has been successfully applied to musical instruments. It is basically a code which can convert any parameter of real musical MIDI IN MIDI THRU... - Page 13 PLAYBACK...
-
Page 14: Preliminary Operation
* Check that the power supply plug is firmly inserted in the power socket (220V/AC). * Connect a MIDI cable (standard 5 pin DIN) from the MIDI OUT connector of the RD-70 to the MIDI IN connector of an external sound source. 5 pin DIN MIDI CABLE MIDI OUT... -
Page 15: Song Number
REPEAT STANDBY N.B. This function is automatically actuated when the RD-70 is turned on. * To move from one song to another, use the SONG < and > buttons. * When a large number of songs are stored on the same disk, you can move more quickly from one number to another by keeping the SONG button indicating the desidered direction of movement pressed down. -
Page 16: Beat Number
To actuate this function, press FF and REW simultaneously. 2.7REPEAT Functions SONG TEMPO * The RD-70 can repeat a whole disk, a single song or a specific section of a song PROGRAM RANDOM ENTER... -
Page 17: Autoplay Function
* The way in which the initial parameters (see 3.6 PROGRAMMING) have been set causes the RD-70 to automatically read all of the songs on a floppy disk in sequence, going from first to second and so on to the end. In order to change this, simply select the SINGLE mode. - Page 19 PROGRAMMING...
-
Page 20: Creating A Chain
PROGRAMMING 3.1Creating a CHAIN * The RD-70 can be programmed to automatically playback a series of songs SONG TEMPO in the order selected by the user (CHAIN). PROGRAM ENTER RANDOM ERASE The procedure is described below: SINGLE REPEAT STANDBY 1) While holding ENTER, press the PROG button (the relative LED will start flashing). -
Page 21: Programmed Pause
PROGRAMMING 3.4Programmed Pause * In chain playback, the RD-70 can also set the interval time between one song SONG TEMPO and another. PROGRAM ENTER RANDOM ERASE 1) While holding ENTER button press also PAUSE. SINGLE REPEAT STANDBY 2) Use the REW and FF buttons to choose the desired interval (in seconds) which will be shown on the display. -
Page 22: Initialization
Proceed as STANDBY follows: 1) Turn off the RD-70 by pressing the STANDBY button (LED will light up). ERASE STANDBY 2) While holding ERASE, turn the RD-70 back on with the STANDBY button. - Page 23 RECORDING...
-
Page 24: Preliminary Operations
*Connect a MIDI cable (standard 5 pin DIN) from the MIDI OUT connector of the RD-70 to the MIDI IN connector of the external sound module (or to the MIDI IN connector of the data source itself if it has a built-in sound source). -
Page 25: Storing
* Data storage is carried out completely automatically DURING actual recording. This is the fundamental characteristic of the "direct to disk" read/write system used by the RD-70 which uses the disk directly as the data loading and unloading unit since it does not have buffer memory banks (RAM). - Page 26 FLOPPY-DISKS...
-
Page 27: Disk Format
At this point the disk is ready for writing. * You may need to format a disk that has already been used by the RD-70 or another machine, or that is not blank in any case. Use the same procedure as... -
Page 28: Copying A Song
When the copy has been made the number of the copied song will be displayed. N.B. If a large amount of data has to be copied, the RD-70 may request the copy source disk a number of times. In this case, the display will request "Src"... -
Page 29: Deleting A Whole Disk
FLOPPY-DISKS 5.6Deleting a Whole Disk * To delete all of the songs on a disk, proceed as follows: 1) Insert the disk to be deleted. 2) While holding PAUSE, press ERASE then REC. At the end of the operation all the songs on the disk will be deleted. 5.7The protection of a song * To enable or disable the protection of an individual song on a disk, against accidental deletion proceed as follows:... -
Page 30: Occupied Disk Space
FLOPPY-DISKS 5.10Occupied Disk Space * To see how much space is occupied by a song on the disk, proceed as follows: 1) Stop the reproduction and select the song with the SONG < and > buttons. 2) While holding ERASE, press the SONG > button. The display will give the value in KBytes. - Page 31 MIDI FUNCTIONS...
-
Page 32: Midi Update Function
RD-70, it can also re-transmit messages from an external MIDI device received at MIDI IN. * This function can be extremely useful in certain cases as it allows the RD-70 to be incorporated into complex MIDI systems, while in others it may cause problems as in certain types of connection it can produce "data loops"... -
Page 33: Time Base Selection
* This function determines the resolution to be used to record incoming MIDI messages. * The RD-70 TIME BASE is usually set to 96, but a value of 240 can be selected if desired. * The following table indicates the compatibility of the two values in relation... -
Page 34: Exclusive System
890 Kbytes * The messages, which will contain set-up data for the devices connected, can be stored by the RD-70 and assigned to the SONG < and > and TEMPO < and > buttons. - Page 35 MESSAGGES...
-
Page 36: Error Messages
ERROR MESSAGES Hardware error CPU halted Cause of error: The RD-70 hes detected a fault in its electronic components Remedy: Contact the technical assistence centre Eject disk Disk error Cause of error: The RD-70 has detected errors during disk reading or writing... - Page 37 Close the tab in the top right hand corner of the disk No Play song Cause of error: The song selected cannot be played by the RD-70. Remedy: The identification parameters of the song that you have selected are incorrect or have not been updated.
- Page 38 Cause of error: There is an overflow of incoming MIDI data at the MIDI-IN port of the RD-70. Remedy: Reduce the amount of data being sent to the RD-70 or send the messages at a No clock selected Cause of error: The internal clock of the RD-70 has been disabled and there is no icoming MIDI-CLOCK message at the MIDI-IN port.
- Page 39 Packet overflow Cause of error: You have tried to save an exclusive system string that is too large for the machine's storage capacity. Remedy: Reduce the size of the string and perform the storage procedure again. No packet transmitted Cause of error:: You have tried to transmit the contents of a memory location (MIDI-Packet) that is empty (see section 6.6 of the manual) Remedy:...
-
Page 40: Other Messages
OTHER MESSAGGES Are you sure? Time base setting at 96 bpm Time base setting at 120 bpm Time base setting 192 bpm Time Base setting at 240 bpm Midi Packet nr. 1 selected Midi Packet nr. 2 selected Midi Packet nr. 3 selected Midi Packet nr. - Page 41 End of song reached Insert source disk Insert destination disk Song protection off Song protection on Automatic MIDI Clock slected Internal Clock selected External MIDI Clock selected Remote Clock Selected External Clock selected...
- Page 42 Unit working Operation interrupted by user...
-
Page 43: Quick Reference Guide
QUICK REFERENCE GUIDE Floppy Disk Operations Format unused disk = Insert disk + ERASE Format used disk = Insert disk + ERASE Copy selected song = REC + ENTER, REC Copy all songs = REC + REPEAT, REC Display protection status = ERASE + SONG <... - Page 44 Exclusive System Management Assign file to SONG > button = STOP + ENTER + SONG > Assign file to SONG < button = STOP + ENTER + SONG < Assign file to TEMPO > button = STOP + ENTER + TEMPO > Assign file to TEMPO <...
- Page 45 CAUTION! This product contains a lithium battery. There is danger of explosion if battery is incorretly replaced. Replace only with a Maxell CR2032. Replace only with the correct polarity. Discard used battery according to manufacter’s instruction’s. ADVARSEL! Lithiumbatteri – Eksplosjonsfare. Vade utksifting benyttes kun batteri som anbefalt av apparatfabrikanten.
- Page 46 Sales Division: Via Belvedere Fogliense 8, I-47836 Mondaino (RN) Italy tel.+39-0541-981700 - fax +39-0541-869605 - e-mail: viscount@omniway.sm - Internet: www.viscount-organs.com - www.viscount.it Distribution for Italy: TITAN MUSIC S.A. Strada Genghe di Atto, 80 - 47031 Acquaviva – Repubblica di San Marino tel.0549-999164 - fax 0549-999490...
Need help?
Do you have a question about the RD-70 and is the answer not in the manual?
Questions and answers