Table of Contents
Advertisement
Quick Links
Advertisement
Table of Contents

Related Manuals for Kyocera Jet KX18


Summary of Contents for Kyocera Jet KX18
- Page 2 PAGE II FCC/IC NOTICE USER GUIDE FOR THE KYOCERA JET KX18 PHONE Kyocera is a registered trademark of Kyocera Corporation. Race 21 and Brick Attack are trademarks of Kyocera Wireless Corp.
- Page 3 PAGE III FCC/IC NOTICE USER GUIDE FOR THE KYOCERA JET KX18 PHONE Before a phone model is available for sale to the public, it must be tested and certified to the FCC that it does not exceed the limit established by the government-adopted requirement for safe exposure.
- Page 4 PAGE IV CAUTION USER GUIDE FOR THE KYOCERA JET KX18 PHONE Hearing aids—Some digital wireless phones may interfere with hearing aids. In the event of such interference, you may want to consult your service provider or call the customer service line to discuss alternatives.
- Page 5 Kyocera phones. Use of any unauthorized PAGE V USE WITH CARE USER GUIDE FOR THE KYOCERA JET KX18 PHONE accessories may be dangerous and will invalidate the phone warranty if said accessories cause damage or a defect to the phone.
- Page 6 093 453 037 Kyocera Wireless Corp. 10300 Campus Point Drive, San Diego, CA 92121 U.S.A. Visit us at www.kyocera-wireless.com PAGE VI BATTERY AND CHARGER SPECIFICATIONS Output 4.5 V 1.2 A 4.5 V 600 mA USER GUIDE FOR THE KYOCERA JET KX18 PHONE...
-
Page 7: Table Of Contents
PAGE VII CONTENTS USER GUIDE FOR THE KYOCERA JET KX18 PHONE 8 USING PUSH TO TALK ....44 Phone position ......44 PTT call types . - Page 8 Index ......85 PAGE VIII CONTENTS USER GUIDE FOR THE KYOCERA JET KX18 PHONE...
-
Page 9: Getting Started
GETTING STARTED Installing the battery Your Amp’d Mobile Jet phone comes with a removable lithium ion (LI Ion) battery. Fully charge the battery before using the phone. To install the battery: 1. Hold the phone face down. 2. Slide the tab at the bottom of the door up and remove the battery door. -
Page 10: Evdo
United States. EvDO is an acronym for Evolution Data Only, and enables download speeds over cell phone networks of up to 2.4Mb per second. EvDO is considered the first 3G, or third generation wireless standard to be adopted within the US. -
Page 11: Getting To Know Your Phone
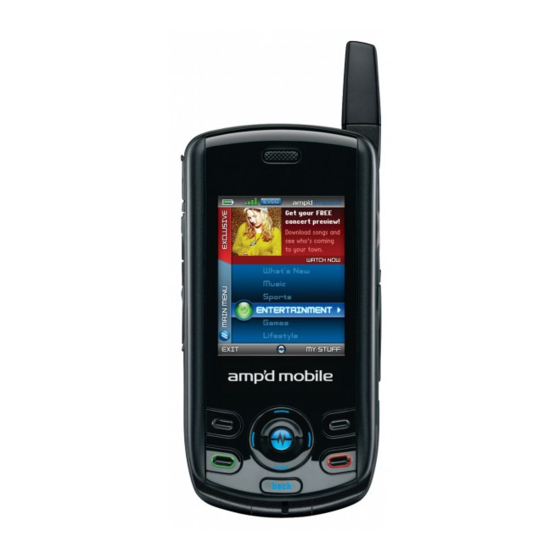
Getting to know your phone The phone is shown here in the open position. You must slide your phone open to use the keys on the lower portion of the phone. Home screen. Left softkey accesses menus and functions. Send/Talk key starts or answers a call. Press once to activate voice dialing, twice to display the Recent Calls list, and three times to redial the last number dialed. - Page 12 Antenna does not extend. Speaker for ringers, speakerphone and music. External camera key activates Camera mode. To activate Camera mode, press and hold until you hear one beep. Press and hold until you hear two beeps for Video mode. TransFlash slot for external memory card. Message Indicator Light Camera flash Jack for hands-free headset (sold separately).
- Page 13 Using menus The contents of the main menu are as follows: Contacts Amp’d Live View All Amp’d PTT Add New Find Name Recent Calls PTT Contacts PTT Groups All Calls Speed Dial List Incoming Calls Voice Dial List Outgoing Calls Messaging Missed Calls Groups...
-
Page 14: Performing Basic Functions
Performing basic functions Note: The phone must be powered ON to perform the following functions. To... Turn the phone on Make a call Answer a call Activate voice dialing Silence the ringer on an incoming call End a call Access voicemail Push to Talk Launch Amp’d Live Verify your phone... - Page 15 To... From the home screen... Access My Stuff Press and hold the Navigation key Access Messaging Menu Press and hold the Navigation key Access Recent Calls list Press the Send/Talk key Press the Navigation key Launch Amp’d Live Media Player Resume Music playback Press the Navigation key Select menu options...
-
Page 16: Understanding Screen Icons
Understanding screen icons These icons may appear on your phone’s screen. EvDO is available. The phone is operating in IS2000 (1X) digital mode. Both EvDO and Is2000 (1X) are available. The phone is operating in IS95 digital mode. The phone is receiving a signal. You can make and receive calls. -
Page 17: Making And Answering Calls
MAKING AND ANSWERING CALLS Making a call Make sure you are in an area where a signal can be received. Look for the screen. The more bars you see in this symbol, the stronger the signal. If there are no bars, move to where the signal strength is better. -
Page 18: Silencing An Incoming Call
Slide open • Press the Send/Talk key incoming call. - or - • Press the speaker key to answer the incoming call and turn on the speakerphone. Slide closed • Press the Send/Talk key the call. Answering calls using the slide You can set the phone to answer immediately when you open the slide. -
Page 19: Using The Speakerphone
Using the speakerphone Your Amp’d Mobile Jet has a built-in speakerphone. • To turn on the speaker, open the slide and press the speaker key . If you press the speaker key during an incoming call alert, you answer the call. •... - Page 20 Dealing with missed calls When you have missed a call, “Missed Call” appears on your screen unless the caller leaves a voicemail. • To clear the screen, press the left softkey to select OK. • To view details of the call, press the right softkey to select Calls then press the Amp’d/OK key...
-
Page 21: Speed Dialing
Erasing recent calls → 1. Select Menu Recent Calls Erase Call Lists. 2. Select an option: All Calls, Incoming Calls, Outgoing Calls, or Missed Calls. 3. Press the left softkey to select Yes. Speed dialing Before you can use speed dialing, you must save a phone number as a contact and assign a speed dial location to it. - Page 22 If you see “New Messages” or “New Alerts” Slide open or closed 1. Press the left softkey to select Call, which initiates a call to your voicemail number. 2. Follow the prompts to retrieve the message. To clear the screen without checking messages: 1.
-
Page 23: Roaming
Timing your calls You can set your phone to beep 10 seconds before each minute passes when you are on a call. → → • Select Menu Settings → Minute Alert Enabled. Roaming Setting an alert for roaming You may use this setting if you want the phone to alert you when you roam outside of your home service area. -
Page 24: Entering Letters, Numbers, And Symbols
ENTERING LETTERS, NUMBERS, AND SYMBOLS You can enter letters, numbers, and symbols in contacts, text messages, and your banner. Understanding text entry screens The current text entry mode (and capitalization setting, when applicable) are indicated by icons. characters remaining capitalization setting text entry field Text entry modes There are six text entry modes:... -
Page 25: Capitalization Settings
Entering symbols While entering text, you can enter symbols by pressing the “1” key until you see the symbol you want. Using this method, you have access to the following symbols: & To access the full set of symbols: 1. From the text entry screen, select Options. 2. -
Page 26: Quick Reference To Text Entry
Quick reference to text entry This table gives general instructions for entering letters, numbers, and symbols. To... Enter a letter Enter a number Enter a symbol Enter a smiley Enter a space Erase a character Erase all characters Move the cursor right or left Move the cursor up or down Move the cursor back and forth between the... -
Page 27: Capitalize Any Letter
To... Capitalize any letter Make any letter lowercase Initial caps Select soft options on the screen PAGE 19 UNDERSTANDING TEXT ENTRY SCREENS Do this... mode, press the * Shift key Choose mode, press the * Shift key mode, press the * Shift key Press the left softkey or the right softkey option on the screen. -
Page 28: Storing Contacts
STORING CONTACTS Use your phone’s Contacts directory to store information about a person or company. Each contact entry can have up to six phone numbers, two email addresses, two Web addresses, two street addresses, and a space for notes. Creating a new contact 1. - Page 29 Assigning ringers 1. Press the right softkey select Contacts. 2. Highlight a contact and press the Amp’d/OK key 3. Highlight the contact name and press the right softkey to select Options. → 4. Select Ringer Assign Ringer. 5. Scroll down the list to hear the different ringers and press the Amp’d/OK key to select one.
-
Page 30: Editing A Contact
Editing a contact 1. Press the right softkey select Contacts. 2. Highlight a contact and press the Amp’d/OK key 3. Highlight the contact name or number and press the left softkey to select Edit. 4. Enter your changes and press the left softkey to select Save. -
Page 31: Finding Contact Information
Finding contact information To find a phone number or contact, you can (1) check the Frequent list, (2) search the Contacts directory, or (3) use Fast Find. Checking the Frequent List From the home screen, select Contacts. The last 15 of your most frequently called contacts appear when the Frequent List is enabled. -
Page 32: Using The Camera
USING THE CAMERA Tips before operating your camera • You cannot activate the camera while on an active call or while browsing files in the media gallery. • Once the camera is active, the home screen acts as the viewfinder. •... - Page 33 Setting up the camera for photos 1. With the camera on, press the right softkey to select Options 2. Press the Amp’d/OK key select Settings. 3. Highlight an option and press the Amp’d/OK key Flash options are Automatic, On, • or Off.
-
Page 34: Taking A Picture
Frames allows you to add a frame or a • stamp to your picture. A frame or stamp cannot be removed once it has been used in a picture. Note: The picture resolution changes to 160 x 120 while taking pictures with frames. -
Page 35: Camera Key Map
Camera key map Internal camera key Left softkey Right softkey Navigation key Up Navigation key Down Amp’d/OK key * You can only use zoom when the camera is set to a resolution of 320 X 240 or below. Setting up the video camera Camera and Video menu settings can only be accessed when the camera or video mode is activated. -
Page 36: Recording A Video
Menu options for video mode 1. Once in video mode select Options. 2. Press the Navigation key scroll through the vertical menu bar and choose an option: Settings allows you to change your • camera settings. See “Setting up the camera for photos”... -
Page 37: Menu Function
Video key map Video Camera Function Left softkey “Record” – starts recording toggle (plays a tone) “Stop” – stops recording toggle (plays a tone) Right softkey “Options” – while not recording toggles between “Pause/Resume” – pause and resume recording Back key When not recording, goes back to the last function. -
Page 38: Amp'd Live
AMP’D LIVE What is Amp’d Live Amp’d Live is a whole new world of mobile entertainment. In addition to all of the phone features you just can't live without, like messaging, photo/video camera and push-to-talk, you can now watch your favorite videos and TV clips, play your favorite 3D multiplayer games, download your favorite music, the hottest ringtones, wallpapers and more - all at broadband speeds and all using the seriously easy Amp’d Mobile user interface. - Page 39 Customize Want to personalize your phone? This is the place to go. There's so much more than just changing ringtones that you can do to make your phone reflect your own personality. • Ringtones: Choose from hundreds of selections in our huge music library. •...
- Page 40 • Speed: Keep your adrenaline pumping with Import Tuner, Supercross and more. • Action Sports: View Wave Watch (Surf Cams), Snowboarder, Surfer, Surfing, Skateboarder, Bike, Powder and FUEL. • Fantasy Sports: Fantasy sports go mobile. Check out player profiles, news, injury reports, LIVE stats and more.
- Page 41 • Strategy: Strain your brain with Donald Trump's Real Estate Tycoon, 3D Pool, Backgammon, Othello, Chess, Cribbage, Reversi and Mahjong. • Puzzles: Play TV Guide Crosswords, Trivia, Word Search, Cryptogram, HangMan, MetroGirls and more. • Lifestyle: Enjoy 3D Pet Care (Tamagotchi), Buzztime Bar Trivia, Stack-Um, Diva Dee Dancing, Mahjong Puzzle, Breakout Bears, Message In A Garden and Bubble Ducky.
- Page 42 Tip: To find items that are similar to other items, go to MyStuff, pick the item you want to compare things with, press Menu, and then pick Get More. Decode the ratings Whether you're looking for adult content or something less racy, all Amp’d Live a rating decal to help you choose correctly.
- Page 43 • Buy Access (Subscription) gives you unlimited access to the item during your subscription period. Subscriptions are billed monthly, and they're a great way to check out a lot of different stuff. Keep in mind that the subscription items change all the time (just like an e-zine or a premium channel), so if you find something you've got to have, it's a good idea to buy that item and download...
- Page 44 Search for a song If you're looking for a specific song, you can use Search for it instead of browsing the Music menu categories. Here's how it works: 1. Go to MyStuff. 2. Pick Music. 3. Press Menu and pick Search Catalog. 4.
- Page 45 Delete or move a song in MyList Here's how it works: 1. Go to MyStuff. 2. Pick Music. 3. Pick Playlist. 4. Pick MyList. 5. Press Menu. 6. Pick one of these commands to make your changes: • Move Up moves the current song up one slot in MyList.
- Page 46 Change PhoneStuff PhoneStuff is where you personalize your phone, setting its ringtone, wallpaper and screensaver. Here's how it works: 1. Go to MyStuff. 2. Pick PhoneStuff. 3. Pick the type of item you want to change. 4. Pick the item you want to use. 5.
- Page 47 Use menu commands Here is a convenient list of all MyStuff commands. This command Does this Add2MyList Adds the selected item to MyList. Unsubscribe Cancels the subscription for the selected item. Delete Deletes the selected item from MyList or your phone (depending on the current selection).
- Page 48 Need Help? Here are a few commonly asked questions and answers... Is there a quick way to get back to the Amp’d Live or MyStuff main menu? 1. Press Menu. 2. Pick Home. How do I finish a download that was interrupted? 1.
-
Page 49: Using The Media Gallery
USING THE MEDIA GALLERY The Media Gallery stores camera pictures, images, sounds, and videos in the phone and displays those files on the phone’s screen. Accessing files → 1. Select Menu Media Gallery. 2. Select an option: Camera Pictures displays thumbnails of •... - Page 50 Take Picture to snap another photo. • Send launches the messaging • application so you can share the image. Erase the image (image must not • be locked). Assign picture as a Caller ID or • as wallpaper. Lock to prevent accidentally erasing •...
- Page 51 4. Use the Navigation key - or - Select Options and choose from the following options: Send launches the messaging • application so you can share the videos. Record New allows you to record • new videos. Erase the videos. •...
-
Page 52: Using Push To Talk
USING PUSH TO TALK The Push to Talk (PTT) feature on your Amp’d Mobile communicate with an individual or group. Once connected, simply press and hold the walkie-talkie button to communicate. Note: To activate PTT press and hold the walkie-talkie button or select the PTT icon. Create a PTT name to be seen by others when you PTT. -
Page 53: Ptt Call Types
PTT call types You can make two types of walkie-talkie calls: • A PTT call automatically connects to the other party. The receiving party does not have the option to ignore the call. It can be a private PTT call to a single PTT user, •... - Page 54 Making a group PTT call A group must be saved before you can call it. To save a group, see page 49. → 1. Select Menu Push to Talk PTT Groups. 2. Highlight the group you want to call. 3. Press and hold the walkie-talkie button. When the audio path is ready and the group is available, the “Ready to Speak”...
-
Page 55: Receiving Ptt Calls And Alerts
Receiving PTT calls and alerts Receiving a PTT call When your phone receives a private or group PTT call, the caller’s voice sounds through the speakerphone and the phone makes the “Open Floor” tone. In a private call, “PTT Call” appears on the screen with the caller’s contact name or phone number. - Page 56 If the other party refused your invitation • or did not respond within a 3-minute period, “Contact Name Not Added” appears. Note: The other party cannot receive or respond to your invitation if their phone is off or if they are outside of the service area.
-
Page 57: Saving, Editing, And Erasing Ptt Groups
Regardless of how you set your availability (presence), you can still make PTT calls. → 1. Select Menu Push to Talk My Availability. 2. Select an option: Available allows you to make and • receive PTT calls. Do Not Disturb ensures that you will •... - Page 58 Tip: The invitation includes your name or number and the group name, but does not list all invited members of the group. After accepting an invitation, the new member can select the group name and view the list of members. Adding a member to a PTT group →...
- Page 59 Erasing a PTT group member You can erase PTT group members only from groups that you created. → 1. Select Menu Push to Talk PTT Groups. 2. Highlight the PTT group name you wish to edit. 3. Press the right softkey to select Options.
-
Page 60: Customizing Your Phone
CUSTOMIZING YOUR PHONE The contents of the Settings menu are as follows. Silent Mode Display Vibrate Only My Banner Vibe then Ring Main Menu View Lights Only Color Themes Normal Sounds Wallpaper Screen Saver Keyguard Backlighting Guard On Close Auto-Hyphen Disabled Time/Date Sounds... -
Page 61: Silencing All Sounds
Silencing all sounds Your phone is set to make sounds when you receive calls, press keys, navigate through menus, and receive alerts (such as new messages). You can silence all sounds and set the phone to vibrate or light up when you receive calls and alerts. -
Page 62: Setting Sounds For Your Phone
Setting sounds for your phone You can set your phone to emit tones when you open and close the slide and when you turn the phone on and off. These sounds will not occur during an incoming call, if you are on a call, or if a headset or car kit is attached to your phone. -
Page 63: Setting Default Message Receipt
Adjusting key tone volume You can change the volume of the tones the phone makes when you press the keys. → → 1. Select Menu Settings Key Volume. 2. Press the Navigation key the volume, or left to decrease the volume and select Save. -
Page 64: Personalizing The Screen
Creating and updating your custom menu You can create a custom menu that contains your favorite features. After you set up your menu, simply press and hold the Navigation key up to access it. 1. Press and hold the Navigation key launch Custom Menu. - Page 65 Using Power Save Mode You can conserve battery life by activating Power Save Mode. The backlighting appears for the selected duration, but is dimmer than with Power Save off. → → • Select Menu Settings → Backlighting Pwr Save Mode Setting power backlighting You can set backlighting to remain on when an external power source, such as the AC adapter,...
-
Page 66: Creating A Secure Environment
Selecting a color theme You can select a color theme for the display background of your phone. → → 1. Select Menu Settings Color Themes. 2. Scroll through the options to view the color themes, highlight an option, and press the Amp’d/OK key to select it. -
Page 67: Network Settings
Notes: • You can view these numbers only when they’re being entered for the first time. • To make a call to an emergency number from a locked phone, you must dial the number (including area code) exactly as it was stored in Emergency Numbers. -
Page 68: Setting Position Location
Note: TTY/TDD service may not be available. Check with your service provider for more information. Setting position location This setting allows you to share your location information with network services other than emergency services (911, 111, 999, 000, etc.) in markets where service has been implemented. -
Page 69: 10 Music, Video, And Data
10 MUSIC, VIDEO, AND DATA Your Amp’d Mobile Jet phone supports a memory card for mass storage (of Music and Video, for example). Removable memory card Your Amp’d Mobile Jet phone uses a removable memory card that, when inserted into the phone, increases storage capacity. -
Page 70: Usb Mode
USB Mode The Amp’d Mobile Jet phone supports three types of USB modes: • Plays4Sure - Music (MTP) mode allows transfer of music files between devices. • USB Drive - Mass storage mode allows you to copy songs from your PC onto your removable TransFlash or microSD. - Page 71 Exporting music files from iTunes. Note: Songs purchased from the iTunes music store are protected and will not play on the device. 1. Create a folder on your desktop called Amp’d Music. 2. Launch iTunes. 3. Select the unprotected song(s) you'd like to export.
- Page 72 Viewing your side-loaded images Note: It may be necessary to turn your phone off and back on again in order for the memory card to be properly read. To view side-loaded images: → 1. Select Menu Media Gallery 2. Scroll down to find your images. Listening to your side-loaded music →...
-
Page 73: 11 Sending And Receiving Text Messages
11 SENDING AND RECEIVING TEXT MESSAGES This chapter describes how to send, receive, and erase text messages from your phone. For information on voicemail messages, see “Checking voicemail messages” on page 13. Sending text messages You can only send text messages to phones that are capable of receiving them or to email addresses. - Page 74 Add Smiley: Scroll through the icons • and press the corresponding number key to select it. 3. When you have finished your message, select Send. See “Setting sending options” below. Setting sending options When you are ready to send a message, you have several options for how and when you want the message to be received.
-
Page 75: Understanding Appended Messages
If you cannot send messages You may not be able to send or receive messages if your phone’s memory is nearly full, or if digital service is not available at the time. To free up memory, erase old messages. See “Erasing messages”... -
Page 76: Retrieving Text Messages
To view successfully sent messages: → 1. Select Menu Messages 2. Press the Navigation key through the list of messages. One of the following symbols appears next to each message: The scheduled message will be sent at the scheduled time. You cannot cancel delivery of the message. - Page 77 Reading the message The options available to you may vary. Check with your service provider. Note: Sounds embedded in text messages will not play if the phone is set to Silence All mode. 1. If the text message is long, press the Navigation key down to view the entire message.
-
Page 78: Customizing Message Settings
Erasing all messages → 1. Select Menu Messages Erase Messages. 2. Select a folder from which to erase all messages: InBox, OutBox, Sent, Saved Folder, Drafts Folder, or All Messages. To erase messages from all folders, select All Messages. 3. A message appears: “Erase all messages?” Select Yes to erase messages or No to cancel. - Page 79 To block messages from a specific address: 1. Select Menu → Settings → Messaging → Block Msgs → Block Address. 2. Enter the email address or cell phone number you want to block. 3. Press the Amp’d/OK key 4. A message is returned from the network letting you know that the requested address has been blocked.
-
Page 80: 12 Sending And Receiving Multimedia Messages
12 SENDING AND RECEIVING MULTIMEDIA MESSAGES Sending multimedia messages You can only send multimedia messages to phones that are capable of receiving them or to email addresses. For details, check with your service provider. Multimedia messages have a predetermined character and file size limit. When you reach the character and file size limit for a single multimedia message, you must edit the message to meet the size limitation. -
Page 81: Receiving Multimedia Messages
Choose: • Record Sound to instantly record a new sound and attach it to your message. • Media Gallery to display a list of categories that contain saved or downloaded sounds and voice memos. Highlight Saved Sounds. Press the left •... -
Page 82: Viewing Multimedia Messages
Auto Retrieve disabled When a multimedia message is received, your screen displays the alert “New Message(s)” along with the question “Retrieve Now?” • To View the multimedia message, press the left softkey • Select Erase to never download the multimedia message. •... - Page 83 Save Picture saves the picture • embedded in the multimedia message. Save Video saves the video embedded • in the multimedia message. Save Sound saves the sound embedded • in the multimedia message. Save Address extracts email addresses, • phone numbers, and/or URLs from the sender info and multimedia message body.
-
Page 84: 13 Using Tools
13 USING TOOLS Voice Memo The Voice Memo tool allows you to record and play back audio memos. Recording a voice memo → → 1. Select Menu Tools Voice Memo Record New. 2. Say your memo and press to the left softkey select Stop. - Page 85 3. Select Options and classify the type of event and press the Amp’d/OK key Meeting, Phone Call, Birthday, Anniversary, Vacation, Medical, or Other. 4. Press the Amp’d/OK key date of the event (the current date is the default date). Press the Navigation key •...
-
Page 86: Alarm Clock
5. Select Edit, Erase, or Send and press the Amp’d/OK key For more information about editing the • event, see “Scheduler” on page 76. To erase the event, highlight Erase and • press the Amp’d/OK key left softkey to confirm. For more information about sending the •... -
Page 87: Calculator
Calculator Use the calculator for basic mathematical equations. → → 1. Select Menu Tools Calculator. 2. Use the keypad to enter numbers. 3. Use the Navigation key mathematical operations: Left x (multiply) Right ÷ (divide) Down - (subtract) 4. Press the Amp’d/OK key the result. -
Page 88: 14 Using Voice Recognition
14 USING VOICE RECOGNITION Voice recognition allows you to make and answer calls by speaking commands into the phone’s microphone. Note: You cannot use voice recognition to end a call; you must press the End/Power key slide is open. Setting up voice dialing To make or receive calls using voice dialing, contacts must be saved with associated voice tags. -
Page 89: Making A Call Using Digit Dialing
Note: If the phone finds multiple voice tags that sound like the name you said, you will be asked to verify which name you want to call. Say Yes when you hear the correct name. Say No when you hear an incorrect name. 5. - Page 90 To activate the Voice Wake-up setting: → → 1. Select Menu Settings → Features Voice Wake-Up With accessory. → → 2. Select Menu Settings Disabled, then press the Amp’d/OK key To wake up the phone: 1. Say “Wake Up” and listen for a tone. 2.
-
Page 91: Training Voice Recognition
Training voice recognition If your phone is having trouble recognizing your voice, you can train it with the commands Yes, No, and Wake up. → → 1. Select Menu Settings Voice Features. 2. Select Voice Training. 3. Read the message and press the left softkey to select OK and continue. -
Page 92: 15 Getting Help
15 GETTING HELP Customer support Your service provider’s customer support department may be accessible directly from your phone when you dial a number, such as *611 (check with your service provider). They can answer questions about your phone, phone bill, call coverage area, and specific features available to you, such as call forwarding or voicemail. -
Page 93: Index
NDEX Numerics 1-Touch dialing , 13 Alarm Clock , 8, 78 alerts for messages , 55 for missed calls , 12 Amp’d Live access your subscriptions , 38 add a song to MyList , 36 adult areas , 34 buy stuff , 34 cancel a subscription , 38... - Page 94 icons contacts , 21 messages , 68 InBox , 68 lights-only mode , 8, 53 limiting calls , 59 lock code , 58 locking phone , 58 memory saving , 69 memory card , 61 menu view , 56 number mode , 16 OutBox , 68...
- Page 95 PAGE 87...
Need help?
Do you have a question about the Jet KX18 and is the answer not in the manual?
Questions and answers