
Related Manuals for Kyocera Sprint DuraXT


Summary of Contents for Kyocera Sprint DuraXT
-
Page 1: User Guide
S/W Version 0.902SP KYOCERA DuraXT User Guide ©2012 Sprint. SPRINT and the logo are trademarks of Sprint. KYOCERA is a registered trademark of Kyocera Corporation. Other marks are the property of their respective owners. -
Page 2: Table Of Contents
Table of Contents Get Started ..........................1 Your Phone at a Glance ......................1 Set Up Your Phone......................... 2 Activate Your Phone ....................... 3 Set Up Voicemail ........................4 Sprint Account Information and Help ..................4 Sprint Account Passwords ....................4 Manage Your Account...................... - Page 3 Call Using Abbreviated Dialing Features ................23 Call a Phone Number With Pauses ..................24 Call a Phone Number in a Message ...................25 Call Emergency Numbers ....................25 Receive Phone Calls ......................26 End Phone Calls ........................28 Missed Call Notification ......................28 Voicemail ..........................28 Set Up Voicemail .......................29 Voicemail Notification ......................29 New Voicemail Message Alerts ..................29 Retrieve Your Voicemail Messages..................30...
- Page 4 Display Your Direct Connect Number .................39 Make and Answer Direct Connect Calls .................40 Make a Direct Connect Call by Entering a Number ............40 Make a Direct Connect Call From Contacts ...............41 Make a Direct Connect Call From History ................41 Make a Direct Connect Call Using a Speed Dial Number ...........42 Make a Direct Connect Call With the Phone Closed ............42 Availability Notifications ......................43 Answer Direct Connect Calls....................43...
- Page 5 Select a Picture ID ......................54 Power Save Mode ......................55 Change the Clock/Calendar Display...................55 Set a Custom Greeting .......................55 Change the Phone‘s Menu Style ..................55 Change the Font Size ......................55 Display Language ......................56 Volume Settings ........................56 Adjust the Phone‘s Volume Settings ..................56 Silence All ..........................56 Ringer Settings ........................57 Ringers ..........................57...
- Page 6 Limit Use ..........................67 Delete Phone Content ......................68 Reset Your Phone and Phone Content ................69 Security Features for Data Services ...................69 History ............................71 View History ..........................71 The History List ........................71 History Icons ........................71 History Thread ........................72 History Details ........................72 History Options ........................72 Make a Call From History ......................73 Save the Information in Your History ..................73 Save a Number From History .....................74...
- Page 7 Add Members to a Group Entry ..................81 Remove Members From a Group Entry ................81 Find Contacts Entries ......................82 Find an Entry From Contacts .....................82 Find an Entry Using the Phone Keypad ................82 Use Contacts Information in Other Applications ..............82 Assign Speed Dial Numbers ....................83 Secret Contacts Entries ......................84 Dial Sprint Services .......................84 Sprint Mobile Sync.........................85...
- Page 8 microSD Card Settings ..................... 100 microSD Card Folders...................... 101 File Manager ........................101 Connect Your Phone to Your Computer ................103 Voice Services ........................104 Automatic Speech Recognition (ASR) ................104 Manage Voice Memos ..................... 107 Calculator ..........................109 World Clock ......................... 109 Countdown Timer ........................
- Page 9 Web and Data ......................... 123 Data Services ........................123 Your User Name ......................123 Launch a Web Connection ....................124 Data Connection Status and Indicators ................124 Browser ..........................124 Learn to Navigate the Web ....................124 Browser Menu ........................126 Download Games, Ringers, and More .................
-
Page 10: Get Started
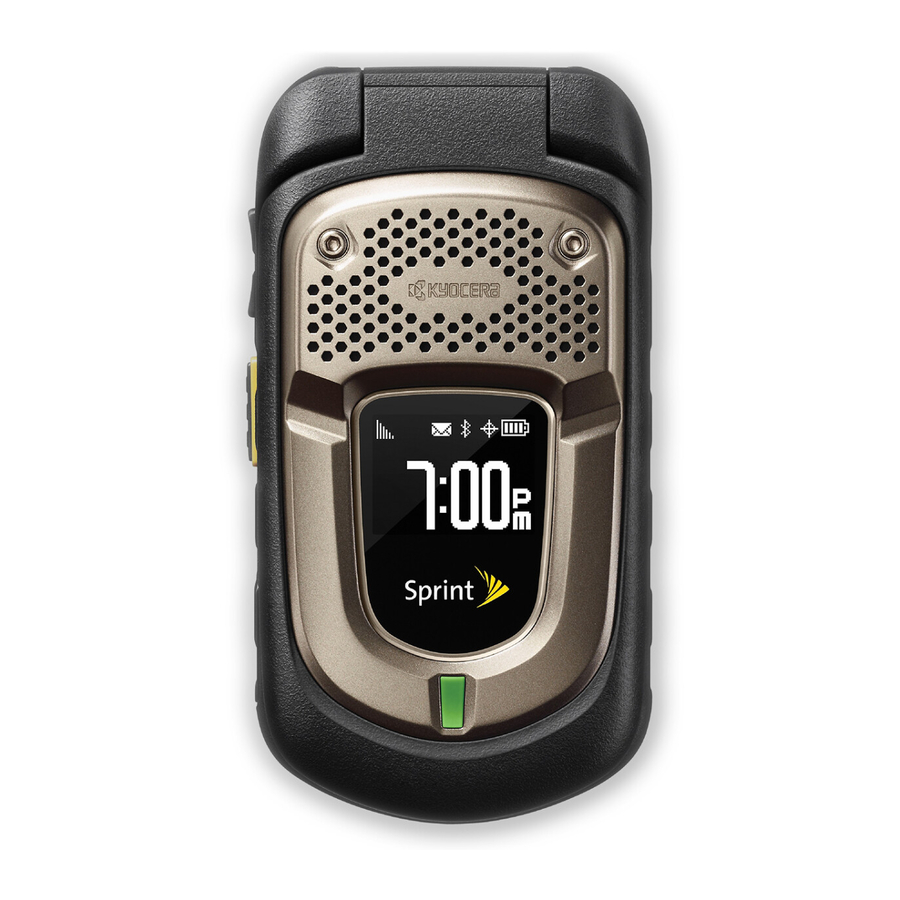
Get Started This section gives you all the information you need to set up your phone and Sprint service the first time. Your Phone at a Glance Set Up Your Phone Activate Your Phone Set Up Voicemail Sprint Account Information and Help Your Phone at a Glance The following illustration outlines your phone‘s primary external features. -
Page 11: Set Up Your Phone
Set Up Your Phone You must first install and charge the battery to begin setting up your phone. 1. Install the battery. Insert the battery into the battery compartment, making sure the connectors align ( ). Gently press down to secure the battery ( ... -
Page 12: Activate Your Phone
2. Charge your battery. Plug the USB connector into the charger/accessory jack on the lower left side of your phone. Plug the AC adapter into an electrical outlet. Note: Your phone‘s battery should have enough charge for your phone to turn on and find a signal, set up your voicemail, and make a call. -
Page 13: Set Up Voicemail
If an error occurs, press ACTIVATE (left softkey) to override auto-activation and start the manual activation wizard. Follow the onscreen prompts to complete the activation process. ● To confirm activation, make a phone call. If your phone is still not activated or you do not have access to the Internet, contact Sprint Customer Service at 1-888-211-4727 for assistance. -
Page 14: Manage Your Account
Account User Name and Password If you are the account owner, you will create an account user name and password when you sign on to sprint.com. (Click Sign in/Sign up and then click Sign up now! to get started.) If you are not the account owner (if someone else receives the bill for your Sprint service), you can get a sub-account password at sprint.com. -
Page 15: Sprint Support Services
From Any Other Phone ● Sprint Customer Service: 1-888-211-4727. ● Business Customer Service: 1-888-788-4727. Sprint Support Services Sprint 411 and Sprint Operator Services let you easily access information and calling assistance from your Sprint phone. Sprint 411 Sprint 411 gives you access to a variety of services and information, including residential, business, and government listings;... -
Page 16: Phone Basics
Phone Basics Your phone is packed with features that simplify your life and expand your ability to stay connected to the people and information that are important to you. The topics in this section will introduce the basic functions and features of your phone. Phone Software Upgrades - Updates to your phone‘s software may become available Tip: from time to time. - Page 17 Key Functions ● Earpiece lets you hear the caller and automated prompts. ● Main Screen displays all the information needed to operate your phone, such as the call status, the Contacts list, the date and time, and the signal and battery strength. ●...
- Page 18 ● Camera Key lets you activate the camera or video mode and take pictures and videos with the phone open. ● TALK Key allows you to place or receive calls, answer Call Waiting, use Three-Way Calling, or activate Automatic Speech Recognition (ASR). ●...
-
Page 19: Turn Your Phone On And Off
Your screen remains blank while your phone is off (unless the battery is charging). Battery and Charger Sprint-approved or Kyocera-approved batteries and accessories can be found at Sprint Stores or through Kyocera; or call 1-866-866-7509 to order. They‘re also available at sprint.com. Warning: Use only Sprint-approved or Kyocera-approved batteries and chargers with your phone. -
Page 20: View The Display Screen
For a quick check of your battery level, glance at the battery charge indicator located in the upper right corner of your phone‘s display screen. When there are approximately five minutes of talk time left, the battery icon ( ) turns red and the phone sounds a warning tone. After an additional five minutes or so, the phone sounds a warning tone three times and then turns off. - Page 21 Signal Strength - Your phone‘s current signal strength. (More bars = stronger signal.) No Service - Your phone cannot find a usable signal. Roaming - Your phone is ―roaming‖ off the Nationwide Sprint Network. DC Unavailable - Direct Connect services are unavailable in your current location.
- Page 22 Messaging and Description Alert Icon New Messages - You have one or more new messages waiting. New Voicemail - You have one or more new voicemail messages waiting. Urgent Messages - You have one or more new urgent messages waiting. Multiple Alerts - You have different kinds of alerts waiting.
- Page 23 Camera and Video Description Icon Beach/Snow Mode - The picture/video mode is set to Beach/Snow. Scenery Mode - The picture/video mode is set to Scenery. Mirror Image Mode - The picture/video mode is set to Mirror Image. Night/Dark Mode - The picture/video mode is set to Night/Dark. Self-Timer (5 Seconds) - The self-timer is set to 5 seconds.
-
Page 24: Navigate Through The Menus
Other Icon Description TTY - Your phone is connected to a TTY device. Alarm - An alarm or countdown is set. Calendar - You have event notifications. HAC Enabled - Your phone‘s HAC (hearing aid compatibility) setting is enabled. Multitasking Virtual Machine - Java applications are running. The number next to the plus sign indicates the number of running applications. -
Page 25: Display Your Phone Number
► Press Display Your Phone Number You can display your phone number and other information about your phone and account. ► Press > Settings > Phone Info > Phone#/User ID. Enter Text You can type on your phone using various input modes. Select a Text Input Mode T9 Text Input ABC Mode... -
Page 26: T9 Text Input
Tip: When entering text, press to change the capitalization style as Abc > ABC > abc (ABC mode), or as T9Word > T9WORD > T9word (T9Word mode). The selected style is displayed in the bottom-right corner of the screen, above the right softkey label (if applicable). -
Page 27: Set Text Entry Options
2. Press the corresponding key repeatedly until the correct letter appears. For example, to enter ―Abc,‖ press once for ―a,‖ twice for ―b,‖ and three times for ―c.‖ Set Text Entry Options The text entry options menu allows you to specify a suitable feature during the text entry process. - Page 28 ● Street addresses ● Phone numbers and Direct Connect numbers ● Web addresses (URLs) Email Address Options ► Highlight an email address, press , and then select an option: Send Message to select Message. The messaging application will open and the email address will appear as the message‘s recipient.
- Page 29 Share to select Message. The messaging application will open and the phone number will appear in the message body. Save to Contacts to save the phone number in Contacts. Contact Details to display the Contacts entry if the phone number is already saved in Contacts.
-
Page 30: Phone Calls & Settings
Phone Calls & Settings With the Nationwide Sprint Network, you can enjoy clear calling across the country. This section explains the features related to phone calls. Make Phone Calls Receive Phone Calls End Phone Calls Missed Call Notification Voicemail Phone Call Options Phone Call Settings Note: The calling information in this section refers to traditional wireless phone calls. -
Page 31: Call With The Phone Closed
1. Enter a phone number from standby mode. (If you make a mistake while dialing, press to erase the numbers.) 2. Press , or the external speaker button. 3. Press when you are finished. Call With the Phone Closed You can make a phone call using Automatic Speech Recognition (ASR) with the phone closed. It also works with the phone open. -
Page 32: Call Using The Plus (+) Code
3. Press to dial the entry‘s default phone number. – or – To dial another number from the same entry, press to select the entry, highlight a number, and then press Call Using the Plus (+) Code When placing international calls, use Plus Code Dialing to automatically enter the international access code for your location (for example, 011 for international calls made from the U.S.). -
Page 33: Call A Phone Number With Pauses
2. Select Prepend > On. 3. Enter a five- or six-digit number and press To place a call using Abbreviated Dialing: 1. Enter the four or more digits of any part of a Contacts entry‘s phone number to use the Contacts Match feature. -
Page 34: Call A Phone Number In A Message
Call a Phone Number in a Message You can place a call to a number that appears in a message. 1. In standby mode, press MESSAGING (left softkey) > Messages. 2. Select a message with the number you want to call. 3. -
Page 35: Receive Phone Calls
Important: Always report your location to the 911 operator when placing an emergency call. Some designated emergency call takers, known as Public Safety Answering Points (PSAPs) may not be equipped to receive GPS location information from your phone. Receive Phone Calls You can select the most convenient way to respond to a call. - Page 36 Mute the Ringer and Stop the Vibration ► Select Silence on the screen. – or – Press , the DC button, or the volume button up or down. Note: Your phone will answer an incoming call by opening the phone by default. To change the setting, see Call Answer Mode.
-
Page 37: End Phone Calls
● Voice Memo to record the other party‘s voice. ● Phone Info to display information about your phone. Further options may also be available. ► Press MUTE/UNMUTE (left softkey) to mute/unmute the microphone. ► Press the volume button up or down to adjust the receiver volume. ►... -
Page 38: Set Up Voicemail
Retrieve Your Voicemail Messages Set Up Voicemail You should set up your Sprint Voicemail and personal greeting as soon as your phone is activated. Always use a password to protect against unauthorized access. 1. Press and hold in standby mode to dial your voicemail number. 2. -
Page 39: Retrieve Your Voicemail Messages
Note: Your phone accepts messages even when it is turned off. However, your phone notifies you of new messages only when it is turned on and you are in a Sprint service area. To set the frequency of new message alerts: 1. -
Page 40: Caller Id
Call Forwarding Caller ID Caller ID identifies a caller before you answer the phone by displaying the number of the incoming call. If you do not want your number displayed when you make a call, follow these steps. 1. Enter 2. -
Page 41: Call Forwarding
If one of the people you called hangs up during your call, you and the remaining caller stay connected. If you initiated the call and are the first to hang up, all callers are disconnected. Call Forwarding Call Forwarding lets you forward all your incoming calls to another phone number—even when your phone is turned off. -
Page 42: Auto-Answer Mode
Auto-Answer Mode Set your phone to automatically pick up incoming calls. Remember, your phone will answer calls in auto-answer mode even if you are not present. 1. Press > Settings > Others > Call Setup > Auto-Answer. 2. Highlight an option and press ... -
Page 43: Tty Use With Sprint Service
TTY Use With Sprint Service A TTY (also known as a TDD or Text Telephone) is a telecommunications device that allows people who are deaf, hard of hearing, or who have speech or language disabilities to communicate by telephone. Your phone is compatible with select TTY devices. Please check with the manufacturer of your TTY device to ensure that it is compatible with digital cell phones. -
Page 44: Hearing Aid Device Compatibility
software used by PSAPs. This matter has been brought to the attention of the FCC, and the wireless industry and the PSAP community are currently working to resolve this. Hearing Aid Device Compatibility Your phone has been tested and rated for hearing aid device compatibility. To use this function effectively, set the hearing aid option to On. -
Page 45: Sprint Direct Connect
Sprint Direct Connect ® ® on your Sprint phone offers instant, two-way ―walkie-talkie-style‖ Sprint Direct Connect communication between you and your family, friends, and co-workers, all at the click of a button. Perfect for get-in get-out conversations such as checking status, getting information, getting directions, or coordinating with others—fast. -
Page 46: Before Making Your First Direct Connect Call
Before Making Your First Direct Connect Call To enable Direct Connect on your phone, a Sprint Customer Service representative must add Direct Connect services to your account. Please call Sprint Customer Service at 1-888-211- 4727 for more information. Important: When the Direct Connect feature is active, your phone‘s data services are enabled and the Net Guard feature is disabled. -
Page 47: Your Direct Connect Number
Off to disable one touch DC. Your Direct Connect Number Your Sprint phone allows you two different options for your Direct Connect number. Your Direct Connect number will be one of the following: ● Separate numbers (DC Only) - Your Direct Connect number is a unique number (not your wireless number). -
Page 48: Save A Direct Connect Number
– or – . ―DC capable‖ will appear below the valid Direct Highlight a contact and press Connect number. Save a Direct Connect Number You can store Direct Connect numbers in your Contacts just like traditional phone numbers. 1. Use your keypad to enter a Direct Connect number. ... -
Page 49: Make And Answer Direct Connect Calls
► Press > Settings > Phone Info > Phone#/User ID. Your Direct Connect number and other information about your phone and account will be displayed. Make and Answer Direct Connect Calls You can make a Direct Connect call by entering a Direct Connect number manually or by selecting an entry containing a Direct Connect number in your Contacts or History. -
Page 50: Make A Direct Connect Call From Contacts
Alternatively, you can hold the button and speak after you first press and hear the tone. In this case, your voice will broadcast instantly over the recipient‘s speaker. Pinging the recipient‘s phone by pressing and releasing may avoid unintentional interruptions. -
Page 51: Make A Direct Connect Call Using A Speed Dial Number
Call Alert Group Connect Call TeamDC Call, Opt-In TeamDC Call Group Connect Invite Opt-In TeamDC Invite 2. Highlight a Direct Connect entry and press and release the DC button. 3. Continue the Direct Connect call as described previously. Tip: To redial your most recent Direct Connect call, press and hold the DC button. Make a Direct Connect Call Using a Speed Dial Number Place a Direct Connect call to the Direct Connect numbers assigned to speed dial locations. -
Page 52: Availability Notifications
Availability Notifications You will receive a message when you place a Direct Connect call to a contact and that contact is on another call. You can press the DC button to try again, or you may be able to send a request to be notified when the contact becomes available. -
Page 53: Direct Connect Permissions
Press – or – Press the call list button. Convert a Direct Connect Call to a Phone Call 1. While on a Direct Connect call, press OPTIONS (right softkey) > Convert Call. 2. Read the message, and then select a number (if more than one number is available) or select CONVERT CALL (left softkey). -
Page 54: Call Alerts
Change Permissions You can change the permissions approach from specifying the blocked numbers to specifying the allowed numbers, or vice versa. All the entries on your existing BLOCKED DC #S or ALLOWED DC #S list will be deleted when this switch is made. 1. -
Page 55: Reply To A Call Alert
Press MSG/ALERT (left softkey) > Call Alert. (You will see a prompt.) Press the navigation key left or right to scroll through available messages. Display a message and press and release the DC button. Important: Preset text messages with Call Alerts can only be sent to and from Direct Connect users with Sprint phones. -
Page 56: Make Group Connect Calls
Make Group Connect Calls You can make Group Connect calls by selecting saved groups from your Contacts, selecting from group calls saved in History, or by creating groups for one-time use. Make a Group Connect Call From Contacts 1. In standby mode, press CONTACTS (right softkey). 2. -
Page 57: Group Connect Call Information
Join or Rejoin a Group Connect Call If you are not available at the beginning of a Group Connect call, or if you drop off the call temporarily, you can rejoin the in-progress Group Connect call. 1. Press > History. 2. -
Page 58: Set Up A Teamdc Group
group. If the user who created the group makes any changes to the group, the system automatically sends updates to the members‘ phones. Note: The TeamDC feature supports group calls only with Direct Connect users with Sprint phones. You cannot include users with Nextel phones in TeamDC groups. Set Up a TeamDC Group Update TeamDC Groups Make a TeamDC Call... -
Page 59: Make A Teamdc Call
1. In standby mode, press CONTACTS (right softkey). 2. Highlight any entry in the list and press OPTIONS (right softkey) > List TeamDC Groups. Your phone will connect to the network and retrieve a current list of TeamDC groups for your account. -
Page 60: Teamdc Call Information
1. In standby mode, press CONTACTS (right softkey). 2. Highlight a TeamDC group and press OPTIONS (right softkey) > Remove Me. 3. Press REMOVE (left softkey). Note: This action also deletes the TeamDC group you belonged to from your Contacts. Note: TeamDC group membership can either be forced or non-forced. -
Page 61: Reply To An Invite
2. Press MSG/INVITE (left softkey) > DC Invite. (You will see a prompt.) 3. Press and release the DC button. Send an Invite during a call To send an Invite during an Opt-In TeamDC call to the group members who have not joined the call yet: ►... -
Page 62: Settings
Settings This section provides an overview of items you can change using your phone‘s settings menus. Display Settings Volume Settings Ringer Settings Messaging Settings Phone Setup Options Roaming Security Settings Display Settings Adjusting your phone‘s display settings not only helps you see what you want, they can also help increase battery life. -
Page 63: Change The Brightness
2. Select a screen saver option by pressing the navigation key up or down, and select a screen saver. Change the Brightness You can adjust the brightness on the main screen. 1. Press > Settings > Display > Brightness. 2. Highlight a brightness level and press twice. -
Page 64: Power Save Mode
1. Press > Settings > Display > Picture ID. 2. Select Contact, Unsaved Numbers, or Private / Unknown. If you select Contact, select an entry. 3. Select a picture ID option and press 4. Select an image and press to assign it. -
Page 65: Display Language
– or – Press > Settings > Display > Font Size. – or – Press > Settings > Others > Accessibility > Font Size. Highlight a font size. You can see the current and new font sizes in the display window above the menu. -
Page 66: Ringer Settings
► Press and hold the volume button down in standby mode. (The screen will display ―Silence All.‖) To deactivate Silence All: ► Press the volume button up repeatedly to select a volume level. Ringer Settings You can assign a ringer or vibration pattern to incoming calls, messages, etc. and also enable audio guidance. -
Page 67: Set Up Voice Guide
2. Select Voicemail, Calendar, or Power Up/Down. 3. Select a ringer option by pressing the navigation key up or down, and then select a ringer. Get New Ringers A wide variety of new ringers is available from the Sprint Digital Lounge, and you can access them right from your phone. -
Page 68: Messaging Settings
2. Select Incoming Calls, Voicemail, Messages, or Alarm/Calendar. 3. Highlight a vibration pattern and press Messaging Settings Your phone‘s advanced messaging capabilities let you send and receive different kinds of messages without placing a voice call. Messaging settings allow you to create a signature with each sent message and your own preset messages. -
Page 69: Add A Customized Signature
2. Select None, My Phone Number, or Other. If you select Other, enter a callback number and press Add a Customized Signature Add a customized signature to each message you send. 1. In standby mode, press MESSAGING (left softkey) > OPTIONS (right softkey) > Signature. -
Page 70: Long Message Reassembly
2. Check the box next to the options you wish to select: Presidential Alerts to deliver a national Presidential alert. Presidential Alerts is always grayed out (not selectable) and cannot be excluded. Imminent Threat - Extreme to deliver emergency alerts in an extreme emergency situation (an extraordinary threat to life or property). -
Page 71: Direct Connect Button
4. Press ASSIGN (left softkey) to save. (For options with submenu levels, such as Settings, you can assign submenu options by navigating to the desired option before pressing ASSIGN.) Direct Connect Button If you don‘t subscribe to Sprint Direct Connect services, you can use the DC button for other functions. -
Page 72: Roaming
Roaming Roaming is the ability to make or receive calls and access data services when you‘re off the Nationwide Sprint Network. Roaming on Other Networks Roaming Settings Roaming Guards Roaming on Other Networks When you‘re roaming on other networks, your call quality and security will be similar to the quality you receive when making calls on the Nationwide Sprint Network. -
Page 73: Roaming Guards
To set the roaming mode: 1. Press > Settings > Others > Roaming > Roaming Mode. 2. Select an option: Sprint Only to access only the Nationwide Sprint Network and prevent roaming on other networks. Automatic to seek service on the Nationwide Sprint Network. When Sprint service is unavailable, the phone searches for an alternate service. -
Page 74: Security Settings
Voice to display a prompt that will require you to respond anytime you attempt to access voice service while roaming in the selected region (domestic or international). Data to display a prompt that will require you to respond when you attempt to access data service while roaming in the selected region (domestic or international). -
Page 75: Lock Your Phone
Security Features for Data Services Lock Your Phone When your phone is locked, you can only make calls to 911 and Sprint Customer Service. 1. Press > Settings > Lock Phone. 2. Enter your lock code. 3. Select Lock Now. Tip: The first time you access the Lock Phone menu, you will be advised to change the default lock code by pressing CHANGE (left softkey). -
Page 76: Limit Use
Tip: If you can‘t recall your lock code, try using the last four digits of your wireless phone number or check your lock code hint. If this doesn‘t work, call Sprint Customer Service at 1-888-211-4727. Limit Use This feature allows you to limit the use of certain functions on the phone. Activate the Limit Use Feature 1. -
Page 77: Delete Phone Content
Restrict Web, Camera, and Location Mode 1. Press > Settings > Limit Use and enter your limit use code. 2. Select Restriction. 3. Read the message and press CONTINUE (left softkey). 4. Select an option: Web to prevent using the browser. ... -
Page 78: Reset Your Phone And Phone Content
Reset Your Phone and Phone Content This option lets you clear different types of personal information stored on your phone, reset your phone to factory settings, or both. 1. Press > Settings > Reset/Delete. 2. Enter your lock code. 3. Highlight an option and press ... - Page 79 Net Guard When you first connect to the Web, the Net Guard will be displayed to confirm that you want to connect. The Net Guard helps you avoid accidental connections. You can disable the Net Guard in the future by selecting Auto-Connect when you see Net Guard displayed. To change your Net Guard settings: ►...
-
Page 80: History
History History keeps track of the calls placed, received, and missed on your phone. View History History Options Make a Call From History Save the Information in Your History Delete History View History History is a list of the last 60 incoming, outgoing, or missed phone calls and Direct Connect calls including Call Alerts and Invites. -
Page 81: History Thread
Incoming Outgoing Missed Phone Call Direct Connect Call Call Alert Group Connect Call TeamDC Call, Opt-In TeamDC Call Group Connect Invite Opt-In TeamDC Invite History Thread The History thread screen shows all history for a selected entry. You can also keep track of all the messages you have sent and received for the selected entry. -
Page 82: Make A Call From History
● Call to call the selected entry. ● Send Message to send a message to the selected entry. ● New Group to create a new group entry. See Create a Group Entry. ● Contact Details to display information about the entry if it has already been saved in your Contacts. -
Page 83: Save A Number From History
Make a New Group Entry From History Save a Number From History You can easily save a number from your History to your Contacts. 1. Press > History. 2. Highlight an entry and press OPTIONS (right softkey) > Save Contact. 3. -
Page 84: Delete History
Delete History You can delete individual or all entries in your History. 1. Press > History. 2. Highlight an entry you wish to delete and press OPTIONS (right softkey) > Delete. 3. Select Delete All to delete all entries. 4. If you are certain you want to delete one or all entries from History, press DELETE (left softkey). -
Page 85: Contacts
Contacts Your phone‘s Contacts help you stay in touch with family, friends, and colleagues by keeping track of all their contact information. This section explains how to use your phone‘s Contacts. About Contacts View Contacts Create a New Contacts Entry Edit a Contacts Entry Find Contacts Entries Use Contacts Information in Other Applications... -
Page 86: View Contacts
View Contacts Access your Contacts entries currently stored in your phone. The Contacts List Contacts Details View History From Contacts The Contacts List The Contacts list shows the Contacts entries stored in your phone. 1. In standby mode, press CONTACTS (right softkey). You will see the Contacts list. 2. -
Page 87: Create A Personal Entry
Create a Personal Entry Create personal Contacts entries, which also will be the basis of group entries. 1. In standby mode, press CONTACTS (right softkey) > Add New... > New Contact. 2. Enter a name for the new entry and press the navigation key down. 3. -
Page 88: Save A Number Using The Phone Keypad
4. When you have selected all the entries you want to add, press CONTINUE (left softkey). 5. Enter a group name and press > SAVE (left softkey). Save a Number Using the Phone Keypad You can save a phone number to Contacts directly from the phone keypad. 1. -
Page 89: Delete A Contacts Entry
4. Add or edit the information and press 5. Press DONE (left softkey) or SAVE (left softkey) to save your changes. Delete a Contacts Entry You can delete existing entries from your Contacts. 1. In standby mode, press CONTACTS (right softkey). 2. -
Page 90: Assign A Picture To A Personal Entry
Assign a Picture to a Personal Entry Assign a picture to display each time a certain contact calls you. 1. In standby mode, press CONTACTS (right softkey). 2. Highlight an entry and press 3. Highlight and press 4. Select Choose Photo. 5. -
Page 91: Find Contacts Entries
Find Contacts Entries You can easily search the information stored in your Contacts. Find an Entry From Contacts Find an Entry Using the Phone Keypad Find an Entry From Contacts You can quickly access the stored information in your Contacts. 1. -
Page 92: Assign Speed Dial Numbers
3. Highlight the information you want to copy, such as phone numbers, email addresses, URLs, or street addresses, and press 4. Select Share > Message. After you select one or more recipients, the text entry screen for the type of message specified will open, and the selected text will appear in the body of the message. -
Page 93: Secret Contacts Entries
Press OPTIONS (right softkey) > Settings > Speed Numbers. Secret Contacts Entries When you make an entry secret and hide it, that entry is not displayed in your Contacts. In History, a telephone number is displayed but the Contacts entry‘s name is not. You cannot make TeamDC entries secret. -
Page 94: Sprint Mobile Sync
Sprint 411 - Sprint Operator - Sprint Mobile Sync You can add and edit all your contacts and groups, including TeamDC groups, online using the Sprint Mobile Sync service. With Sprint Mobile Sync you can: ● Add and edit contacts and groups. Use your computer to easily add, edit, and manage contacts and groups, and set up and manage TeamDC groups. -
Page 95: Messaging
Messaging Send your messages to your family and friends with text messaging (SMS) and multimedia messaging (MMS). You can also set up an email account on your phone. Text Messaging and Multimedia Messaging Email Text Messaging and Multimedia Messaging With messaging, you can send and receive messages between your phone and another messaging-ready phone. -
Page 96: Access Messages
Go to Contacts to select a recipient from your Contacts. (Qualifying Contacts entries must contain a phone number or an email address.) MULTIPLE (left softkey) to select multiple recipients. Press CONTINUE (left softkey) when you have finished selecting and entering recipients. (You may include up to 40 recipients per message.) ... - Page 97 You will see a thread list. Each thread has an entry‘s name (if saved in Contacts), a phone number, or an email address. You will also see the number of unread messages, if any, for each thread. View Messages Highlight a thread and press to display the messages sent to and received from a particular contact, in reverse chronological order.
-
Page 98: Email
Send Invite to send an Invite. Lock to lock the selected message. Unlock to unlock the selected message. Unlock All to unlock all messages. Note: Messages are automatically deleted starting with the oldest. To save messages, lock them. - Page 99 5. Follow the onscreen instructions to read, reply to, compose, and send messages and manage your email account. Messaging...
-
Page 100: Calendar & Tools
Calendar & Tools Learn how to use many of your phone‘s productivity-enhancing features. Calendar Alarm Bluetooth microSD Card Voice Services Calculator World Clock Countdown Timer Stopwatch Calendar Use Calendar to create and manage events, meeting, and appointments. Your Calendar helps organize your time and reminds you of important events. -
Page 101: Add A To Do List Item To The Calendar
4. Select a category for the event (Appointment, Meeting, etc.) by highlighting the category field and pressing 5. Select a priority for the event by highlighting the priority field and pressing 6. Select a start and end time for the event by highlighting the start and end time fields and pressing 7. -
Page 102: Calendar Alerts
6. Select a priority for the item by highlighting the priority field and pressing 7. Select a time and date for the item by highlighting the time and date field and pressing 8. Select a status for the item by highlighting the status field and pressing . -
Page 103: Alarm
2. Highlight the day from which you would like to delete an event and press – or – Press OPTIONS (right softkey) > Schedule List or To Do List. 3. Highlight an event and press OPTIONS (right softkey) > Delete. 4. -
Page 104: Bluetooth
10. Select a snooze interval for the alarm by highlighting the snooze interval field and pressing 11. Select the number of times the snooze should repeat by highlighting the snooze time field and pressing 12. Press SAVE (left softkey). Tip: Press ON or OFF (left softkey) to toggle the alarm on and off. -
Page 105: Bluetooth Menu
Bluetooth Status Indicators The following icons show your Bluetooth connection status at a glance: Icon Description Your phone‘s Bluetooth feature is turned on. Your phone is visible to other Bluetooth devices. Your phone is connected to a Bluetooth device. Your phone is connected to or communicating with a Bluetooth device via Hands-free Profile (HFP). -
Page 106: Pair Bluetooth Devices
Pair Bluetooth Devices The Bluetooth pairing process allows you to establish trusted connections between your phone and another Bluetooth device. When devices are paired, a passkey (PIN) is shared between devices, allowing for fast, secure connections while bypassing the discovery and authentication process. -
Page 107: Send Items Via Bluetooth
Add New to add a new Bluetooth device. Delete to delete the selected device from the list. Delete All to delete all devices from the list. Auto-Accept to configure your phone‘s accessibility to other Bluetooth devices. ... - Page 108 Note: You can easily damage the microSD card by improper operation. Please be careful when inserting, removing, or handling it. Remove the microSD Card 1. Remove the battery cover and the battery. (The battery must be removed in order to remove the microSD card.) 2.
-
Page 109: Microsd Card Settings
5. Gently press the card and the card holder ( ), and then slide the holder in the direction of the arrow to lock it ( 6. Place the battery back into its compartment and replace the battery cover. Note: Make sure your battery is fully charged before using the microSD card. Your data may become damaged or unusable if the battery runs our while using the microSD card. -
Page 110: Microsd Card Folders
2. Press your navigation key down to display memory in the microSD card. Format the microSD Card Formatting a microSD card permanently removes all files stored on the card. 1. Press > Tools > Memory Storage. 2. Highlight Format Memory Card and press . - Page 111 2. Highlight an option and press In Phone to access files stored in your phone‘s memory. Memory Card to access files stored on the memory card. Note: All unknown or unsupported file types are displayed as or . Open Files in File Manager 1.
-
Page 112: Connect Your Phone To Your Computer
● Use Bluetooth to play an audio file through a Bluetooth device. ● Create Folders to create preset folders on the memory card. See Create Folders in the microSD Card. ● List/Thumbnail to switch between list view and thumbnail view. ●... -
Page 113: Voice Services
● While you are connected to the computer, your phone‘s screen will display ―Phone Off.‖ You cannot make or receive calls. ● If you connect a mass storage device to a peripheral device, your device may not work properly. Voice Services Your phone‘s voice services let you place calls using your voice, store voice reminders, and record memos right on your phone. - Page 114 Tip: Use ASR in a quiet environment so it can accurately recognize your commands. Tip: During ASR operation, press TUTORIAL (left softkey) or HELP (left softkey) to get instructions for using the software. Make a Voice Call Using ASR 1. Press and hold , or the external speaker button.
- Page 115 3. When you hear ―Which shortcut?,‖ say an application name (for example, ―Messaging‖). 4. The phone opens the selected menu. Say ―More options‖ to display additional application names. Tip: Check Phone Status Using ASR You can use ASR to obtain information about your phone: ●...
-
Page 116: Manage Voice Memos
To reset the adaptation: 1. Press and hold , or the external speaker button. 2. Press SETTINGS (right softkey) > Adaptation > Reset Voice > YES (left softkey). To change the ASR mode: 1. Press and hold , or the external speaker button. 2. - Page 117 1. Press > Tools > Voice Services > Voice Memo > Record. 2. Start recording after the beep. 3. To stop recording, press , or STOP (right softkey). To record the other party‘s voice during a phone call: 1. During a call, press OPTIONS (right softkey) > Voice Memo. 2.
-
Page 118: Calculator
Speaker On or Speaker Off to activate or deactivate the speakerphone mode. Edit Title to edit the title of a memo. Properties to display information about a memo. Type Filter to filter only audio memos, only call memos, or to display all memos. ... -
Page 119: Countdown Timer
2. Press the navigation key left or right to scroll through different time zones. Note: Press OPTIONS (right softkey) > Standard or Summer to change between daylight saving time and standard time. Countdown Timer This feature allows you to use your phone as a countdown timer to alert you when a specified period of time has elapsed. -
Page 120: Camera
Camera You can use the camera or camcorder to take and share pictures and videos. Your phone comes with a 3.2 megapixel camera that lets you capture sharp pictures and videos. Take Pictures Record Videos Store Pictures and Videos Send Pictures and Videos Print Pictures Take Pictures Taking pictures with your phone‘s built-in camera is as simple as choosing a subject, aiming the... -
Page 121: Assign Pictures
Assign to assign the picture. See Assign Pictures. Delete to delete the picture you just took. Print to print the picture. You can choose whether to print using a PictBridge- or Bluetooth-enabled printer. Review Media to go to the In Phone folder or memory card folder to review your saved pictures. - Page 122 ● Fun Tools to select an option from the following: Multiple Shots to take multiple shots. See Multiple Shots. Fun Frames to select your favorite fun picture frame to decorate your picture (displayed only when the resolution setting is 0.3M or 0.1M). ...
-
Page 123: Camera Settings
3. Highlight the duration of the interval between shots (Normal or Fast) and press 4. Press , or CAPTURE (left softkey) to take the pictures. (The screen will display up to nine thumbnail pictures.) Zoom This feature allows you to zoom in on an object when you take a picture. You can adjust the zoom from 1x to 12x. -
Page 124: Record A Video
Record a Video Recording a video is as easy as taking a picture. 1. Press > Photos & Videos. Shortcut: Press to access the Photos & Videos menus. 2. Press Camcorder > Video Mail or Long Video to activate camcorder mode. Additional video options are available. -
Page 125: Camcorder Settings
● Video Light to turn on the video light. The video light turns on once this option is set to ● Zoom to zoom in on an object. You can adjust the zoom from 1x to 12x. ● Self-Timer to activate the timer function. See Self-timer for details. -
Page 126: Set Storage Options
● In Phone – See In Phone Folder. ● On Memory Card – See On Memory Card Folder. Set Storage Options In Phone Folder On Memory Card Folder In Phone and Memory Card Folder Options Review Pictures and Videos in the Assigned Media Folder Set Storage Options You can specify where to save your pictures and videos. -
Page 127: Review Pictures And Videos In The Assigned Media Folder
● Assign to assign the picture or video. Select an option and press ● Delete to delete pictures and videos. Select This, Selected, or All. Note: Deleting data will free up memory space in your phone to enable you to take more pictures and videos. -
Page 128: Send Pictures And Videos
Send Pictures and Videos Once you have taken a picture or a video, you can use the messaging or Bluetooth capabilities of your phone to instantly share it with family and friends as an attachment. Send Pictures and Videos Using the Messaging Feature Send Pictures and Videos Using the Bluetooth Feature Send Pictures and Videos Using the Messaging Feature You can attach your pictures and videos to a message. -
Page 129: Print Pictures
4. Read the message and press SEND (left softkey). 5. Follow the instructions on the screen to proceed. Print Pictures You can print your pictures using a PictBridge-enabled or Bluetooth-enabled printer. You can also order your prints via Digital Print Order Format (DPOF) service. Print Pictures From Your Phone Digital Print Order Format (DPOF) Print Pictures From Your Phone... - Page 130 6. When printing is finished, press 7. Press YES (left softkey). Follow the instructions on the display to unplug the USB cable from the phone. To print pictures using a Bluetooth-enabled printer: 1. Press > Tools > Bluetooth > Trusted Devices. 2.
-
Page 131: Digital Print Order Format (Dpof)
Note: Printer Error Messages - From time to time you may encounter printing problems. Your phone will display any printer error messages informing you of the specific problems encountered. Please refer to the user‘s guide that came with your printer for descriptions, explanations, and possible resolutions for any error messages. -
Page 132: Web And Data
Web and Data Your phone‘s data capabilities let you wirelessly access the Internet. This section addresses your phone‘s data connections and the built-in Web browser. Data Services Browser Download Games, Ringers, and More Data Services With your Sprint service, you are ready to start enjoying the advantages of data services. This section will help you learn the basics of using your data services, including managing your user name, launching a data connection, and navigating the Web with your phone. -
Page 133: Launch A Web Connection
Launch a Web Connection Launching a Web connection is as simple as opening the browser on your phone. ► Press > Web. (Your data connection starts and you see the SprintWeb home page.) Note: If Net Guard is enabled and displayed (see Guard), press YES (left softkey) to continue and launch the Web. - Page 134 Softkeys During a data session, the bottom line of your phone‘s display screen contains one or more softkeys. These keys are shortcut controls for navigating around the Web, and they correspond to the softkeys directly below the phone‘s display screen. Tip: Depending on which websites you visit, the labels on the softkeys may change to indicate their function.
-
Page 135: Browser Menu
Browser Menu Although the SprintWeb home page offers a broad and convenient array of sites and services for you to browse, not all sites are represented, and certain functions, such as going directly to specific websites, are not available. For these and other functions, you will need to use the browser menu. -
Page 136: Browser Settings
● Search the web to launch a Web search. ● Add this page to bookmarks to store the address of the currently viewed Web page. ● View all bookmarks to display a bookmark list. ● View browsing history to display a list of the Web pages visited. ●... -
Page 137: Download Games, Ringers, And More
Virtual Mouse to set the speed of the virtual mouse. Reset browser to reset all browser settings. Download Games, Ringers, and More You have access to a dynamic variety of downloadable content, such as games, ringers, screen savers, and other applications. (Additional charges may apply.) Follow the basic steps below to access and download these items. - Page 138 To download a selected item: 1. From the information page, use your navigation key to move the cursor over Buy. When the cursor changes from an arrow into a hand, press . The item will download automatically. When you see the NEW DOWNLOAD screen, you have successfully downloaded the item to your phone.
- Page 139 2. Highlight Download and press . The item will download automatically. When you see the NEW DOWNLOAD screen, you have successfully downloaded the item to your phone. (When you download a call tone, you will not see the NEW DOWNLOAD screen. Instead, you will see a screen giving you the option to set the downloaded call tone as your default.) 3.
-
Page 140: Gps Navigation
GPS Navigation Your phone‘s built-in GPS capability gives you access to a number of location-based services. GPS Services GPS Navigation Sprint Family Locator GPS Services Before using any of the location-based services, you must turn on your phone‘s location mode. Activate Location Mode To enable your phone‘s Location feature: 1. -
Page 141: Sprint Family Locator
Register Sprint Navigation Before you can use Sprint Navigation, your phone and service must be registered. 1. Press > Maps > Sprint Navigation. 2. Follow the onscreen instructions to enter and submit the required information. Use Sprint Navigation 1. Press >... - Page 142 3. Select a phone to locate from the available child phone list. 4. When you are finished, select Sign Out. Note: You may also use Sprint Family Locator with any computer with an Internet connection. Visit sprint.com/familylocator for complete details. GPS Navigation...
-
Page 143: Copyrights
Independent JPEG Group. The Bluetooth word mark and logos are owned by the Bluetooth SIG, Inc. and any use of such marks by Kyocera Corporation is under license. Other trademarks and trade names are those of their respective owners. -
Page 144: Index
Index 3-Way Calling, 31 Abbreviated Dialing, 23 Activation, 3 Airplane Mode, 33 Alarm, 94 Alert Notification, 33 Answer Call, 26 Direct Connect Call, 43 Applications Download, 128 Auto-Answer Mode, 33 Automatic Speech Recognition (ASR), 104 Backlight, 54 Battery, 10 Capacity, 10 Charge, 3 Install, 2 Remove, 11... - Page 145 End, 28 Forward, 32 In-call Options, 27 Make, 21 Missed, 28 Phone Call Options, 30 Settings, 32 Call Alerts, 45 Preset Text Feature, 45 Reply, 46 Send, 45 Call Answer Mode, 32 Call Waiting, 31 Callback Number, 59 Caller ID, 31 Camcorder, 114 Camcorder Mode Options, 115 Record a Video, 115...
- Page 146 Find, 82 List, 77 Make a Call From, 22 Make a Direct Connect Call From, 41 Secret Entries, 84 Sprint Mobile Sync, 85 Use Information in Other Applications, 82 View History From, 77 Countdown Timer, 110 Data Services, 123 Browser, 124 Disable, 69 Enable, 69 Launch, 124...
- Page 147 Icons, 11, 41 Invites, 51 Reply, 52 Send, 51 Make a Call, 40 Availability Notifications, 43 By Entering a Number, 40 From Contacts, 41 From History, 41 Using Speed Dial, 42 With the Phone Closed, 42 One Touch DC, 37 Opt-In TeamDC, 51 Permissions, 44 Settings, 37...
- Page 148 Games Download, 128 GPS Navigation, 131 GPS Services, 131 Greeting, 55 Group Connect, 46 Call Information, 48 Join or Rejoin a Call, 48 Make a Call, 47 Termination Options, 48 Headset, 62 Hearing Aid Device Compatibility (HAC) Mode, 35 History, 71 Delete, 75 Details, 72 Icons, 71...
- Page 149 Using Abbreviated Dialing, 23 Using ASR, 105 Using Speed Dial, 23 Using the Phone Keypad, 21 Using the Plus (+) Code, 23 With Pauses, 24 With the Phone Closed, 22 Make a Direct Connect Call, 40 Availability Notifications, 43 By Entering a Number, 40 From Contacts, 41 From History, 41 Using Speed Dial, 42...
- Page 150 Net Guard, 70 Notification Pop-up, 54 Opt-In TeamDC, 51 Phone Activate, 3 Illustration, 1, 7 Key Functions, 8 Lock, 66 Reset, 69 Set Up, 2 Turn On and Off, 10 Unlock, 66 Phone Number Display, 16 Find, 82 With Pauses, 24 PictBridge, 120 Picture and Video Storage, 116 Assigned Media Folder, 118...
- Page 151 Ringers, 57 Assign, 57, 80 Download, 58, 128 Mute, 27 Roaming, 63 Check Voicemail Messages, 63 Icon, 63 On Other Networks, 63 Roaming Guards, 64 Settings, 63 Save Direct Connect Number, 39 Group From History, 74 Number From History, 74 Number Using Keypad, 79 Number With Pauses, 24 Screen Saver, 53...
- Page 152 Simple Data Exchange, 18 Speed Dial, 23, 42 Assign Numbers, 83 Sprint Family Locator, 132 Sprint Mobile Sync, 85 Sprint Services, 4 Account Passwords, 4 Dial, 84 Manage Account, 5 Operator Services, 6 Sprint 411, 6 Support, 6 Stopwatch, 110 TeamDC, 48 Call Information, 51 Join or Rejoin a Call, 50...
- Page 153 Store, 116 Voice Guide, 58 Voice Memos, 107 Voice Services, 104 Automatic Speech Recogniation (ASR), 104 Voice Memos, 107 Voicemail, 28 Check Messages While Roaming, 63 New Message Alerts, 29 Notification, 29 Password, 5 Retrieve Messages, 30 Set Up, 4, 29 Volume, 56 Adjust, 56 Silence All, 56...
Need help?
Do you have a question about the Sprint DuraXT and is the answer not in the manual?
Questions and answers