Table of Contents
Advertisement
Quick Links
Advertisement
Table of Contents

Related Manuals for Kuppersbusch GMS 955.1


Summary of Contents for Kuppersbusch GMS 955.1
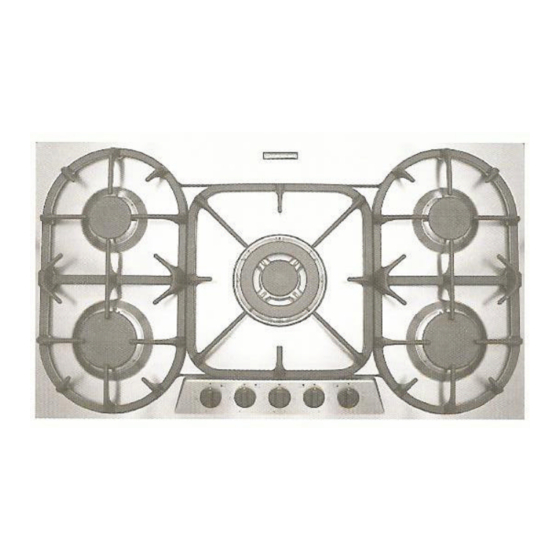
- Page 1 Gas Cooktop Installation, User and Service Instructions GMS 955.1...
-
Page 2: Table Of Contents
Gas tubing and Electrical location … … … … … … … … … … … … … … … … … … … … Installing the Cooktop… … … … … … … … … … … … … … … … … … … … … … … …... -
Page 3: Gas Installation Requirements
20” Water column (5 kPa). The supplied regulator must be installed between the main gas supply line and the Cooktop. The regulator must be set to the proper gas supply. The gas pressure required on this unit is 4” Water column (Natural) and 11” Water column (Liquid Propane). -
Page 4: Dimension And Distance Requirements
Fig 3 shows the minimum clearances between the Cooktop surface and adjacent cabinetry. B1 is the minimum distance between the front edge of the Cooktop and the front edge of the cabinet. B2 and B4 are the minimum clearance between left / right side edge of the appliance and the side wall and B3 is the minimum clearance between the back edge of the cooktop and the back cabinet wall. -
Page 5: Overall And Cutout Dimensions
Please inspect all packing materials before discarding. After removing all packaged installation Parts from the box, make sure that the Cooktop is not damaged and is suitable for the particular Gas being used (Natural gas or liquid Propane). The unit is shipped ready to install to Natural gas. If the supplied gas is Liquid Propane (L.P.) Please refer to Page for gas conversion. -
Page 6: Gas Connection
Trim any exposed gasket seal. Gas Connection Check the ‘ gas type’ sticker attached to the Cooktop. Details of the injector sizes used are recorded on the data plate located on the base of the Cooktop. Remove the regulator from the cartoon and install to the Cooktop. The inlet connection has a ½” B.S.P. male thread. It Is essential that the elbow on the appliance be held firmly with a spanner wrench when connecting the supply. -
Page 7: Electrical Connection
Electrical Connection WARNING! This appliance is equipped with a three-prong grounding plug for your protection against shock hazard and should be plugged directly into a properly grounded receptacle. Do not cut or remove the grounding prong from the plug. Please refer to Fig. 5 0n page 5 for the location of the electrical wall plug. This unit requires a 15 amp polarized and grounded wall outlet. - Page 8 Turn the right front burner on to ignite. Once lit, turn to the lowest setting (small flame). Remove the knob from the cooktop and place in a secured location. Locate the adjustment screw shown in Fig. 8 in the center of the burner valve shaft.
-
Page 9: User Instructions
- When the liquid is boiling, turn down the knob to the MINIMUM position. - Dry the bottom of the pan before placing it on the Cooktop - Use pots with a flat, thick bottom with the exception of wok cooking - When using the burners, ensure that the handles of the pans are correctly positioned. -
Page 10: After Sales Service
The burner caps may be removed from the Cooktop and washed in soapy water and then dried thoroughly. Before replacement on the burner head ensure that the holes are free of debris. Erratic flame dispersement from the burner head is a sign of clogged ports on the burner head.
Need help?
Do you have a question about the GMS 955.1 and is the answer not in the manual?
Questions and answers