Woodway Curve Operating Manual
Motorless treadmill
Hide thumbs
Also See for Curve:
- User manual (121 pages) ,
- Owner's manual (37 pages) ,
- Assembly manual (25 pages)

Related Manuals for Woodway Curve


Summary of Contents for Woodway Curve
- Page 1 CURVE / CURVE XL Motorless Treadmill Translation of the Original German Operating Manual Version: 08/2013-v1.0en...
- Page 2 European representative: Manufacturer: WOODWAY GmbH WOODWAY USA, Inc. Steinackerstr. 20 W229 N591 Foster Ct. 79576 Weil am Rhein Waukesha, WI 53186 Germany Tel.: +49 (0) 7621 - 940 999 - 0 Tel.: +1 262 - 548 - 6235 Fax.: +49 (0) 7621 - 940 999 - 40 +1 262 - 522 - 6235 Fax.:...
-
Page 3: Table Of Contents
Contents Table of Contents Introduction ..................... 5 Operating Instruction Information ..........5 Limitation of Liability ..............5 Copyright ..................6 Replacement Parts ............... 6 Customer Service ................. 7 Safety ...................... 8 General ..................8 Description of Warning Notices ............. 8 Safety Notices on Device .............. - Page 4 Table of Contents Display ..................31 7.5.1 Display Parameters ............32 7.5.2 Display Description ............32 7.5.3 Function Key Description ..........32 Training Process ................ 33 Accessories and Services ................. 34 Maintenance and Cleaning ..............35 Cleaning ..................35 Lubrication ................36 9.2.1 Bearings .................
-
Page 5: Introduction
Introduction Introduction Operating Instruction Information This manual provides information on the safe operation of the CURVE treadmill. A condition for safe operation is compliance with all safety and operating instruc- tions. Read and observe the operating instructions! Read these instructions carefully before beginning any work on the treadmill! It is a part of the device and must be kept accessible at all times and in the immediate vi- cinity of the treadmill for operating and maintenance personnel. -
Page 6: Copyright
WOODWAY. Replacement Parts WOODWAY recommends the use of original replacement parts. Original replace- ment parts have particular qualities and ensure reliable and safe operation; Developed for specific use with the device, •... -
Page 7: Customer Service
Introduction Customer Service For service questions contact the following: WOODWAY GmbH Steinackerstr. 20 79576 Weil am Rhein GERMANY Contact: Tel. .+49 (0) 7621 - 940 999 - 14 Fax. +49 (0) 7621 - 940 999 - 40 Email: service@woodway.de For faster processing of your request please have the following data and infor-... -
Page 8: Safety
Warnings attached directly to the device must be observed and kept in a legible condition. Inappropriate use will result in the rejection of any liability or guarantee by WOODWAY. Description of Warning Notices Warning notices indicate potential hazards or safety risks. They are indicated in this manual by a color-coded signal word panel (symbol with the appropriate signal word). -
Page 9: Safety Notices On Device
Safety Safety Notices on Device There are two safety stickers on the Curve. It is noted that the treadmill is motor- less, that the running surface belt only moves in one direction and that the device must be mounted from the rear. Reference is also made to health hazards through overexertion. -
Page 10: Intended Use
► Only use the CURVE for its intended use. ► Read and strictly adhere to all information in the operating instructions. The CURVE is a motorless treadmill. It is intended for fitness training, to increase stamina and physical fitness. The operating instructions are an integral part of the device and are to be available to all users at all times. -
Page 11: Technical Data
Technical Data Name Plate Each WOODWAY treadmill receives a serial number during production. Depending on the year of your model, it has an alphanumeric code with 7-8 characters or a numeric code with 9 digits. The serial number can be found on the nameplate on the front left of the treadmill frame. -
Page 12: Technical Specifications
Technical Data Technical Specifications Device designation: Model: CURVE Model: CURVE XL Walking surface (L x W): 172 x 43 cm 218 x 55 cm Usable walking surface (L x W): 157 x 43 cm 203 x 55 cm Walking surface / Technology:... -
Page 13: Dimensions
Technical Data Dimensions Fig. 2 Device dimensions 08/2013-v1.0de... -
Page 14: Transportation And Storage
Transport Rollers! The CURVE is equipped with two rollers on the bottom front of the device for short transport distances. A handle is welded to the frame at the back of the device. Using this handle the entire unit can be lifted and maneuvered like a wheelbarrow. -
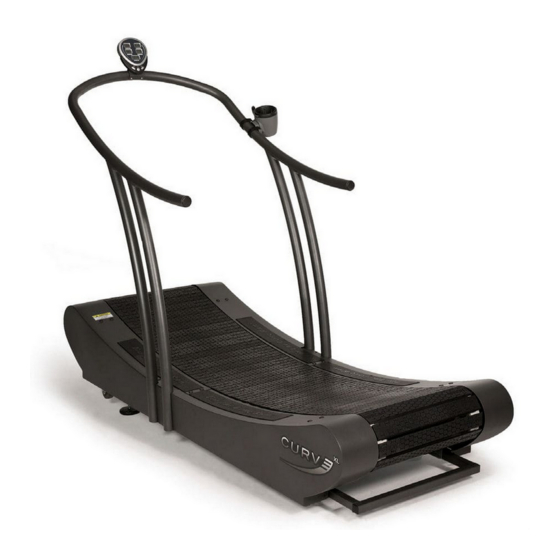
Page 15: Product Description
The treadmill is accelerated, slowed or stopped through the shifting of weight and the resulting running speed. The CURVE functions without a motor, so there is no emergency stop device. The treadmill stops on its own. It can take some time be- fore the device stops depending on the running speed. -
Page 16: Running Surface
WOODWAY treadmill you may initially notice higher surface grip than you have ex- perienced before. The more you use your treadmill, the more you will get used to the grip. As with all treadmills, it is also important on a WOODWAY treadmill not to shuffle your feet if possible. -
Page 17: Commissioning
This also minimizes carpet wear. Assembly The CURVE slatted treadmill is usually delivered and installed free place of use by WOODWAY or an authorized carrier. The handrail assembly and the side panels can be removed to reduce the weight and facilitating transport. -
Page 18: Positioning The Device
Commissioning 6.3.1 Positioning the Device Fig. 4 Installation step, positioning the device Position the unit on a sufficiently solid and horizontal surface. For information • see section 6.2 page 17. There are wheels under the front end of the treadmill. The treadmill can be •... -
Page 19: Mounting The Side Panels
The CURVE side panels are different from the CURVE XL side panels. The CURVE XL panels consist of two separate panels on each side. The panels are separated in the middle (see Fig. 8 page 21), further assembly is identical to the CURVE. -
Page 20: Fig. 6 Installation Step, Fixing Bottom Of Side Panel
Fig. 6 Installation step, fixing bottom of side panel Fix both side panels (on the CURVE XL four pieces) to the frame. Fix the pan- • els to the bottom of the device at the four points in the front and rear with the supplied Phillips screws and screwdrivers. -
Page 21: Mounting The Railing
6.3.3 Mounting the Railing ATTENTION The CURVE treadmill may not be used without the railing! There is a danger of injury! Fig. 9 Installation step, positioning railing Hold the railing as shown and carefully step onto the right and left side panels. -
Page 22: Fig. 10 Installation Step, Positioning Railing
Commissioning Fig. 10 Installation step, positioning railing Attention! • Do not insert the railing completely into the seat. Before inserting the railing into the seat, check that the data wire is protrud- • ing out of the base of the device and that the connecting wire is protruding from the opening at the bottom of the railing. -
Page 23: Fig. 12 Installation Step, Connect Wires
Commissioning When you have checked the position of the wires, insert the railing into the • seat until it stops. If the railing does not slide in easily, adjust the insertion an- gle by slightly moving the railing to the left and right or front and back. Fig. -
Page 24: Fig. 14 Installation Step, Mounting Cover Plate
Commissioning Fig. 14 Installation step, mounting cover plate Then place the cover plates over the bolts on both sides and stow the display • wire behind it (on the runner's right). Fig. 15 Installation step, fixing cover plates Fix the right and left cover plates with a Phillips screw from the top and two •... -
Page 25: Mounting The Display
Commissioning 6.3.4 Mounting the Display Open the display box. Unpack the display, two Allen screws and the Allen key. Connect the two plugs (one from the railing and one from the display) and ensure that a click is heard. Stow the excess wire in the railing tube. Fig. -
Page 26: Operation
For safe operation and successful training please read the following points for your own safety before starting to use the CURVE: The CURVE does not have a motor and the belt moves freely! Always mount • and dismount the CURVE from the rear. Always hold on to the railing during mounting. -
Page 27: Safety Equipment
Safety Equipment 7.2.1 Reverse Brake The CURVE non-motorized running face is designed so that the user drives the run- ning surface and controls its speed. This is only possible due to the innovative curved design combined with gravity. Only Forwards... -
Page 28: Safety Railing
7.2.2 Safety Railing The CURVE is equipped with a railing that extends along both sides and is bowed around the front. This allows the user to maintain direct contact, so as to obtain safety and stability along the entire curvature of the running surface. -
Page 29: Calculating Maximum Heart Rate
Operation 7.3.4 Calculating Maximum Heart Rate To determine your maximum heart rate subtract your age from the number 220 (general formula). The difference is an approximation of your maximum heart rate. This formula is used by the American Heart Association (AHA) and the American College of Sports Medicine (ACSM). -
Page 30: Training Frequency
Operation 7.3.6 Training Frequency At the beginning of training allow yourself enough time to get into shape. After a break from training, you should also allow sufficient time to rebuild physical condi- tion. Endurance training! The priority is regularity and persistence of training - not the intensity. Fitness experts recommend in the beginning training three to four times per week within your target heart rate for at least 20 minutes per workout. -
Page 31: Transmitter Function
Operation 7.4.2 Transmitter Function The signal will only be transmitted if the transmitter is within one meter of the re- ceiver. Note that variations in the heart rate display can occur when the transmitter ® is too close to other Polar devices. -
Page 32: Display Parameters
Operation 7.5.1 Display Parameters Manual user speed control (SPEED) • Display for TIME, CALORIES, DISTANCE and PULSE • Running surface speed indicator (SPEED) • 7.5.2 Display Description The indicators in the display indicate the following data: SPEED: Displays the current speed in km/h. TIME: Displays the cumulative training time. -
Page 33: Training Process
Start running slowly and hold on to the railing. The display will be activated by the movement. If you are using the motorless CURVE for the first time, continue walking at a slow speed for a few minutes. In this way you familiarize yourself with the device and learn the reaction to longer and shorted steps. -
Page 34: Accessories And Services
+49 (0)7621 - 940 999 - 0/ or your responsible WOODWAY dealer. Protective Floor Serves to protect the floor or carpet under the WOODWAY device and at the same Mat: time protects against obstacles such as deep pile carpet. -
Page 35: Maintenance And Cleaning
► It is the sole responsibility of the representative to assign qualified person- nel for maintenance and repair work. ► In case of doubt or questions, always contact the WOODWAY customer service or dealer! ► The manufacturer is not liable for personal injury and material damage... -
Page 36: Lubrication
Maintenance and Cleaning Lubrication 9.2.1 Bearings All bearings in the treadmill have been lubricated at the factory and must not be lu- bricated except for the axle bearings. The bearings on the front and rear axle are to be lubricated with a grease gun once a year (two in the front, two in the rear). -
Page 37: Synchronization Belt
For proper inspection and regular review, we recommend a WOODWAY mainte- nance contract. ATTENTION Worn or damaged components must be replaced immediately. If the observed deficiency can cause danger to the user or operator, the CURVE may not be used until it is repaired. 08/2013-v1.0de... -
Page 38: Weekly Maintenance
With the exception of the maintenance work described in this chapter, the treadmill can only be checked and repaired by qualified personnel. If necessary the WOODWAY dealer or service center is to be contacted! For specific consultation during servicing, we require details about your treadmill. -
Page 39: Disposal Notice
Disposal Notice Disposal Notice 10.1 Batteries Always return used batteries. Discharged batteries can be returned to public collection or retail stores. Batteries supplied by us can be returned to us at no charge. They can also be sent by mail. Returning Batteries: This symbol indicates that the display batteries may not be disposed of in the household trash after used. -
Page 40: Maintenance Report
Maintenance Report Maintenance Report D ATE M AI NTEN ANCE MEASURES FROM REM ARKS 08/2013-v1.0de... -
Page 41: Table Of Figures
Installation step, fixing bottom of side panel ........20 Fig. 7 Installation step, fixing top/sides of side panel ........20 Fig. 8 Installation step, fixing top/middle of side panels (CURVE XL) ....21 Fig. 9 Installation step, positioning railing ............ 21 Fig. 10 Installation step, positioning railing ............
Need help?
Do you have a question about the Curve and is the answer not in the manual?
Questions and answers