Table of Contents
Advertisement
Quick Links
"Made for iPhone," and "Made for iPad" mean that an electronic accessory has been designed to connect specifically to iPhone,
or iPad, respectively, and has been certified by the developer to meet Apple performance standards. Apple is not responsible for
the operation of this device or its compliance with safety and regulatory standards. Please note that the use of this accessory with
iPhone, or iPad may affect wireless performance.
All trademarks are the property of their respective owners and all rights are acknowledged.
V1.6
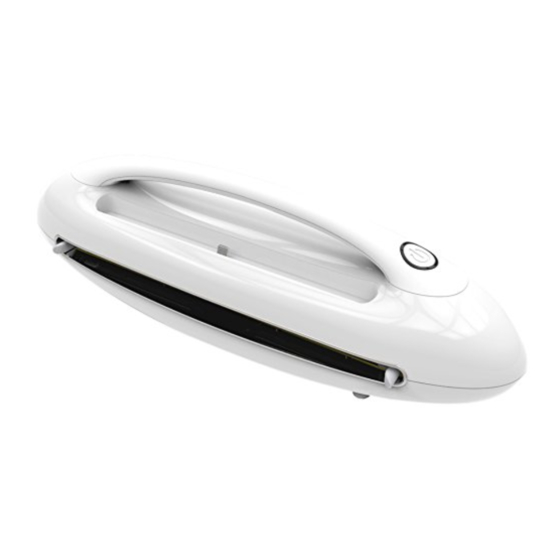
Works with
iScan Pro
Scanner App
Docking Scanner
For iPad, iPad mini and iPhone
Advertisement
Table of Contents

Related Manuals for Mustek Docking Scanner


Summary of Contents for Mustek Docking Scanner
- Page 1 Docking Scanner For iPad, iPad mini and iPhone Works with iScan Pro Scanner App “Made for iPhone,” and “Made for iPad” mean that an electronic accessory has been designed to connect specifically to iPhone, or iPad, respectively, and has been certified by the developer to meet Apple performance standards. Apple is not responsible for the operation of this device or its compliance with safety and regulatory standards.
-
Page 2: Safety And Precautions
Safety and Precautions Never store the unit in hot, or very cold, or humid or dusty places. • For an extended storage period, we recommend storing the unit in a cool and dry place. • To help keep the scanning area clean, store the unit in a proper case when not in use. •... -
Page 3: Table Of Contents
Contents Safety and Precautions ..........................2 Contents ..............................3 Supported Devices ........................... 4 Quick Start ............................... 5 Unpack ..............................6 Scanner Parts ............................7 Connect and Turn on ..........................8 Attach the Plastic Clamp .......................... 9 Dock and Install the iScan Pro App ......................10 Scan and Save ............................ -
Page 4: Supported Devices
Supported Devices This scanner is compatible with following devices: iPad (4th generation) and iPad mini with iOS 6.0 or later. iPhone 5 with iOS 6.0 or later. -
Page 5: Quick Start
Quick Start Connect to a power source. Turn on the power. Dock your device. USB power adapter (not included) Install the 'iScan Pro' app. Insert a photo, press 'Scan'. Press 'Save' to save the image. Install ‘iScan Pro’ from the App Store. -
Page 6: Unpack
Unpack Make sure following items are included. Scanner USB Cable Calibration Card Cleaning Board (See p.8) (See p.15) (See p.13) Cleaning Strip Photo Sleeve Plastic Clamp User Guide (See p.14) (See p.12) (See p.9) NOTES Please use the original USB power adapter that comes with your device for power supply. -
Page 7: Scanner Parts
Scanner Parts Power Button Lightning Connector Power LED Exit Slot Feed Slot Paper Guide Paper Guide Mini USB Port Stand (For DC 5V power input only) -
Page 8: Connect And Turn On
Connect and Turn on 1. Connect the USB Cable to the Scanner, and connect the other end to the USB power adapter included with your device. 2. Connect the USB power adapter to a power outlet. USB power adapter 3. Long press the button for 3 seconds to (not included) turn on the Scanner. -
Page 9: Attach The Plastic Clamp
Attach the Plastic Clamp Attach the supplied Plastic Clamp to the handle of the Scanner to cushion between your device and the Scanner. NOTES Frequently attaching and detaching the Plastic Clamp can develop scratches on the surface of the handle. -
Page 10: Dock And Install The Iscan Pro App
Dock and Install the iScan Pro App 1. Turn on your device. Hold and gently dock it to the Lightning Connector. Make sure it sits firmly in place. 2. An 'App Not Installed' message will appear to redirect you to the App Store for installing the iScan Pro app, press "App Store". -
Page 11: Scan And Save
Scan and Save 1. Press the (Settings) icon at the top-right Resolution corner, select the Resolution (Standard or Fine). 2. Place a photo/document facing up into the Scan Feed Slot, adjust the Paper Guides, gently push it in until it is pulled into the Feed Slot. 3. -
Page 12: Use The Photo Sleeve
Use the Photo Sleeve Use the Photo Sleeve when photos are fragile or small to avoid damage or jams, and get the best result. Locking 1. Remove the plastic foil on the Sleeve, place slot the photo inside of it, insert the tab into the slot at the open end. -
Page 13: Clean
Clean Dirt and residues can build up inside the Scanner and affect image quality. Clean Scanner’s rollers Clean and lens periodically to get the best result. NOTES Make sure the Cleaning Board and Cleaning Strip are Clean • clean and free of dust before use. Use a soft cloth dampened with alcohol to remove •... -
Page 14: Cleaning The Lens
Clean (cont'd) Cleaning the Lens 1. Turn off the Scanner, remove the device. 2. Hold the foam grip handle of Cleaning Strip facing down. 3. Insert the thinner end with cotton side facing up into the Exit Slot from the rear of the Scanner. -
Page 15: Calibrate
Calibrate NOTES • Always clean Scanner’s rollers and lens first before Calibrate calibration. If cleaning rollers and lens did not improve image quality, then perform calibration. • If necessary, perform calibration few times until image quality is improved. Calibrate • Make sure the Calibration Card is clean and free of dust before use. -
Page 16: Charge The Device
Charge the Device Your mobile device will start charging when it is docked to the Scanner that is turned on. Your device's screen will indicate its charging status. USB power adapter (not included) NOTES • Your device will not charge when the Scanner is in operation. -
Page 17: Helpful Hints
Helpful Hints Scanner does not turn on. • Check if the USB cable is connected properly, and the Scanner is turned on. The Scanner turns off automatically in 5 minutes when your mobile device has not connected to it yet. •... -
Page 18: Specifications
Specifications Scanner Type Sheetfed Scanner Image Sensor Color CIS Light Source LED (R, G, B) Scan Size Min. 55mm x 90mm (2.2" x 3.5") ; Max. 216mm x 356 mm (8.5" x 14") (W x L) Scan Thickness 0.08mm ~ 0.6mm (with supplied Photo Sleeve) Scan Resolution Standard (300 dpi), Fine (600 dpi) 12 seconds per page (A4 color) at 300 dpi...
Need help?
Do you have a question about the Docking Scanner and is the answer not in the manual?
Questions and answers