
Subscribe to Our Youtube Channel
Related Manuals for Kleenmaid G10FF-6SS


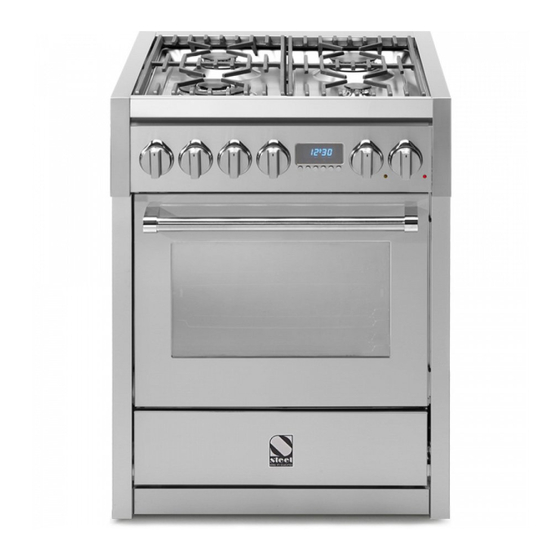
Summary of Contents for Kleenmaid G10FF-6SS
- Page 1 Cooking Collection Instructions for Use and Warranty Details Professional Series Freestanding Ovens and Cooktops...
- Page 2 More than one million Australians enjoy using Kleenmaid appliances daily. Selected because of their unique design, outstanding performance, excellent quality and unquestionable reliability, each one is value-for-money, 100 per-cent guaranteed and at the top of its class.
-
Page 3: Table Of Contents
Contents 1. General information ______________________________________ 5 Technical service _________________________________________________________ 5 2. Warnings for safety and use ________________________________ 6 3. Installation______________________________________________ 8 General warnings _________________________________________________________ 8 Fitting the adjustable feet ___________________________________________________ 9 Fitting the front moulding ___________________________________________________ 9 Electric connection _______________________________________________________ 10 Power consumption of the vitroceramic hob____________________________________ 12 Power consumption of the volcanic rock grill ___________________________________ 12 Ventilation in rooms with gas appliances ______________________________________ 13... - Page 4 Contents 11. Using the ovens _______________________________________ 30 11.1 General warnings ________________________________________________________ 30 11.2 Drawer ________________________________________________________________ 30 11.3 Using the electric multifunction oven _________________________________________ 30 11.4 Using the auxiliary oven with natural convection ________________________________ 32 11.5 Using the convection electric oven ___________________________________________ 33 11.6 Using the grill oven with natural convection ____________________________________ 34 12.
-
Page 5: General Information
Warnings This user’s manual is an integral part of the product purchased. The user must conserve the manual correctly so that it is always available for consultation during the use and maintenance of the product. Keep this user’s manual for future reference. If the product is resold, the manual must be transferred to any subsequent owner or user of the product. -
Page 6: Warnings For Safety And Use
Warnings 2. Warnings for safety and use THIS MANUAL IS AN INTEGRAL PART OF THE APPLIANCE. IT SHOULD BE KEPT IN GOOD CONDITION AND CLOSE TO THE APPLIANCE FOR THE WHOLE LIFECYCLE OF THE COOKER. WE RECOMMEND READING THIS MANUAL AND ALL THE INDICATIONS IT INCLUDES VERY CAREFULLY BEFORE USING THE COOKER. - Page 7 Warnings NEVER PUT INFLAMMABLE OBJECTS INTO THE OVEN: SHOULD IT BE ACCIDENTALLY SWITCHED ON, A FIRE MAY BREAK OUT. IN THE EVENT OF A FIRE: CLOSE THE MAIN GAS SUPPLY AND CUT OFF THE ELECTRIC CURRENT. DO NOT THROW WATER ON BURNING OR FRYING OIL. DO NOT STORE INFLAMMABLE OBJECTS OR AEROSOL CANS NEAR THE APPLIANCE AND DO NOT SPRAY NEAR THE BURNERS WHEN SWITCHED ON.
-
Page 8: Installation
Instructions for the installer 3. Installation DIMENSIONS OF THE COOKERS General warnings This appliance shall be installed only by authorised personnel and in accordance with the manufacturer’s installation instructions, local gas fitting regulations, municipal building codes, water supply regulations, electrical wiring regulations, AS 5601/AG 601 - Gas Installations and any other statutory regulations. -
Page 9: Fitting The Adjustable Feet
Instructions for the installer Fitting the adjustable feet Before turning the cooker over, we recommend removing all the parts that are not stably attached to it, in particular the cooking hob grids and burners. To lighten the weight of the cooker, the accessories inside the oven may also be removed, thereby preventing accidental damage during the overturning operation. -
Page 10: Electric Connection
Instructions for the installer Electric connection Make sure that the voltage and the size of the mains correspond to the specifications shown on the plate located on the back of the appliance. The plate must never be removed. The plug at the end of the power supply cable and the wall socket must be the same type and must comply with current electric standards. -
Page 11: Instructions For The Installer
Instructions for the installer 3.4.2 Type of power supply It is possible to obtain different connections according to the voltage, simply by moving the unconnected cable ends on the terminal board as shown in the following diagrams. According to the model, consult the table "C ". -
Page 12: Power Consumption Of The Vitroceramic Hob
Instructions for the installer 3.4.3 Replacing the electric cable To replace the electric cable, it is necessary to access the terminal board. It is located on the back of the appliance, at the top left, as shown in the figure. To replace the cable, proceed as follows: •... -
Page 13: Ventilation In Rooms With Gas Appliances
Instructions for the installer Ventilation in rooms with gas appliances This appliance is not connected to an exhaust device for products of combustion. Ventilation must be in accordance with AS5601/AG 601 - Gas Installations. In general, the appliance should have adequate ventilation for complete combustion of gas, proper flueing and to maintain temperature of immediate surroundings within safe limits. - Page 14 Instructions for the installer • Do not allow the pipes to be constricted or crushed; • Pipes must not be subject to tractive force or torsional stress; • Do not allow the pipes to come into contact with cutting or sharp edges, etc... •...
-
Page 15: Gas Adjustments
Instructions for the installer Gas adjustments For cooktops, the Data Label is located on the underside of the appliance. A duplicate label is supplied to adhere in an accessible area adjacent to the appliance. For cookers, the label is situated in the appliance drawer. This appliance is suitable for Natural Gas and Propane; ensure that the available gas supply matches the Data Label. -
Page 16: Final Operations
Instructions for the installer The hob is made up of the 4 indicated modules: • modules 1 and 4 are featured on all the cookers; • modules 2 and 3 are included depending on which cooker is purchased and can be replaced with electric modules (fry-top, steak grill, grill, vitroceramic hob or deep fryer). -
Page 17: Description Of Controls
Instructions for the user 5. Description of controls The front panel All the commands and controls for the cooking hob and oven are on the front panel. CONTROL PANEL DESCRIPTION OF HOB BURNER KNOB The flame is lit by simultaneously pressing and turning the knob anticlockwise to the low flame symbol . -
Page 18: Instructions For The User
Instructions for the user DESCRIPTION OF DEEP FRYER KNOB The knob of the thermostat that controls the temperature of the heating element can be adjusted between 0° and 200°C. There are also two warning lights: the red light signals the deep fryer is working; the orange light switches on while the appliance is heating. - Page 19 Instructions for the user DESCRIPTION OF ELECTRIC OVEN KNOBS The electric oven is controlled by two knobs: function switch knob and thermostat knob. They allow you to choose the most suitable type of heating for different cooking requirements, by switching on the heating elements appropriately setting...
- Page 20 Instructions for the user DESCRIPTION OF GRILL OVEN KNOB The electric oven, equipped with function grill with natural convection, is controlled by a single knob. By positioning the knob appropriately and by setting the required temperature, both upper and lower heating elements will switch on.
- Page 21 Instructions for the user DESCRIPTION AND USE OF THE END OF COOKING DISPLAY ON THE ELECTRIC OVEN The end of cooking display electronically checks the operation of the oven. Programming the display allows the user to set the oven to switch on and off at set times. TIMER BUTTON COOKING TIME BUTTON END OF COOKING BUTTON...
- Page 22 Instructions for the user ADJUSTING THE VOLUME OF THE BELL The volume of the bell can be varied (on 3 levels) while it is operating by pressing button DEACTIVATING THE BELL The bell automatically stops ringing after seven minutes. It is possible to deactivate it manually by pressing button After pressing button the oven begins to operate once again: to switch it off, turn the function...
-
Page 23: Using The Cooking Hob
Instructions for the user 6. Using the cooking hob Make sure that the flame caps, the burner caps and the grids are fitted correctly. During normal operations, the appliance heats up considerably. Caution should therefore be used. Do not allow children to approach the appliance. Do not leave the cooking hob unattended while it is on. -
Page 24: Using The Deep Fryer
Instructions for the user 7. Using the deep fryer During normal operations, the surface of the deep fryer heats up considerably. Do not allow children to approach the deep fryer. Do not leave the deep fryer unattended while it is on. Oil or fat in bad condition may burst into flames. -
Page 25: Indicative Frying Times
Instructions for the user • lift the basket periodically to check the frying. When the food is crisp as required, remove the basket completely from the frying liquid and shake it lightly to remove excess liquid; • hang the basket on the element of the deep fryer (as shown in the figure) and allow to drip. -
Page 26: Using The Fry-Top / Steak Grill
Instructions for the user 8. Using the fry-top / steak grill During normal operations, the appliance heats up considerably. Caution should therefore be used. Do not allow children to approach the appliance. Do not leave the fry-top/steak grill unattended while it is on. Depending on the model, the appliance is fitted with a fry-top with smooth griddle, or a steak grill with lined griddle. -
Page 27: Using The Volcanic Rock Grill
Instructions for the user 9. Using the volcanic rock grill During normal operations, the appliance heats up considerably. Caution should therefore be used. Do not allow children to approach the appliance. Do not leave the grill unattended while it is on. When using the burners we recommend removing the safety cover A (only available on certain models). -
Page 28: Energy Regulator Table
Instructions for the user The appliance can also be used in the same way as an “open burner”, which is ideal for simmering. Only use multi-function pans whose dimensions are compatible with the cooking surface of the cast iron grill. This type of cooking is ideal for: beef stews, grilled pork, blanquette, rabbit with beer, tongue. -
Page 29: Using The Vitroceramic Hob
Instructions for the user 10. Using the vitroceramic hob During normal operations, the appliance heats up considerably. Caution should therefore be used. Do not allow children to approach the appliance. Do not leave the vitroceramic hob unattended while it is on. 10.1 General warnings The first time it is heated, the vitroceramic hob may develop an acrid or burnt smell caused by oily residue from manufacturing, which disappears completely after repeated use. -
Page 30: Using The Ovens
Instructions for the user 11. Using the ovens 11.1 General warnings When the oven or grill is operating, the outer walls and oven door can become very hot. Keep children away from the appliance. Do not allow children to sit on the oven door or play with it. Do not use the door as a stool. - Page 31 Instructions for the user To prevent any steam in the oven from scalding, proceed as follows: turn the function switch knob to "0", or to function ; open the door in two stages: hold it partly open (approx. 5 cm) for 4-5 seconds, then open it completely.
-
Page 32: Using The Auxiliary Oven With Natural Convection
Instructions for the user 11.4 Using the auxiliary oven with natural convection The end of cooking display and the control knobs on the main oven have no bearing on the operation of the auxiliary oven. The auxiliary oven with natural convection is equipped with: •... -
Page 33: Using The Convection Electric Oven
Instructions for the user 11.5 Using the convection electric oven The end of cooking display and the control knob on the convection oven have no bearing on the operation of the grill oven. The convection oven is equipped with a circular heating element with a fan located on the rear wall of the oven. -
Page 34: Using The Grill Oven With Natural Convection
Instructions for the user 11.6 Using the grill oven with natural convection The grill oven knob do not influence the functioning of the convection oven. The grill oven with natural convection is equipped with: • a heating element positioned on the base of the oven (at the bottom); •... -
Page 35: Cooking Suggestions
Instructions for the user 12. Cooking suggestions 12.1 Suggestions for using the hob burners correctly The diameter of the base of cooking recipients Burner Recipient diameter should fit the diameter of the burner used (see (in cm) adjacent table). The burner flame must never be wider than the diameter of the recipient. -
Page 36: Suggestions For Using The Vitroceramic Hob Correctly
Instructions for the user 12.5 Suggestions for using the vitroceramic hob correctly In order to obtain good efficiency and adequate energy consumption, it is essential to use only recipients that are suitable for electric cooking. The diameter of the base of the recipient must be the same as the diameter of the outline of the cooking area. - Page 37 Instructions for the user 12.6.3 Cooking with the grill The heat comes from the top. Almost all meat can be grilled, with the exception of lean game and dishes such as meat-loaf. Meat and fish to be grilled should be lightly drizzled with oil and placed on the grid bars, which should be placed in the guides closest to or farthest away from the grill element, depending on the thickness of the meat, so as to avoid burning the surface and cooking too little inside.
-
Page 38: Recommended Cooking Tables
Instructions for the user 12.6.7 Recommended cooking tables Cooking times vary according to the nature, homogeneity and volume of the food. We recommend monitoring your first attempts and checking the results, as similar results are obtained by cooking the same dishes in the same conditions. The following three tables (I, II and III) provide guidelines. TABLE OF CONVECTION AND TRADITIONAL COOKING TIMES (I) POSITION OF GUIDE TEMPERATURE... -
Page 39: Cleaning And Maintenance
Instructions for the user 13. Cleaning and maintenance Before cleaning or carrying out maintenance, switch off the power supply to the appliance and close the gas tap. Warning: Servicing should be carried out only by authorised personnel. Do not clean the surfaces of the appliance when they are still hot. Do not use pressure or steam spray guns to clean the appliance. -
Page 40: Cleaning The Igniter Plugs And Thermocouples
Instructions for the user 13.6 Cleaning the igniter plugs and thermocouples In order for the igniter plugs and thermocouples to operate correctly, they must be kept clean at all times. Check them frequently and, if necessary, clean them with a damp cloth. Any dry residue should be removed with a toothpick or needle, taking care not to damage the insulating ceramic part. -
Page 41: Cleaning The Volcanic Rock Grill
Instructions for the user 13.9 Cleaning the volcanic rock grill After cooking, the cast iron grill and other components will remain hot for a certain length of time. Make sure they are completely cool before handling them for cleaning. Proceed as follows: •... -
Page 42: Cleaning The Oven
Instructions for the user Any grease deposits on the vitroceramic hob can be removed more easily by heating it for approximately 20-30 minutes (knob in position 11). Afterwards, this residue can be cleaned off with a wooden spatula. Allow the surface to cool, rinse with water and dry well with a clean cloth. -
Page 43: Special Maintenance
Instructions for the user 14. Special maintenance Periodically, it is necessary to maintain or replace some parts that are subject to wear and tear. Specific instructions are given below for each type of maintenance. Before carrying out maintenance, switch off the power supply to the appliance and close the gas tap. -
Page 44: Removing The Side Rack-Holder Frames
Instructions for the user 14.2 Removing the side rack-holder frames The rack-holder frames can be removed to clean them separately and to facilitate cleaning the oven walls. The frames are hooked to the oven wall in the three points indicated by the arrows in the figure (detail 1). - Page 45 Notes ______________________________________________________________________ ______________________________________________________________________ ______________________________________________________________________ ______________________________________________________________________ ______________________________________________________________________ ______________________________________________________________________ ______________________________________________________________________ ______________________________________________________________________ ______________________________________________________________________ ______________________________________________________________________...
- Page 46 Notes ______________________________________________________________________ ______________________________________________________________________ ______________________________________________________________________ ______________________________________________________________________ ______________________________________________________________________ ______________________________________________________________________ ______________________________________________________________________ ______________________________________________________________________ ______________________________________________________________________ ______________________________________________________________________...
- Page 47 In addition to all statutory rights which you, the Consumer, have under the relevant laws in respect of this appliance, during the first five years of ownership as the original purchaser of this Kleenmaid appliance, we guarantee that any fault caused by faulty material or workmanship becoming apparent will be rectified free of charge for parts and labour, provided that all service is performed during normal working hours by Kleenmaid or their designated Agents.
- Page 48 Washing Machines Dryers Dishwashers Ovens Cooktops Outdoor Cooking Centres Built-In Coffee Machines Rangehoods Freestanding Ovens and Cooktops Sinks Waste Disposals Taps Cookware Refrigerators Wine Cellars Vacuum Cleaners To find your nearest Kleenmaid Showroom telephone 13 13 08. B00090 ZS3360 12/07...
Need help?
Do you have a question about the G10FF-6SS and is the answer not in the manual?
Questions and answers