
Related Manuals for Kleenmaid TO901X


Summary of Contents for Kleenmaid TO901X
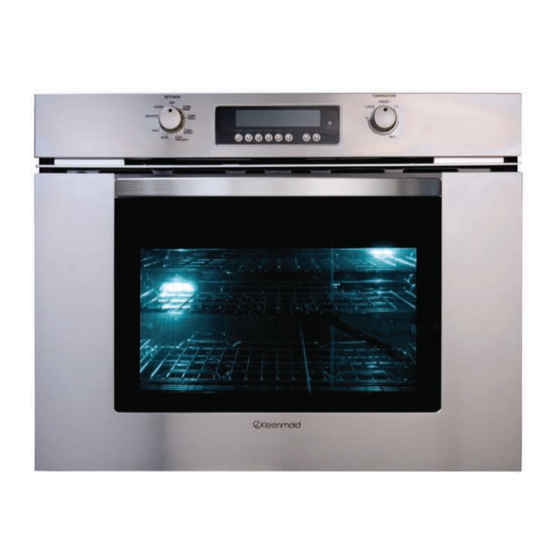
- Page 1 Cooking Collection Instructions for Use and Warranty Details TO901X - Single TO951X - Double Multi Function Pyrolytic Ovens - Stainless Steel...
- Page 2 More than one million Australians enjoy using Kleenmaid appliances daily. Selected because of their unique design, outstanding performance, excellent quality and unquestionable reliability, each one is value-for-money, 100 per-cent guaranteed and at the top of its class.
-
Page 3: Table Of Contents
Table of Contents IMPORTANT SAFETY INSTRUCTIONS ....................3 Product Features ............................4 About Your Oven........................... 4 Cooling Fan........................... 4 Rack Positions ..........................4 Baking Elements ........................... 5 Grilling Element..........................5 Convection Element ........................5 About Convection Ovens ......................5 The Control Panels ........................... 6 Command Keys.......................... - Page 4 Steps For Installation ........................29 Technical Data ............................30 Single Oven ..........................30 Double Oven..........................30 Wall Installation, Single Oven ........................31 Wall Installation, Double Oven .......................32 Electrical Supply............................33 Wiring Requirements ........................33 Connecting The Oven To The Mains...................33 Final Check List ............................34 Model Warranty............................35...
-
Page 5: Important Safety Instructions
IMPORTANT SAFETY INSTRUCTIONS WARNING - when using this appliance, basic safety precautions should always be followed to reduce The risk of fire, electric shock, and/or injury to persons, including the following: 1. Read all instructions before using the oven. 2. Installation - The installation must be carried out by an authorised person and in compliance with current regulations in force. -
Page 6: Product Features
(not visible) Figure 1 About Your Oven TO901X - single oven Above you will find an illustration of a Kleenmaid TO951X - both upper and lower ovens oven showing the components of the oven. • 2 x wire shelves • 1 x telescopic rack Cooling Fan •... -
Page 7: Baking Elements
Baking Elements minutes for each additional rack. As individual The Kleenmaid oven uses two elements for tastes vary, you may find you need to adjust the baking: one located at the top of the oven and the time and temperature to achieve desired results. -
Page 8: The Control Panels
THE CONTROL PANELS The user interface has the following features: commands, cooking mode and temperature display, preheat light indicators, keys for selectors. Command Keys Four time digits (green), for time of day, minute minder, automatic cooking. AM/PM indication is [SET CLOCK or CLOCK ]: to set or change also present. -
Page 9: Oven Modes
OVEN MODES The following illustrations give an overview of The arrows represent the location of the heat what happens in the oven with each mode source during specific modes. The lower element setting. is concealed under the oven floor. Table 1. Cooking function settings Convection Bake and Defrost Fast Preheat Convection Bake cooks with heat from a third... -
Page 10: General Oven Information
Before You Use Your Oven Before using your oven for the first time remove Default Settings all packing and external materials from the oven(s). The cooking modes automatically select a Any material of this sort left in the oven(s) may suitable temperature when the selector is in the melt and/ or burn when the oven(s) is(are) used. -
Page 11: General Oven Tips
GENERAL OVEN TIPS Preheating the Oven Oven Condensation and Temperature· Preheat the oven when using the Bake, It is normal for a certain amount of moisture to Convection Bake and Convection Roast evaporate from the food during any cooking modes. process. -
Page 12: Setting The Clock And Timer
SETTING THE CLOCK AND TIMER The time of day is displayed in hours and 5. Press [+] or [-] to set the desired minutes minutes. value, hold the key to change by 10 minute steps. Always set the clock immediately after installation 6. -
Page 13: Selecting The Oven Mode
SELECTING THE OVEN MODE To Set a Cooking Mode and Temperature Using Oven Lights The following modes can be selected by A single light key activates the lights in either moving the cooking mode knob to the desired oven.· position. To select Clean, the temperature If LIGHT key is touched when both ovens are knob must also be moved into the appropriate off, lights in both the upper and lower oven... -
Page 15: Meat Probe
MEAT PROBE Insert the probe in its receptacle, (Figure1, Page 4) The meat probe can be used with a few cooking modes only. and turn the settings knob to the desired function. The display shows the preset meat probe The functions disabled are (CONVENTION temperature on the left and the oven temperature GRILL –... -
Page 16: Bake Tips And Techniques
BAKE TIPS AND TECHNIQUES Baking is cooking with heated air. Both upper and Use baking sheets with or without sides or lower elements in the oven are used to heat the jelly roll pans. air but no fan is used to circulate the heat. Dark metal pans or nonstick coatings will cook faster with more browning. -
Page 17: Convection Bake Tips And Techniques
CONVECTION BAKE TIPS AND TECHNIQUES Foods recommended for Convection Bake Reduce recipe baking temperatures by 15 °C mode: (25 °F).· Appetizers Biscuits Coffee Cakes For best results, foods should be cooked Cookies (2 to 4 racks) Yeast Breads uncovered, in low-sided pans to take Cream Puffs advantage of the forced air circulation. - Page 18 Convection Bake Chart This chart is a guide. Reduce standard recipe temperature by 15 ºC Follow recipe or package directions and reduce (25 °F) for Convection Bake. temperatures appropriately. Temperatures have been reduced in this chart. TEMPERATURE °C (°F) FOOD ITEM RACK POSITION TIME (MIN) (PREHEATED OVEN)
-
Page 19: Convection Roast Tips And Techniques
CONVECTION ROAST TIPS AND TECHNIQUES Preheat for Convection Roast. Quick and easy recipe tips: Roast in a low-sided, uncovered pan. Converting from standard When roasting whole chickens or turkey, tuck BAKE to CONVECTION ROAST: wings behind back and loosely tie legs with Temperature does not have to be lowered. -
Page 20: Convection Grill Tips And Techniques
CONVECTION GRILL TIPS AND TECHNIQUES Place rack in the required position needed Use the 2-piece baking pan. before turning on the oven.· Turn meats once halfway through the cooking Use Convection Grill mode with the oven door time (see convection grill chart). closed.·... -
Page 21: Grill Tips And Techniques
GRILL TIPS AND TECHNIQUES Place rack in the required position needed Meats may be brushed with cooking oil or before turning on the oven.· butter to prevent sticking. Use Grill mode with the oven door closed. Turn meats once halfway through the cooking time (see grill chart). -
Page 22: Special Features
SPECIAL FEATURES The Special Features function can be used to 1. Press the [+] or the [-] key to scroll all select the following special oven features: available options until the desired one is found. 1. SAB => SABBATH MODE (for religious faiths with “no work”... -
Page 23: Sabbath Mode Instruction
SPECIAL FEATURES Sabbath Mode Instruction The cooling fan must run in Sabbath mode. Preheat lights are inhibited during Sabbath Enter the user option menu holding CLOCK and mode. TIMER keys at the same time for 3 seconds. Scroll the option list in the red digits field (dEG, The buzzer must always be silent, regardless OFF, Hr, Sab), by pressing [+] / [-], until of any fault, end of activity, etc. -
Page 24: Care & Cleaning
CARE & CLEANING The Kleenmaid line of ovens feature a pyrolytic self- Follow manufacture instructions. cleaning function that eliminates the difficult and time DO NOT USE ABRASIVE MATERIALS SUCH consuming manual scrubbing of the oven interior. AS STEEL WOOL OR ROUGH SPONGES. -
Page 25: Self-Cleaning Function
SELF-CLEANING FUNCTION Use a soapy sponge or plastic scrubber. Only one oven at a time can be set to Self- Hand-clean the oven door edge, oven front Clean. frame and up to 1-½ “ (2-3 cm) inside the It is common to see smoke and/or an frame with detergent and hot water. -
Page 26: Setting The Self-Clean Mode
SETTING THE SELF-CLEAN MODE 5. To change the minutes, touch the COOK To Set the Self-Clean Mode 1. Press UPPER/LOWER key to select the TIME key. cavity to be cleaned, if the oven is a double. 6. The number of minutes for cleaning will flash. 2. -
Page 27: Do-It-Yourself Maintenance Oven Door Removal
DO-IT-YOURSELF MAINTENANCE OVEN DOOR REMOVAL To Remove Door WARNING! 1. Open the door completely. 2. Lift up the hinge bracket (1) into the slot (2). Make sure oven is cool and power to the 3. Hold the door firmly on both sides using both oven has been turned off before removing hands and close the door. -
Page 28: Replacing An Oven Light
REPLACING AN OVEN LIGHT Each oven is equipped with two halogen WARNING! lights located in the back wall of the oven. The lights are switched on when the door is Make sure the oven and lights are cool and opened or when the oven is in a cooking power to the oven has been turned off cycle. -
Page 29: Solving Baking Problems
SOLVING BAKING PROBLEMS With either Bake or Convection Bake, poor solution may be to replace old baking utensils results can occur for many reasons other than a that have darkened and warped with age and malfunction of the oven. use. Check the chart below for causes of the most Check the Baking Charts from page 14 to 19 for common problems. -
Page 30: Solving Operational Problems
Any work performed by unauthorised personnel If after reviewing Table 2, you decide that you do may void the warranty. require service for your oven, contact Kleenmaid You will find the model number and serial number Service on 1300 652 100. -
Page 31: Installation Introduction
INSTALLATION INTRODUCTION Please read these instructions COMPLETELY Steps For Installation AND CAREFULLY. The following pages provide the necessary They will save you time and effort and help to information for proper installation of the oven ensure optimum oven performance. arranged as follows: Be sure to observe all WARNINGS. -
Page 32: Technical Data
Single Maximum Nominal Connected Load Oven Model Amperes Watts @ Volts Hertz @ 240 V 240 V TO901X 3600 Double Oven For cutout dimensions see following sections titled: Preparing Location Electrical Ratings Double Maximum Nominal Connected Load Oven Model Amperes... -
Page 33: Wall Installation, Single Oven
(open door to see frame and mounting holes). Do not overtighten screws. NOTE : We recommend Flush Fitting : Refer to Kleenmaid Technical Specifications Figure 9 Note: 6. Be careful when placing oven. DO NOT pinch the wiring between the oven back or wall and 1. -
Page 34: Wall Installation, Double Oven
WALL INSTALLATION - DOUBLE OVEN NOTE : We recommend Flush Fitting : Refer to Kleenmaid Technical Specifications Figure 10 Note: 6. Be careful when placing oven. DO NOT pinch the wiring between the oven back or wall and 1. Do not slide oven across floor. Damage to the inner cabinet wall or floor. -
Page 35: Electrical Supply
ELECTRICAL SUPPLY Before installing the oven have a qualified The oven must be connected with COPPER electrician verify that your home is provided with WIRE ONLY. adequate electrical service and that the addition The oven must be installed to conform with of the oven will not overload the circuit on which it the current Australian Standard. -
Page 36: Final Check List
FINAL CHECK LIST To prevent improper connections leading to 6. Test the bake mode by following this step: damage of electrical components and so voiding Move cooking mode knob to “BAKE” the warranty, the following steps must be position. performed: Cooling fan, oven lights, preheat led will turn on. -
Page 37: Model Warranty
In addition to all statutory rights which you, the Consumer, have under the relevant laws in respect of this appliance, during the first five years of ownership as the original purchaser of this Kleenmaid appliance, we guarantee that any fault caused by faulty material or workmanship becoming apparent will be rectified free of charge for parts and labour, provided that all service is performed during normal working hours by Kleenmaid or their designated Agents. - Page 38 This outstanding appliance from our professional series is proudly handed crafted in Italy. Washing Machines Dryers Dishwashers Ovens Cooktops Outdoor Cooking Centres Built-In Coffee Machines Rangehoods Freestanding Ovens and Cooktops Sinks Waste Disposals Taps Cookware Refrigerators Wine Cellars Vacuum Cleaners To find your nearest Kleenmaid Showroom telephone 13 13 08. ZS1215 02/06...
Need help?
Do you have a question about the TO901X and is the answer not in the manual?
Questions and answers