UTStarcom F1000 User Manual
Hide thumbs
Also See for F1000:
- User manual (86 pages) ,
- Handbook (79 pages) ,
- Getting started (79 pages)
Table of Contents
Advertisement
Quick Links
_______________________________________
Copyright Statement: "© 2004 UTStarcom, Inc. All rights reserved. No
part of this publication may be reproduced in any form or by any means
without the prior written permission of UTStarcom, Inc."
Warranty Language: "The contents of this manual, whether in whole or in
part, do not constitute any express or implied warranty with respect to any
products of UTStarcom, Inc., or its affiliates."
Doc. Code: 8810020200.050104
i
Advertisement
Table of Contents

Related Manuals for UTStarcom F1000


Summary of Contents for UTStarcom F1000
- Page 1 _______________________________________ Copyright Statement: “© 2004 UTStarcom, Inc. All rights reserved. No part of this publication may be reproduced in any form or by any means without the prior written permission of UTStarcom, Inc.” Warranty Language: “The contents of this manual, whether in whole or in part, do not constitute any express or implied warranty with respect to any products of UTStarcom, Inc., or its affiliates.”...
-
Page 2: Table Of Contents
Table of Contents SAFETY PRECAUTIONS............ 1 FCC RF E ............1 XPOSURE OMPLIANCE ........2 ANDLING THE HONE ATTERY AND HARGER ................3 ANDLING THE HONE ..............5 ANDLING THE ATTERY ..............6 ANDLING THE HARGER 1. GETTING STARTED ............7 1.1 P ..............7 ACKAGE ONTENTS 1.2 P ..............8... - Page 3 2.7 S ............23 TORE A HONE UMBER 2.8 C ..............23 HORTCUT 2.9 C ..........24 USTOM UNCTIONS HORTCUT 2.10 C ...........24 URRENT ROFILE HORTCUT 2.11 V ...............24 IBRATION HORTCUT 2.12 K ................25 EYPAD 3. PHONEBOOK (NAMES) ..........26 3.1 S ..................26 EARCH 3.1.1 Edit ....................27 3.1.2 Delete Entry ...................27...
- Page 4 4.3.3 Answer Mode .................43 4.3.4 Language..................43 4.3.5 Display...................44 4.3.6 Set Security ...................46 4.3.7 Input Method..................48 4.4 T ..................49 OOLS 4.4.1 Calculator ..................49 4.4.2 Calendar ..................50 4.4.3 Alarm .....................50 4.4.4 Time Zone..................51 4.5 W ................52 ETTINGS 4.5.1 Network Parameter ................52 4.5.2 Signal Protocol................54 4.5.3 WiFi Config ..................57 4.5.4 Net Search..................58 4.5.5 Vendor Information.................59...
-
Page 5: Safety Precautions
Safety Precautions SAFETY PRECAUTIONS FCC RF Exposure Compliance This PCS phone has been tested and complies with the Federal Communications Commission (FCC) RF exposure limits for the General Population/Uncontrolled exposure environment. In addition, it complies with the following Standards and Guidelines: FCC 96-326, Guidelines for Evaluating the Environmental Effects of Radio-Frequency Radiation FCC OET Bulletin 65 Edition 01-01 (2001) Supplement C, Evaluating... -
Page 6: Handling The Phone, Battery And Charger
Safety Precautions Handling the Phone, Battery and Charger DANGER Only use the battery and charger specified for the phone. Failure to do so can result in damage to the phone, electric shock or fire CAUTION Do not store or operate the phone or charger in hot, damp, or dusty areas, which can damage electrical and mechanical components. -
Page 7: Handling The Phone
Safety Precautions Handling the Phone This device complies with Part 15 of the FCC Rules. Operation is subject to the following two conditions: This device may not cause harmful interference This device must accept any interference received, including interference that may cause undesired operation DANGER This phone has been tested and found to comply with the limits for a Class B digital device, pursuant to Part... - Page 8 Do not use the phone while operating a vehicle CAUTION Changes or modifications not expressly approved by UTStarcom, Inc. could void the user’s authority to operate the phone Keep all storage media (magnetic cards, floppy disks, credit cards, etc.) away from the phone. Close...
-
Page 9: Handling The Battery
Safety Precautions Handling the Battery DANGER Do not dispose of the battery pack in a fire. It may explode. Check with local waste management codes for disposal instructions Do not force the battery pack into the phone. Improper installation can cause malfunctions or damage the battery pack. -
Page 10: Handling The Charger
Safety Precautions Handling the Charger DANGER Only use a power source that provides the appropriate voltage (AC100~240 V) for the charger. An unsuitable power source can result in damage to the charger, electric shock or fire Do not use the charger if the power supply cord or plug is damaged or frayed (exposed or broken wires, etc). -
Page 11: Getting Started
Please check the package contents by comparing them with the following list. If you find anything missing or if the documentation set is incomplete, contact your local phone dealer immediately Model F1000 (with one battery) Charger (one) User manual (one) -
Page 12: Phone Specifications
Getting Started 1.2 Phone Specifications Dimensions About 107.8 x 44 x 23.5 (L×W×H) mm Weight Approximately 100g Battery DC 3.6V 1500mAh Li-ion battery Charger Input: 100~240V AC, 50~60Hz Output: 5.2V DC, 600mA Charger Weight Approximately 80g Charging Time 3~4 hours Standby Time 50~100 hours Talking Time... -
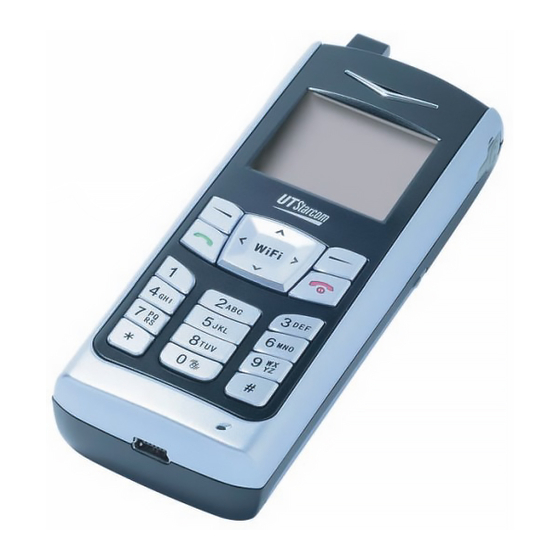
Page 13: Handset Description
Getting Started 1.3 Handset Description 1. Fixed antenna 2. Earpiece 3. LCD Screen Navigation Key: This key is used to scroll up and down through menu lists Left Soft Key: This key is used to perform the function indicated on the screen above... - Page 14 Getting Started Talk Key: This key is used to make or receive a call. It can also be used to access outgoing call logs in standby mode Number Keypad: These keys are used to enter numbers and characters * Key/Switch Key: This key is used to key in “*”...
-
Page 15: Display Indicators
Getting Started 1.4 Display Indicators 4 5 6 Shows the current signal strength. The higher the bar, the stronger the signal Strong Weak Indicates a new voice mail has been received Indicates the keypad is locked Means the Ring Mode is set to Mute; if the Ring Mode is set to Ringing, will be displayed Means the Ring Mode is set to Vibration... -
Page 16: Charge The Battery
Getting Started 8. Content Display Area: Shows phone numbers, characters, etc. 9. Soft key function display area: Shows the functions of the left soft key and the right soft key 1.5 Charge the Battery When the battery power is low and needs recharging, the battery indicator will flash continuously, and the phone will sound a low battery alarm (if the alert tone is set to ON), reminding you that the battery is running low and the phone will be switched off automatically. -
Page 17: Replace The Battery
Getting Started 3. When the battery indicator bar stops scrolling, charging is complete. The text “Fully Charged!” is also displayed on the LCD screen, if the phone is off The phone takes about 3~4 hours to charge and the exact time may vary depending on the circumstances With your phone turned off, charge your new battery for 4 hours before its first use... - Page 18 Getting Started 3. Remove the old battery Disconnect the cord by firmly gripping the connector (not the battery connection wire) and pulling gently as illustrated Black Yellow 4. Install the new battery Connect the cord of the new battery by firmly inserting the connector into its place.
-
Page 19: Conventions Used In This Manual
Getting Started 5. Replace the battery cover until it clicks into place 1.7 Conventions Used in this Manual In this manual, “press the key” means to release the key after you press it; “press and hold the key” means to press the key for over 2 seconds before releasing it The text displayed on the screen is indicated in bold in this manual, for example Menu... -
Page 20: Access Menu/List Options
Getting Started 1.8 Access Menu/List Options A variety of options are available for the menus and lists, such as: Menu and Names For example, to access Settings Answer Mode, follow the steps below: 1. In standby mode, press the left soft key (Menu) 2. -
Page 21: Basic Operations
Basic Operations 2. BASIC OPERATIONS 2.1 Switch the Phone On/Off Press and hold the power key . The phone will display the power-on/off animation If the PowerOn Code function is active, after switching on the phone, enter the security code (with each input displayed as *) and press the left soft key (Ok). -
Page 22: Answer A Call
Basic Operations 1. In standby mode, press and hold the corresponding speed dial key to automatically display the phone number 2. Press to call the number 2.4 Answer a Call If the Answer Mode is set to Talk Key, press the left soft key (Answer) or the key to answer an incoming call If the Answer Mode is set to Any Key, press any key to answer an... -
Page 23: I Ncall Operations
Basic Operations 2.6 In Call Operations While on a call, you can perform the following operations: 2.6.1 Hold a Call You can place an ongoing call temporarily on hold During a call, press the left soft key (Option), and then press the left soft key (Ok) to select Hold. -
Page 24: Make A New Call
Basic Operations Press the right soft key (Hangup) to end the current call. Then, you can press the left soft key (Option) and select Unhold to take the held call off hold Press the key to end both calls 2.6.3 Make a New Call While on a call, if you need to connect to a third party, press the left soft (Option). -
Page 25: Transfer A Call
Basic Operations soft key (Ok) to initiate the conference call During the conference call, press the left soft key (Option). Press to highlight Drop and press the left soft key (Ok). Press to highlight the desired party, and press the left soft key (Ok) to end the call with the selected party During the conference call, pressing the right soft key... -
Page 26: Access The Phonebook
Basic Operations 2.6.7 Access the Phonebook While on a call, press to access the phonebook entry list When you press to access the phonebook, the last phonebook entry will be highlighted; when you press to access the phonebook, the first entry will be highlighted After entering the phonebook, press to scroll through the entries. -
Page 27: Store A Phone Number
Basic Operations 3. After completing the volume selection, press the right soft key (Exit) or wait for two seconds to return to the call timer mode. The phone will save the adjusted volume level 2.7 Store a Phone Number In standby mode, new entries can be added to the phonebook 1. -
Page 28: Custom Functions Shortcut
Basic Operations After the intended record is displayed, you can press to call the number To perform other operations with the record, press the left soft key (Option). (See “Call Log” for details) 2.9 Custom Functions Shortcut 1. In standby mode, press to access the custom functions menu 2. -
Page 29: Keypad Lock
Basic Operations 2.12 Keypad Lock The keypad lock prevents the keys from being accidentally pressed, resulting in unintentional operations In standby mode, press and hold to lock the keypad. The indicator will be displayed To unlock the keypad, press and hold again in standby mode When the keypad is locked, you can answer a call as usual. -
Page 30: Phonebook (Names)
Phonebook (Names) 3. PHONEBOOK (NAMES) You can store frequently used phone numbers and names in the phone memory (phonebook). The phonebook can store up to 200 entries. Each entry may contain a name, phone number and group information You can enter the phonebook in either of the following ways: In standby mode, press the right soft key (Names) In standby mode, press the left soft key... -
Page 31: Edit
Phonebook (Names) 2. The letter/digit just entered will be underlined. After you have entered the intended letter/digit, press the appropriate number key to input the next letter/digit. If the next letter/digit and current letter/digit share the same key, wait for one second to input the letter/digit again To delete the last entered letter/digit, press the right soft key (Clear);... - Page 32 Phonebook (Names) 1. Key in the name, and press the left soft key (Ok) You can enter a maximum of 20 English letters or 10 Chinese characters (see “Input Method”) 2. Enter the phone number (24 digits maximum), and press the left soft (Ok) The phone number cannot be left blank;...
-
Page 33: Delete Entry
Phonebook (Names) 3.3 Delete Entry Delete Entry You can select from the following options to delete entries one by one or all at once 3.3.1 One by One Delete Entry One by one When you access this option, the phonebook entry list will be displayed. Enter the first letter(s)/digit(s) of the intended entry (name). -
Page 34: Ring Tone
Phonebook (Names) 3.4.1 Ring Tone Select this option to specify a ring tone for the particular group category Press to highlight and sample the ring tone options. Then press the left soft key (Ok) to complete your selection Note: The Blacklist only has a Browse function because the phone will automatically reject any call from this group. -
Page 35: Memory
Phonebook (Names) Press to highlight the entry, and press the left soft key (Ok) to assign the number to the key If a phone number has been assigned to the key, the corresponding name will be displayed. To change or cancel the setting for this key, press the left soft key (Option), and then select Edit or Cancel Note: If the record for a speed dial key is modified in the phonebook,... -
Page 36: Menu
Menu 4. MENU In standby mode, press the left soft key (Menu) to access the menu. Press to reach the desired submenu, and press the left soft key (Ok) to access the submenu 4.1 Call Log Call Log Your phone records missed, received and dialed calls as well as their call durations In standby mode, you can press to quickly access... - Page 37 Menu following options will be available: 4.1.1.1 Edit After you access this option, the caller’s phone number will be displayed. You can edit the phone number, and then save or dial the edited number: Save Number After editing the number, press the left soft key (Save).
-
Page 38: Received Log
Menu 4.1.2 Received Log Call Log Received Log This option enables you to view the last 20 received calls After you access this option, the phone will display the information of the most recently received call Received 1: the caller’s phone number or name (if the number is stored in the phonebook). -
Page 39: Dialed Log
Menu 4.1.2.4 Duration Select this option to view the duration of the received call. 4.1.3 Dialed log Call Log Dialed Log This option enables you to view the last 20 dialed calls After you access this option, the phone will display the information of the most recent outgoing call Dialed 1: the dialed phone number or name (if the number is stored in the phonebook). -
Page 40: Delete Log
Menu Note: The phone number and name cannot be identical to those of an existing phone book entry. Otherwise, the text Exists will be displayed after you enter the name and press the left soft key (Ok). Dial Number After editing the number, press to call the displayed number 4.1.3.2 Time Select this option to view the time the call was dialed... -
Page 41: Duration
Menu 4.1.5 Duration Call Log Duration This option enables you to view the approximate duration of received calls, dialed calls, or the duration of all calls After accessing this option, press to view the duration of received calls (Received), dialed calls (Dialed), as well as the duration of all calls (Total Time). -
Page 42: Profiles
Menu 4.2 Profiles Profiles This submenu enables you to customize the phone alert settings to suit a variety of environments When you access this submenu, the profile list will be displayed; the current profile will be highlighted. You can customize each profile, and activate the one that suits your environment. - Page 43 Menu There are two volume levels: High and Low. Press to reach the desired volume level, and press the left soft key (Ok) to complete the operation Ring Mode This function enables you to define how the phone will notify you of incoming calls The available options include: Ringing, Vibration and Mute.
-
Page 44: Meeting
Menu Alert Tone If this function is activated, a warning tone will sound when the battery power is low Select ON or OFF to activate or deactivate this function 4.2.2 Meeting Profiles Meeting This profile is suitable for meeting environments. You can preset this option to meet your needs by following the same steps specified in “Standard”... -
Page 45: Settings
Menu 4.3 Settings Settings From this submenu, you can perform various phone settings 4.3.1 Scheme Settings Scheme When this option is highlighted, the current setting will be displayed in the adjacent bubble. After accessing this option, you can select from the following options: 4.3.1.1 Static Picture The standby display will become static after you set this option... -
Page 46: Date/Time
Menu Default The standby display will change every hour in the default picture sequence after you select this option User Edit This option enables you to specify the picture or text for each hour (Picture1~Picture24) Select from the options Picture1~Picture24, and then edit text or select a picture by following the same operations specified in “Static Picture”. -
Page 47: Answer Mode
Menu After accessing the option, enter a date from 2004-01-01 to 2019-12-31, and then enter the time in 24-hour format. Press the left soft key (Ok) to complete the operation When you key in the date or time, you can press to move the cursor and modify the number 4.3.3 Answer Mode... -
Page 48: Display
Menu 4.3.5 Display Settings Display You may set the display for the LCD screen as follows: 4.3.5.1 Backlight Settings Display Backlight When you highlight this option, the current setting will be displayed in the adjacent bubble If the Backlight is not set to OFF, the LCD screen and keypad will light when you press keys or the phone receives a call The following options are available: Select this option to deactivate the backlight... - Page 49 Menu reaching the desired contrast level, press the left soft key (Ok) to complete the operation 4.3.5.3 Screen Saver Settings Display Screen Saver When you highlight this option, the current setting will be displayed in the adjacent bubble If the Screen Saver is not set to Off, the clock screen saver will be displayed after the phone has been in standby mode for one minute.
-
Page 50: Set Security
Menu 4.3.6 Set Security Settings Set Security This option enables you to set the security level to protect your phone After accessing this option, you will be prompted to enter the security code. Key in the security code and press the left soft key (Ok). - Page 51 Menu 4.3.6.3 Reset All Select this option to restore your phone’s default settings When you access this option, “Reset All?” will be displayed. Press the left soft key (Ok) to complete the operation This operation will not delete the phonebook entries or call logs. It cannot change the phone’s date and time either Phone Default Settings Functions...
-
Page 52: Input Method
Menu Functions Default Settings Alarm (On/Off) 08:00 Alarm (Set Time) Alarm (Snooze) Current Time Zone New York Profiles Default Settings Profile User Standard Meeting Outdoor Options Define Ring Volume High High High Ring Mode Ringing Vibration Ringing Ringing Ring Tone Ring 6 Ring 6 Ring 6... -
Page 53: Tools
Menu 4.4 Tools Tools From this submenu, you can use the Calculator, view the Calendar, set the Alarm or change the current Time Zone 4.4.1 Calculator Tools Calculator This function enables you to add, subtract, multiply and divide 1. The screen will initially display the number “0”. Enter the first number to be calculated - To enter a minus sign, press (only the first number can be... -
Page 54: Calendar
Menu If the formula violates mathematical principles (for example, 5/0), Error will be displayed If the absolute value of the calculation result exceeds 999,999,999, Overflow will be displayed 4.4.2 Calendar Tools Calendar This function enables you to view the calendar from January 1, 2000 to December 31, 2049 After accessing this option, you can press to highlight the desired... -
Page 55: Time Zone
Menu 4.4.3.2 Set Time Tools Alarm Set Time Select this option to set the alarm time. Enter the time in 24-hour format, and then press the left soft key (Ok) to complete the operation When you key in the time, you can press to move the cursor and modify the number The cursor will advance if the number entered is valid;... -
Page 56: Wifi-Settings
Menu 4.5 WiFi-Settings WiFi-Settings From this submenu, you can perform the following WiFi settings Note: After completing WiFi settings, switch off the phone and then switch it on, in order that the changed WiFi settings can take effect 4.5.1 Network Parameter WiFi-Settings Network Parameter This option enables you to set network parameters: 4.5.1.1 DHCP... - Page 57 Menu IP Address Select this option to set the phone’s IP address After accessing this option, key in the IP address, and press the left soft (Ok) to complete the operation Subnet Mask Select this option to set the subnet mask After accessing this option, key in the subnet mask, and press the left soft (Ok) to complete the operation Gateway IP Address...
-
Page 58: Signal Protocol
Menu Priority Select this option to set the priority You can select DHCP First or Local First 4.5.1.4 Network Information WiFi-Settings Network Parameter Network Information Select this option to view the network information 4.5.2 Signal Protocol WiFi-Settings Signal Protocol From this option, you can set signal protocols: 4.5.2.1 SIP WiFi-Settings Signal Protocol SIP This option enables you to set the SIP protocol. - Page 59 Menu SIP Proxy Domain Name Select this option to set the SIP proxy domain name After accessing this option, enter the domain name, and press the left soft (Ok) to complete the operation SIP Proxy IP Address Select this option to set the SIP proxy IP address After accessing this option, key in the IP address, and press the left soft (Ok) to complete the operation SIP Proxy Port...
- Page 60 Menu 4.5.2.2 RTP WiFi-Settings Signal Protocol RTP Select this option to set the RTP protocol After you access this option, the RTP Port option will be displayed. Its current setting will be displayed in the adjacent bubble RTP Port This option enables you to set the RTP port After accessing this option, key in the RTP port number (10000~20000), and press the left soft key (Ok) to complete the operation...
-
Page 61: Wifi Config
Menu 4.5.3 WiFi Config WiFi-Settings WiFi Config From this option, you can perform WiFi configuration. After you access this option, the SSID & WEP KEY option will be displayed 4.5.3.1 SSID & WEP KEY WiFi-Settings WiFi Config SSID & WEP KEY This option enables you to set SSIDs and WEP keys. -
Page 62: Net Search
Menu - If 128Bit is selected, you can select Edit or Activate to edit or activate the 128Bit WEP key. While editing the WEP key, ensure that the WEP key consists of 13 ASCII characters or 26 hexadecimal characters To activate the setting of the SSID and WEP key, select Activate Note: The corresponding AP (Access Point) need to select WEP Key 1 as the default transmit key. -
Page 63: Vendor Information
Menu 4.5.5 Vendor Information WiFi-Settings Vendor Information Select this option to view the vendor information. Press to highlight the desired option: Vendor Name, Enterprise Code, Model Name and Version, and then press the left soft key (Ok) to view the corresponding information 4.5.6 PC Config WiFi-Settings PC Config... -
Page 64: Network Service
Menu 4.6 Network Service Network Service From this submenu, you can set the following network services: 4.6.1 Call Waiting Network Service Call Waiting This option enables you to set the call waiting function 4.6.1.1 Per Call Basis Network Service Call Waiting Per Call Basis Select Enable or Disable to activate or deactivate the per call basis call waiting function 4.6.2 Call Transfer... -
Page 65: Registration Interval Time
Menu 4.6.3 Registration Interval Time Network Service Registration Interval Time This opt ion enables you to set the registration interval time After accessing this option, enter the interval time (0~86 400 seconds), and then press the left soft key (Ok) to complete the operation 4.6.4 Caller-ID Block Network Service Caller-ID Block If this f... -
Page 66: Reject Anonymous Incoming Call
Menu After you press the left soft key (Update), “Connecting…” will be displayed. You can press the right soft key (Shutdown) to stop the update and switch the phone off When the connection succeeds, “Processing…” and “Please Wait” will be displayed. All keystrokes are invalid in this state When the update is complete, restart the phone Note: The phone will spend a long time completing the TFTP update. -
Page 67: Input Method
Input Method 5. INPUT METHOD This phone supports five input methods, including PinYin, Sim Stroke, English, Letter and Digit in order to provide easy input for letters and digits in text editing mode 5.1 Switch Input Method When you enter text-editing mode, the last active input method is displayed. - Page 68 Input Method 1. To enter letters, press one time for the letters labeled on the respective key; a word matching the input letters will be displayed automatically - When you enter the first letter of any English word, “*” will be displayed (except ).
-
Page 69: Letter
Input Method 5.4 Letter Switch to Letter input method; will be displayed at the lower left corner of the screen 1. Press to enter the corresponding letter labeled on the respective key. To input a letter, press the corresponding key repeatedly until the letter appears For example: if you press repeatedly, the following letters... -
Page 70: Digit
Input Method 5 Digit itch to digi t input method; will be displayed in the lower left corner of the screen To enter digits, press the co esponding number keys Press to switch input methods... -
Page 71: Troubleshooting
Troubleshooting 6. TROUBLESHOOTING When using this phone, if you run into malfunctions, please refer to the following troubleshooting techniques before requesting help: Symptom Diagnosis Solution Have you pressed Press and hold held more than more than The phone seconds? seconds cannot be battery connector... - Page 72 Troubleshooting Symptom Diagnosis Solution The battery charger properly Connect the charger cannot be connected to the phone? and phone correctly charged (The battery Connect the charger Is the charger connected to a indicator to a 100~240V AC 100~240V AC wall outlet? bar does wall outlet correctly not scroll)
Need help?
Do you have a question about the F1000 and is the answer not in the manual?
Questions and answers