Table of Contents
Advertisement
Quick Links
Advertisement
Table of Contents

Related Manuals for Gericom Beetle G733


Summary of Contents for Gericom Beetle G733
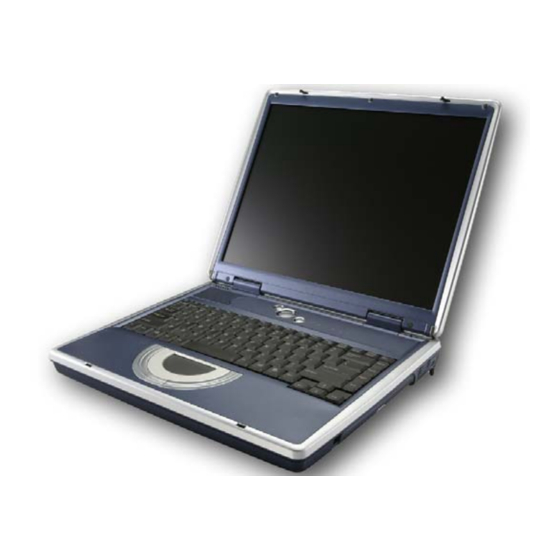
- Page 1 Notebook Computer User's Guide...
-
Page 3: Limitation Of Liability
Preface Copyright 2003 All Rights Reserved. Document Number G733 The information in this document is subject to change without prior notice in order to improve reliability, design and function and does not represent a commitment on the part of the manufacturer. - Page 4 Notices Federal Communications Commission Radio Frequency Interference Statement This equipment has been tested and found to comply with the limits for a Class B digital device, pursuant to Part 15 of the FCC Rules. These limits are designed to provide reasonable protection against harmful interference in a residential installation.
- Page 5 Notice: Changes or modifications not expressly approved by the party responsible for compliance could void the user’s authority to operate the equipment. Shielded interface cables and a non-shielded AC power cord must be used in order to comply with emission limits. This equipment is to be used with power supply: I/P: 100-240 Vac, 50-60Hz, 1.5A O/P: 19Vdc, 4.74A...
- Page 6 This page is intentionally blank...
-
Page 7: Table Of Contents
Table of Contents Chapter 1: Before you Start ................. 9 Conventions of This manual ....................10 Things you must remember before working on your computer ..........17 Chapter 2: Introduction..................19 Welcome to the Notebook PC ....................20 Unpacking the Notebook ......................20 Features .......................... - Page 8 Chapter 6: Configuring & Maintaining Your System ........61 Introduction ..........................62 Chapter 7: The Software Utilities Disks ............71 AutoRun Installation....................... 72 Manual Installation ......................... 75 VGA Utilities.......................... 76 Chapter 8: Troubleshooting................83 Locating a Problem ......................... 84 Checking Cables and Connections ..................84 The Power-On Self Test......................
-
Page 9: Personal Inventory
Personal Inventory This Notebook computer system is designed for years of productive and pleasurable computing. Use this section to keep notes about details of your purchase. Update this section when you add new options. Date of Purchase: Dealer’s Name: Phone: Address: E-Mail Address: WWW Site:... -
Page 11: Chapter 1: Before You Start
Before you Start... -
Page 12: Conventions Of This Manual
Conventions of This manual Use this manual will help you get the most from your notebook computer. • If you are an experienced user of computers and/or Microsoft’s Windows operating systems, you might find it useful to read the Quick Start Guide that comes along with your accessories. -
Page 13: Safety Precautions
Safety Precautions This section is designed to assist you in identifying potentially unsafe conditions while working with this product. Required safety features have been installed in the computer to protect you from injury. However, you should use good judgment to identify potential safety hazards: Please read these safety instructions carefully. - Page 14 The Power cord or plug is damaged. Liquid has penetrated into the equipment. The equipment has been exposed to moisture. The equipment has not worked well or you cannot get it work according to the user's manual. The equipment has dropped and damaged. If the equipment has obvious sign of breakage.
-
Page 15: Wichtige Sicherheitshinweise
• The minimum specifications for the flexible cord are .75m ㎡ conductors. For Other Countries: • The cord set fittings must bear the certification mark of the agency responsible for evaluation in a specific country. • The flexible cord must be of a HAR (harmonized) type H05VV-F. •... - Page 16 Heben Sie dirse Anleitung für den späteren Gebrauch auf. Vor jedem Reinigen ist das Gerät vom Stromnetz zu trennen. Versenden Sie Keine Flüssig- oder Aerosolreiniger. Am besten eignet sich ein angefeuchtetes Tuch zur Reinigung. Die Netzanschluβsteckdose soll nahe dem Gerät angebracht und leicht zugänglich sein.
- Page 17 Das Gerät ist gefallen und/oder das Gehäuse ist beschädigt. Wenn das Gerät deutliche Anzeichen eines Defektes aufweist. VORSICHT: Explosiongsgetahr bei unsachgemäßen Austausch der Batterie. Ersatz nur durch denselben oder einem vom Hersteller empfohlenem ähnlichen Typ. Entsorgung gebrauchter Batterien nach Angaben des Herstellers. Dieses Schaltnetzteil kann bis zu einer Außentemperatur von maximal 35ºC.
- Page 18 • Die Zubehörteile des Kabel-Sets müssen das Prüfsiegel derjenigen Stelle, die in dem jeweiligen Land für die Sicherheitsprüfung zuständig ist, tragen. • Das Kabel muss vom HAR (harmonisierten) Typ H05VV-F sein. • Das Kabel-Set muss eine Stromkapazität von mindestens 2,5 Ampere haben und Spannungen von 125 oder 250 V Wechselstrom gestatten.
-
Page 19: Things You Must Remember Before Working On Your Computer
Things you must remember before working on your computer Let your computer acclimate itself Your notebook can easily stand temperature extremes but it doesn’t like rapid changes in temperature, like going from the cold outdoors to a warm office. Rapid changes in temperature can cause water droplets to condense inside your case, threatening to damage the electronic parts inside. -
Page 20: Suitable Place To Work
Suitable place to work Your computer will run well wherever you’re comfortable but extremes of temperature and humidity can be challenging to your system’s parts. There are some things you can tolerate that the computer can’t – things like static electricity, dust, water, steam and oil. -
Page 21: Chapter 2: Introduction
Introduction... -
Page 22: Welcome To The Notebook Pc
Welcome to the Notebook PC Congratulations on your purchase of the Notebook PC. Your Notebook features the latest advances in portable computing technology. The Notebook’s modular design provides maximum expandability without compromising portability. The high-performance CPU and enhanced IDE hard drive provides you with extra processing power for handling complex graphics and running large programs. - Page 23 The Notebook’s hardware has the following features: The microprocessor (CPU) is the key hardware feature; it is the brain of the computer, performing all the computing functions and orchestrating the actions of the system. Upgradeable System Memory The Notebook has a 64-bit memory bus. Display The LCD assembly is field-interchangeable and comes with the following display options: 14.1”/15.0”...
- Page 24 Pointing Device The TouchPad is a pressure-sensitive pointing device. It allows you to move the cursor around the screen and make selections just as with a conventional mouse. The TouchPad can be used concurrently with an external PS/2 mouse. Battery and AC Power System The Notebook can operate on two power sources;...
- Page 25 Audio System The Notebook’s sound system includes amplified output, two built-in 1 watt stereo speakers, a manual volume control and a built-in microphone. Audio Port The Notebook comes with a Line in for connecting audio equipment for use with the multimedia system;...
-
Page 26: Getting To Know Your Computer
Getting to Know Your Computer Opening the LCD Panel At the front of the Notebook you will find a retaining latch on the display panel that locks the display in closed position when the Notebook is not in use. Locate the display latch on the front of the unit. Slide the latch until the display panel releases. - Page 27 Try not to place any object on top when it is closed or open. Be sure the system is turned off or in suspend mode before you close the display panel. With the LCD screen open, you will see several features important for operating your Notebook computer.
- Page 28 LCD Cover Release Latch Slide this latch to the right to open the LCD cover. LCD Screen Your Notebook computer is equipped with a replaceable color Liquid Crystal Display (LCD) screen that supports up to 1024 x 768 or 1400 x 1050 x 16M LCD resolution utilizing an AGP BUS.
- Page 29 System Status Indicator Panel The system status indicator panel keeps you informed of the computer’s operating status. There are also two system status indicators — Power and Charge LED — on the left side of the notebook. (Please refer to "The Left Side" section description) Indicates the computer is accessing the PCMCIA drive.
- Page 30 Keyboard Your computer has an 88-key enhanced keyboard that provides all the functions of a standard 101/102 key keyboard. TouchPad The TouchPad is hardware-compatible with the IBM PS/2 mouse and software- compatible with the Microsoft mouse. Scroll Button Use this button to scroll up and down the scrolling bar. TouchPad Buttons The buttons below the TouchPad correspond to the left and right buttons on a standard mouse.
-
Page 31: The Left Side
The Left Side Kensington Lock Allows you to connect a special computer lock to secure your system. You can purchase a lock at most computer retailers. USB Ports Your computer includes four Universal Serial Bus (USB) 2.0 ports. USB2.0 is the latest development in Plug and Play technology. - Page 32 as video devices. Also supports both Plug-and-Play and hot plugging, and also provides power to peripheral devices. PCMCIA Socket Cover Open this cover to access the PCMCIA socket. The computer’s PCMCIA socket lets you extend the capabilities of your computer by inserting PC cards. PCMCIA Socket Button The computer has one PCMCIA type II socket External Microphone Jack...
-
Page 33: Led Indicator
LED Indicator A. Battery Charge/Suspend An orange color light indicates the battery is in charging status. When it turn to green color light it indicates the system is in suspend mode. When the indicator light turn off, it indicates the system is in full charge. B. - Page 34 The Right Side The Modem Port This jack is an internal 56K voice/fax/data modem. You will connect your computer to your phone line through this port. Always disconnect all telephone lines from the wall outlet before servicing or disassembling this equipment. To reduce the risk of fire use only No.
-
Page 35: The Rear
DC IN Connector Plug the AC adapter into this connector. The Rear Parallel Port This port allows you to easily connect a parallel printer or plotter using this 25-pin bi- directional female port. External CRT Port This port allows you to easily connect an external VGA/SVGA display monitor into your Notebook using the 15-pin female connector. - Page 36 The LAN Port This jack provides a standard RJ-45 connection for integration with an existing network or a high-speed (DSL or cable) connection via a network cable. When using a LAN, please use an EMI Shielding Cable to minimize an inteference when transmitting. Infrared Data Port The Infrared Data Port allows your Notebook to become truly wireless.
-
Page 37: The Bottom Panel
The Bottom Panel The CD-ROM/DVD-ROM/Combo Drive Your Notebook comes with a swappable 24X (or higher) 5.25" IDE CD-ROM or DVD- ROM drive. Battery Release Latch Lift up this latch to release the battery from its bay. - Page 38 Battery Your notebook comes equipped with a factory-installed battery pack module. After the battery runs down, the module can be removed and replaced with a charged battery. CPU Compartment This compartment will serve as upgrading your system CPU. Hard Disk Drive Your computer includes a 2.5-inch IDE hard disk drive (9.5mm in height).
-
Page 39: Chapter 3: Getting Started
Getting Started... -
Page 40: Connecting To A Power Source
Connecting to a Power Source Connecting the AC Adapter A universal AC adapter is provided to supply your computer with power and also charge the computer’s battery pack. The adapter’s AC input voltage can range anywhere from 100 to 240 volts, covering the standard voltages available in almost every country. The power cord for the AC adapter requires a three-hole grounded AC outlet. -
Page 41: Turning On Your Notebook Computer
The best kind of AC power source to connect your Notebook to is a UPS (Uninterruptible Power Supply). Lacking this, use a power strip with a built-in surge protector. Do not use inferior extension cords as this may result in damage to your Notebook. -
Page 42: Operating On Battery Power
Operating on Battery Power Your computer comes with a rechargeable battery pack that lets you operate the computer without an external power source. When the battery pack is fully charged, you can operate the computer for approximately 2 hours under the following conditions: •... - Page 43 Turn over the notebook with the front of the unit facing you and place it on a solid, flat surface. Angle the battery into the bay. The front edge of the battery should slide into the grooves in the system case. Gently lower the battery into the bay and push it until it clicks securely in the bay.
-
Page 44: Charging The Battery Pack
Hold the battery at the finger grip and lift it out of the compartment. Charging the Battery Pack The installed battery pack charges automatically any time the computer is connected to the AC adapter and an external power source. If this is your first time to use the battery, be sure to fully discharge the battery and recharged until it is fully charged. -
Page 45: Chapter 4: Using The Notebook Computer
Using the Notebook Computer... -
Page 46: Adjusting The Lcd Screen Display
Adjusting the LCD Screen Display The LCD screen display can be adjusted by the following key combinations. KEYS FUNCTIONS [Fn] + [F7] Decreases the brightness level. [Fn] + [F8] Increases the brightness level. [Fn] + [F10] Use this key combination to expand your video screen or reset to its original size. -
Page 47: A Tour Of The Notebook's Keyboard
• Simultaneous display of the TV screen and CRT monitor You can switch between these display configurations by pressing the key combination [Fn] + [F12]. For information on connecting an external display, please refer to Chapter Four. A Tour of the Notebook’s Keyboard The Notebook’s keyboard uses a standard QWERTY layout with the addition of special function keys and an embedded numeric keypad for number intensive data entry. -
Page 48: The Touchpad
The Notebook’s Hot Key Controls KEYS FUNCTION(S) Power Button Press this button once to power on or enter the suspend/resume mode. Press this button for more than 4 seconds to power off the system. Internet Button Open Internet WWW Home short-cut key Email Button Open Email Reader short-cut key [Fn] + [F2]... -
Page 49: Connecting An External Tracking Devices
TouchPad Precautions The TouchPad is a pressure sensitive device. Please take note of the following precautions. • Make sure the TouchPad does not come into contact with dirt, liquids or grease. • Do not touch the TouchPad if your fingers are dirty. •... -
Page 50: The Dvd-Rom/Combo
Data Storage and Retrieval Data storage and retrieval are two of the most fundamental tasks you will perform when working with your computer. The Notebook is equipped with a hard disk drive (HDD). The HDD is removable allowing for easy upgrades. The DVD-ROM/Combo Features of the DVD-ROM/Combo Module The features of the DVD-ROM/Combo drive are listed below. -
Page 51: Pcmcia Cards And Expansion Sockets
Loading a Disc To play a CD disc, follow the instructions listed below. Push the DVD-ROM/Combo eject button on the CD drive door. Gently pull the tray all the way out. Carefully lift the DVD-ROM/Combo by the edges and make sure the shiny surface is face down (the side with no writing on it). -
Page 52: Power Saving Modes
Inserting a PCMCIA Card The computer will emit a medium tone followed by a high tone when a PC card is inserted. When you eject a card, the computer will emit a high tone followed by a medium tone. You can insert and remove a PC card whether the computer is turned On or Off. -
Page 53: The Battery Power System
The Battery Power System A fully charged pack will provide approximately 2 hours of battery life depending on your system configuration application it runs. Before using the computer on battery power for the first time, check the battery status icon on the Windows Toolbar to make sure the battery is fully charged. -
Page 54: Automatic Battery Pack Charging Function
The battery pack is now calibrated properly. In general, using the battery until the low-low battery-warning indicator appears and fully recharges the battery each time (full discharge/charge cycle) will ensure the accurate reporting of the battery gauge status. Automatic Battery Pack Charging Function You can automatically charge the battery pack by using the AC Adapter. -
Page 55: Resetting The System
Sound Meaning Continuous beeping Battery Low: Indicates that there is 7 to 10 minutes every 1.5 seconds charge remaining. Beeping accelerates Battery Low Low: Indicates that there is 1 to 2 minutes of battery charge remaining. Save your work and turn off the Notebook, or connect the AC adapter. -
Page 56: Adjusting The Brightness
Adjusting the Brightness To adjust the brightness on the LCD screen, press and hold down the [Fn] key in the lower left hand corner of the keyboard and press the [F7] key to reduce the brightness or [F8] to increase the brightness. -
Page 57: Chapter 5: Desktop Operation
Desktop Operation... -
Page 58: Audio
Your notebook is capable of providing you with efficient and productive mobile computing; it also has the speed and capacity to service as a desktop system. This chapter discusses those functions of your notebook that are typical of desktop systems. Audio The Multimedia Sound System The Notebook’s built-in audio capabilities allow you to take advantage of a wide range of... -
Page 59: Connecting Peripheral Devices
Audio Software Your notebook comes equipped with an integrated sound system capable of providing you with quality audio sound through the built-in speakers or through external speakers connected via the system ports. Sound Recording Your system allows you to record sounds and store them as files using the microphone via the microphone jack on the rear of the notebook computer. -
Page 60: Installing The Printer
Installing the Printer The installation of the printer is very easy. Simply connect the enclosed cable to connect the notebook computer printer port to the printer. You also have to install the printer driver. Please follow the instructions in the printer manual for installation. Installing USB Devices USB devices are Plug &... - Page 61 Then follow the instructions from your ISP (Internet Service Provider), to make the proper connection to the Internet. Connect peripheral devices to the computer's interface ports as shown below:...
-
Page 63: Chapter 6: Configuring & Maintaining Your System
Configuring & Maintaining Your System... -
Page 64: Introduction
Introduction The BIOS (Basic Input and Output System) Setup program is a menu driven utility that enables you to make changes to the system configuration and tailor your system to reflect installed hardware or alter system performance. When the notebook computer is turned back on, the system is configured with the values stored in CMOS. - Page 65 Peripheral Setup Configure I/O support for the Notebook computer. To access the menu bar items, press the up or down arrow key on the keyboard until the desired item is highlighted. The Legend Bar At the bottom of the Setup screen you will notice a legend bar. The keys in the legend bar allow you to navigate through the various setup menus.
-
Page 66: The Advanced Cmos Setup
Date/Time The current values for each category are displayed. Enter new values through the keyboard. Pri Master, Sec Master Select one of these hard disk drive icons to configure the hard disk drive named in the option. The Advanced CMOS Setup When the Setup program is accessed, the following screen appears:... - Page 67 Auto Detect CPUandDRAM Frequency Set this option to auto detect the system CPU and DRAM frequency. The settings are Disabled or Enabled (default value). Quick Boot Set this option to Enabled to instruct AMIBIOS to boot quickly when the computer is powered on.
- Page 68 Boot Device This option sets the type of device for the second boot drives that AMIBIOS attempts to boot from after AMIBIOS POST completes. The settings are Disabled, IDE-0 (default value), CD/DVD, and Intel UNDI. Boot Device This option sets the type of device for the third boot drives that the AMIBOOS attempts to boot from after AMIBIOS POST completes.
-
Page 69: The Peripheral Setup
The Peripheral Setup TV Display Type This field allows you to choose the television display option when using the TV out port. The settings are PAL, NTSC (default value). TV PAL Display Type This field allows you to choose the television PAL system type. The settings are PAL (default value), PAL-M, PAL-N. - Page 70 The settings are Auto, Disabled, 3F8h/COM1, 2F8h/COM2 (default value), 3E8h/COM3, 2E8h/COM4 IR Mode Select This option specifies the infrared transmission method. OnBoard Parallel Port This option specifies the base I/O port address of the parallel port on the motherboard. The settings are Auto (default value), Disabled, 378h, 278h and 3Bch. Parallel Port Mode This option specifies the parallel port mode.
- Page 71 Execute Battery Calibration [Y/N] ? Save Settings and Exit This option saves your selections and exit the Setup program. Save current settings and exit [Y/N] ? Exit Without Saving This option should only be used if you do not want to save the changes you have made to the Setup program.
-
Page 73: Chapter 7: The Software Utilities Disks
The Software Utilities Disks... -
Page 74: Autorun Installation
There are two separate procedures on how to install the driver: AutoRun installation and Manual installation. AutoRun Installation • Follow the step-by-step procedures on the DVD-ROM to execute the “AutoRun” application by selecting the topic of “Driver Installation”. • To re-run the “AutoRun” installation, please refer to the procedures on the “Manual Installation”... - Page 75 Follow the Wizard’s on-screen instructions to complete the installation. Restart the system. Intalling the Audio Driver for Win2K\XP Insert the DVD-ROM Driver into your DVD-ROM drive. Click “Start” and Select “Run”. Type the following: D:\Driver\Audio\Setup.exe (If D is not your DVD-ROM drive, substitute D with the correct drive letter).
- Page 76 Type the following: D:\Driver\USB20\USB20.exe (If D is not your DVD-ROM drive, substitute D with the correct drive letter). Click on “USB20” to begin the Installation Wizard. Follow the Wizard’s on-screen instructions to complete the installation. Restart the system. Please note that Window XP Service Pack 1 provides built-in driver for USB 2.0.
-
Page 77: Manual Installation
Click on “Setup” to begin the Installation Wizard. Follow the Wizard’s on-screen instructions to complete the installation. Restart the system. Manual Installation To install the driver manually, follow the step-by-step procedures described on each individual section for a more clear installation. Installing the CardBus Driver for WinXP Please follow these instructions to install the cardbus driver: From Start, click on the "My Computer"... -
Page 78: Vga Utilities
Click on the "Hardware" tab from the "System Properties" dialog window. Double click to enter the "Device Manager" window. Click on the "PCMCIA adapters",select the "Generic CardBus Controller" and click on the "Driver" tab. Click the "Driver" tab then click the "Update Driver" item. Select the "Search for a suitable driver for my device (recommended)"... - Page 79 Driver Mode Setting The SiS's driver allows five simultaneous outputs to LCD only, CRT only, TV only, LCD/CRT and TV/CRT. Before proceeding, be sure the monitor is connected to the computer.
- Page 80 Driver Mode This define the two status of Single, Mirror and Multi Monitor (when an external monitor is connected to your notebook computer). • When the "Single" is selected, the display can only be seen on the notebook computer LCD panel or external monitor. •...
- Page 81 • Select the "VGA1" if you want the picture to only display on the monitor screen. • Select "LCD2" if you want the picture to only display on the notebook computer screen. Use the [Fn] + [F12] hot keys to toggle between the LCD and external monitor display.
- Page 82 Multi-Monitor "Multi-Monitor" is only applicable when the function of "Dual View" is being access. This function will only be available if an external monitor is connected to your notebook computer. Use this to achieve a large desktop display on a small size screen. To do this: •...
- Page 83 Video Setting From the "Setting", you can also adjust the video of your display to overlay, contrast or brightness.
- Page 84 Gamma Correction You can adjust the right color for your window screen by moving the “Brightness” adjustment window to increase or decrease the right resolution for your screen display.
-
Page 85: Chapter 8: Troubleshooting
Troubleshooting... -
Page 86: Locating A Problem
This chapter describes locating and solving problems that you may encounter while using your computer. Locating a Problem Problems with your computer can be caused by something as minor as an unplugged power cord – or as major as a damaged hard disk. The information in this chapter is designed to help you find and solve minor problems. -
Page 87: The Power-On Self Test
source and make sure that the battery has a charge. If you are using the Notebook with the AC adapter, check the power outlet, the power cord, and any power switches that may affect your computer. • Check the wall outlet or power strip with an item that you know is functioning properly. -
Page 88: General Hardware Problems
A few seconds after you turn on your computer, a copyright message appears on your display screen. A memory test message appears next; as the test continues, memory size increases until all installed memory is tested. Normally, the only test routine visible on the screen will be the memory test. - Page 89 Problem: Failure in the installation of the Audio driver. Solution: Be sure to first remove the current audio device from your system. Please follow the instruction on the installation of audio driver. Problem: The display screen is dark Solution: Make sure that the computer is not in Suspend mode. Check the Brightness controls for the screen.
- Page 90 Problem: The system cannot access the DVD-ROM drive. Solution: Check that a CD is properly inserted in the drive. Make sure that you are using the correct program for that kind of CD. For example, the system cannot read a data CD using an audio program. Problem: You cannot operate the printer.
-
Page 91: Contacting Your Dealer
Contacting Your Dealer If you still have a problem after reading the preceding sections, the next step is to contact your dealer. Your dealer can determine if the problem is something that requires the computer to be taken to the shop. Before you call your dealer, however, prepare the following information: •... -
Page 93: Chapter 9: How Do I Expand My Notebook
How do I expand my Notebook... -
Page 94: Upgrading Your Memory
Upgrading your Memory Refer to the following instructions and illustration for information on upgrading your notebook's memory. Turn off the computer and disconnect the AC adapter and all peripherals. Open your computer and locate on the 4 grip of the keyboard attaching to the slot. Use any card to release the keyboard by inserting on the 4 grip attaching the keyboard. - Page 95 Turn over the keyboard and locate for the RAM module compartment. Remove the screws that secure the RAM module compartment cover and set it aside in a safe place.
- Page 96 Remove the compartment cover and then angling it up and out. If you need to install a higher capacity module, gently push the edge clips on both sides to release the module. Angle the card slightly upward and gently slide it from its edge connector slot.
-
Page 97: Easy To Upgrade Hdd Module
Easy to Upgrade HDD Module The hard drive in your notebook computer is made to be easily swapped out for upgrading. You should back up your hard drive before attempting o change the hard drive. Make sure that before you install a new drive, all the files in your system should be backed How to upgrade your Hard Drive Power down the system completely. -
Page 98: Cpu Upgrade
Gently hold the grip of the HDD, lift it up to release from its compartment. To install the new HDD, you will need to align the tabs on the drive bracket with the slots on the bay. Press down gently on the drive bracket until it engages with the system. - Page 99 Unscrew and remove the cover of the CPU compartment. Remove all the screws attached to the heatsink. Before removing the screws, there are certain measures to followed in removing the heatsink.
-
Page 100: Removing The Dvd-Rom/Combo Drive
To remove the heatsink, first loosen the screw carefully. After loosening one screw, be certain that the next to be loosen should be the screw on its adjacent side as shown on the illustration. Be sure to loosen all the screws first before removing it totally to release the heatsink. -
Page 101: Appendix A: Specification
Specification... -
Page 102: Detailed Notebook Specifications
Detailed Notebook Specifications General • Intel P4 Northwood series 2.26GHz/2.4GHz /2.53GHz /2.66GHz /2.8GHz /3.06GHz (w/ Hyperthreading) CPU, 512KB l2 cache on die, CPU front-side bus (FSB) 533 MHz • Intel P4 series 1.4GHz/1.5GHz/1.6GHz/1.7GHz/1.8GHz CPU, 256KB L2 cache on die, CPU front-side bus 400MHz •... - Page 103 • 128/256/512MB memory options • One 200 pin DDR SO DIMM type memory slot • 2.5V DDR SDRAM module • Supports DD266/333 Synchronous DRAM • 512KB Flash ROM • Boot block protection Mass Storage • Support enhanced IDE (PIO mode 4) and bus master (Ultra DMA 33/66/100 mode) •...
- Page 104 • US/Europe, DOS/V keyboard for Japan, full size keyboard alike pitch • 300 mm keyboard with key stroke 3.0mm • Twelve function keys and Windows Function key • Internal keyboard works a standard 101/102 desktop keyboard • 2 short-cut keys: WWW & eMail Audio Controller •...
-
Page 105: Video System
• MIC-in, headphone jack w/ adaptor for 5.1 channel SP/DIP support • RJ-11 jack for Fax/Modem • RJ-45 jack for LAN • IEEE 1394 mini-jack • One SIR port Video System Display • Supports: 14.1” XGA/15.0” XGA TFT LCD Electrical AC Adapter •... -
Page 106: Operating Environment
• Size: 332.0mm (W) x 281.0mm (D) x 39.7mm (H) or 13.07 in (W) x 10.81 in (D) x 1.56 in/1.96 in (H) Operating Environment Temperature • Operating: 5°C ~ 35°C • Storage: -20°C ~ 60°C Humidity • Operating: 30% ~ 90% (non-condensing) •... - Page 107 System Software • System BIOS: AMI BIOS • Supported Operating Systems Optional Windows XP Home/Professional or above version Optional Windows 2000 or above version • Standard Software Drivers VGA driver, Audio driver, LAN driver TouchPad driver, Modem driver, USB20 driver CardBus driver...
Need help?
Do you have a question about the Beetle G733 and is the answer not in the manual?
Questions and answers